EmBlazeGuard Door Holder
A functional door holder that makes your open printer highly visible and impossible to ignore.
Overview
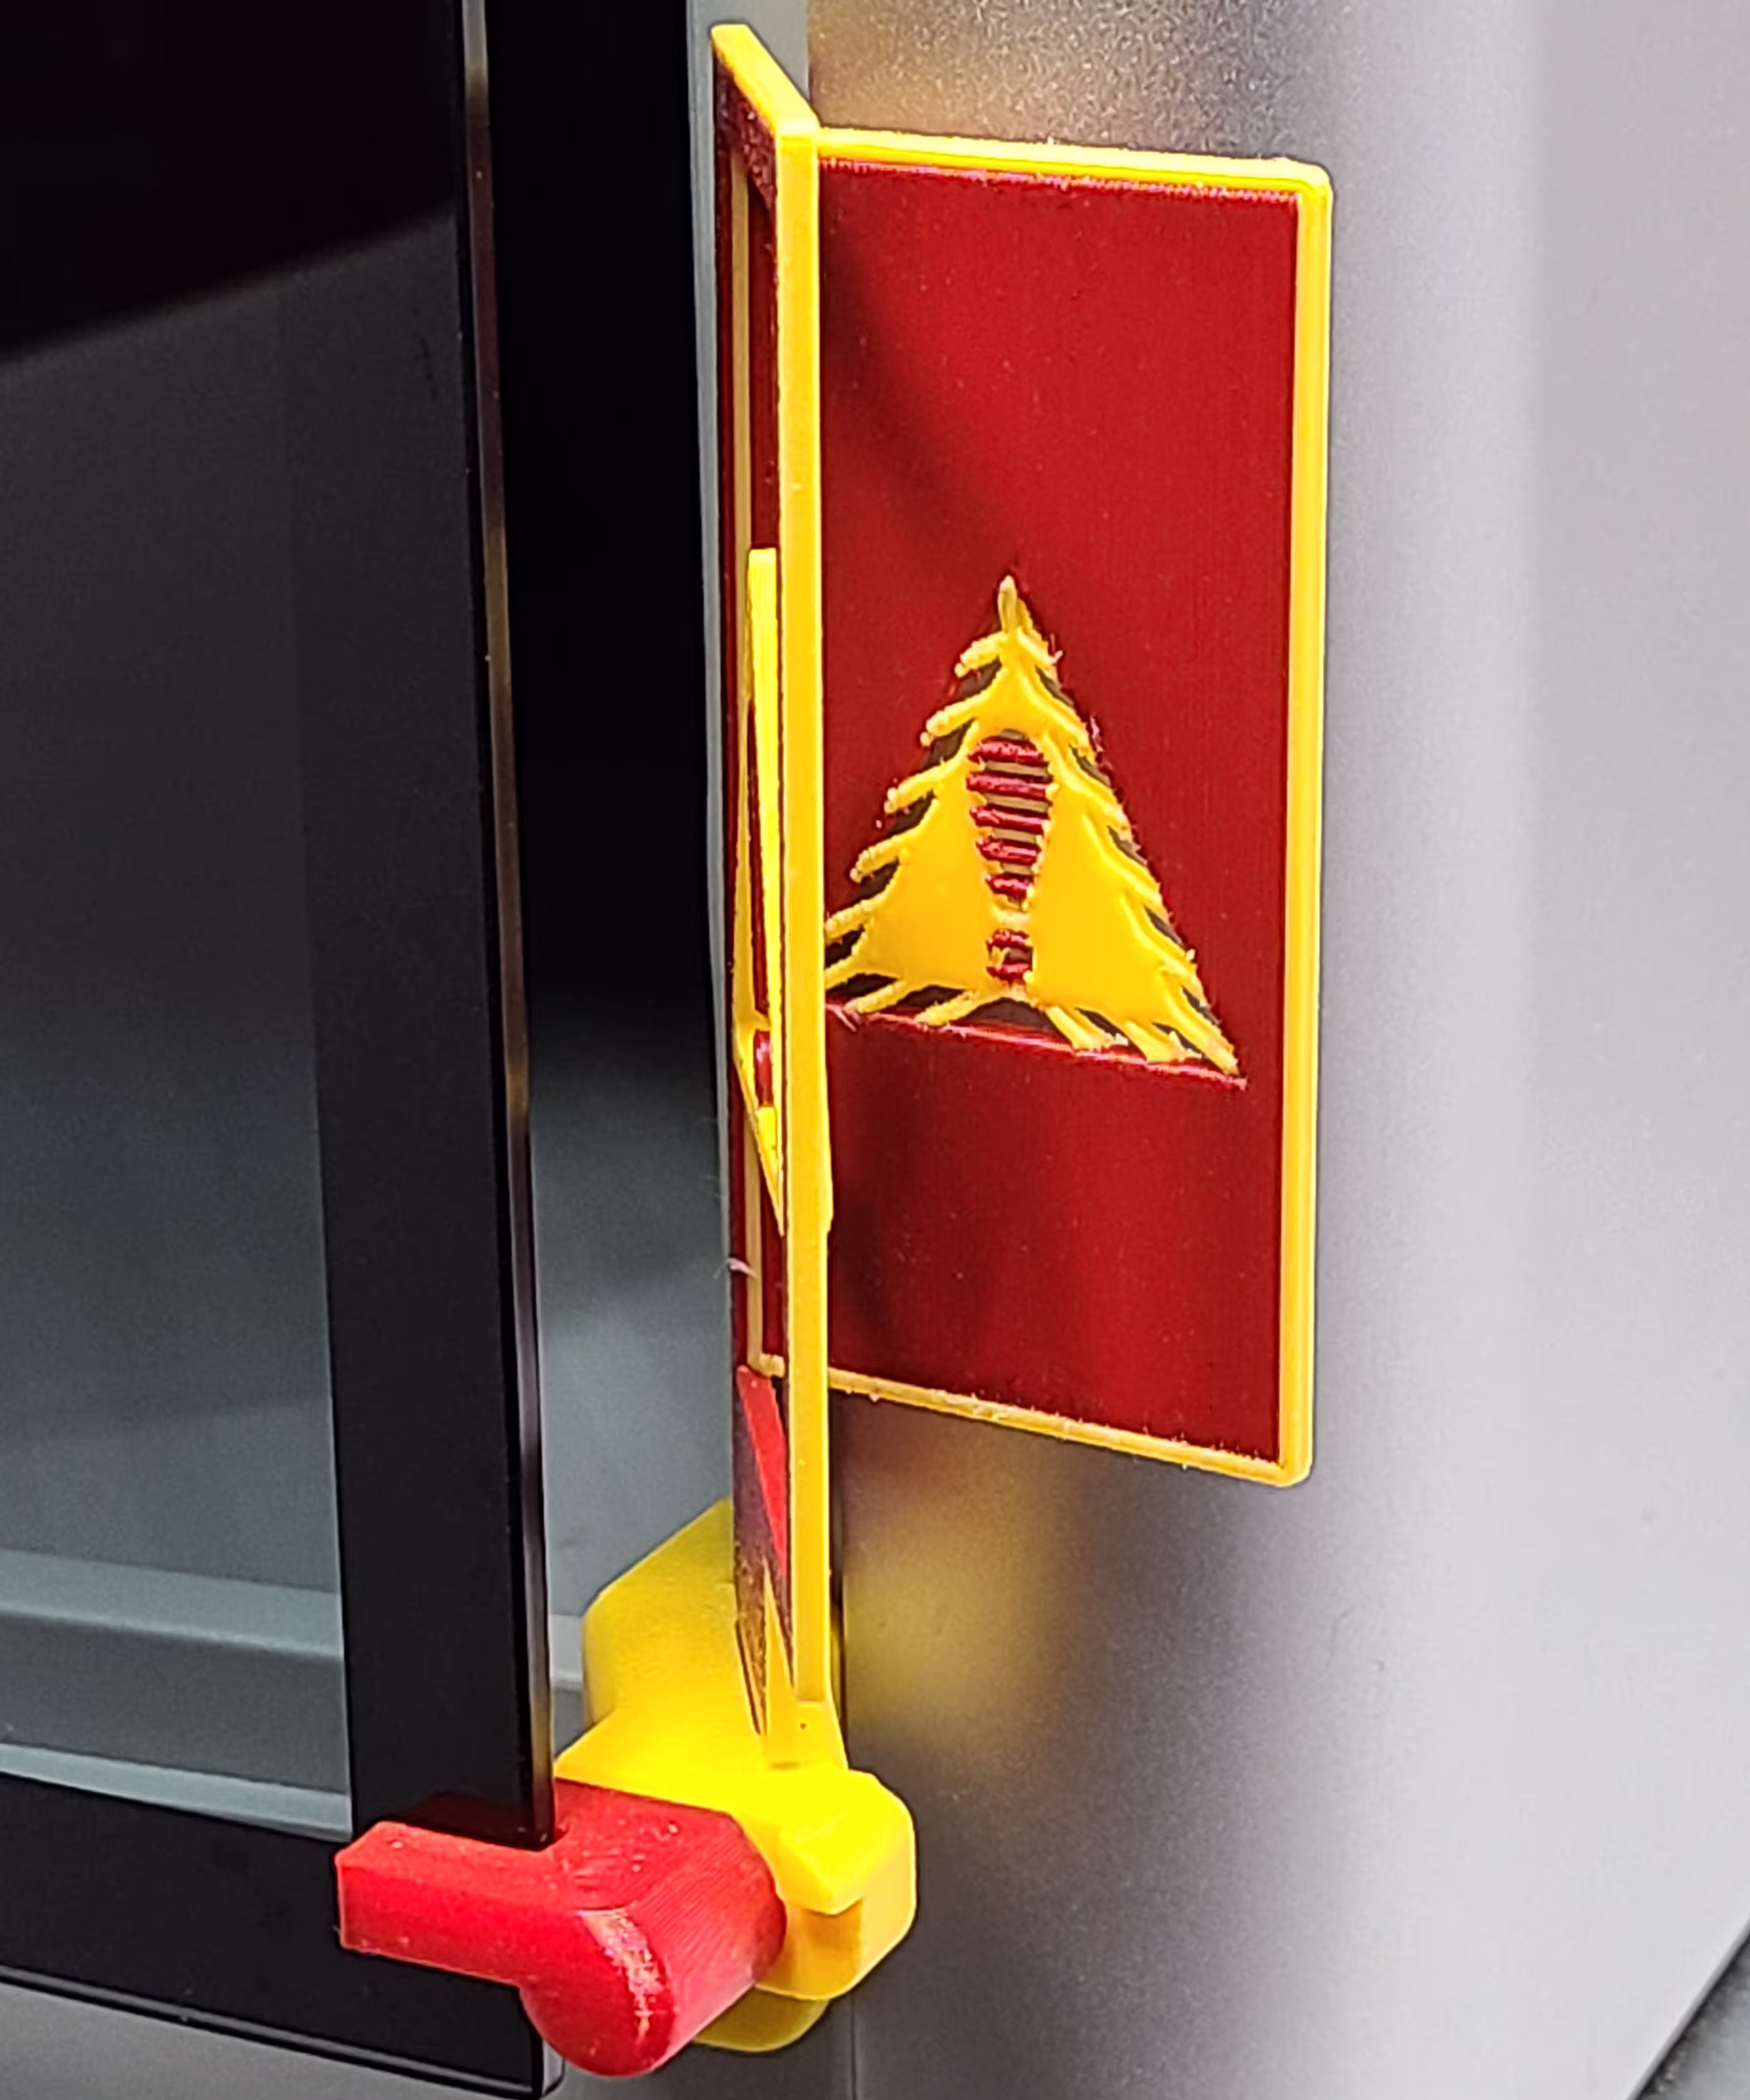
The EmBlazeGuard Door Holder is designed for Bambu Lab X1 and P1 series printers to safely hold the front door open while printing materials that benefit from airflow—such as PLA, PETG, and TPU—while also providing a high-visibility decorative warning visible on both sides of the printer.
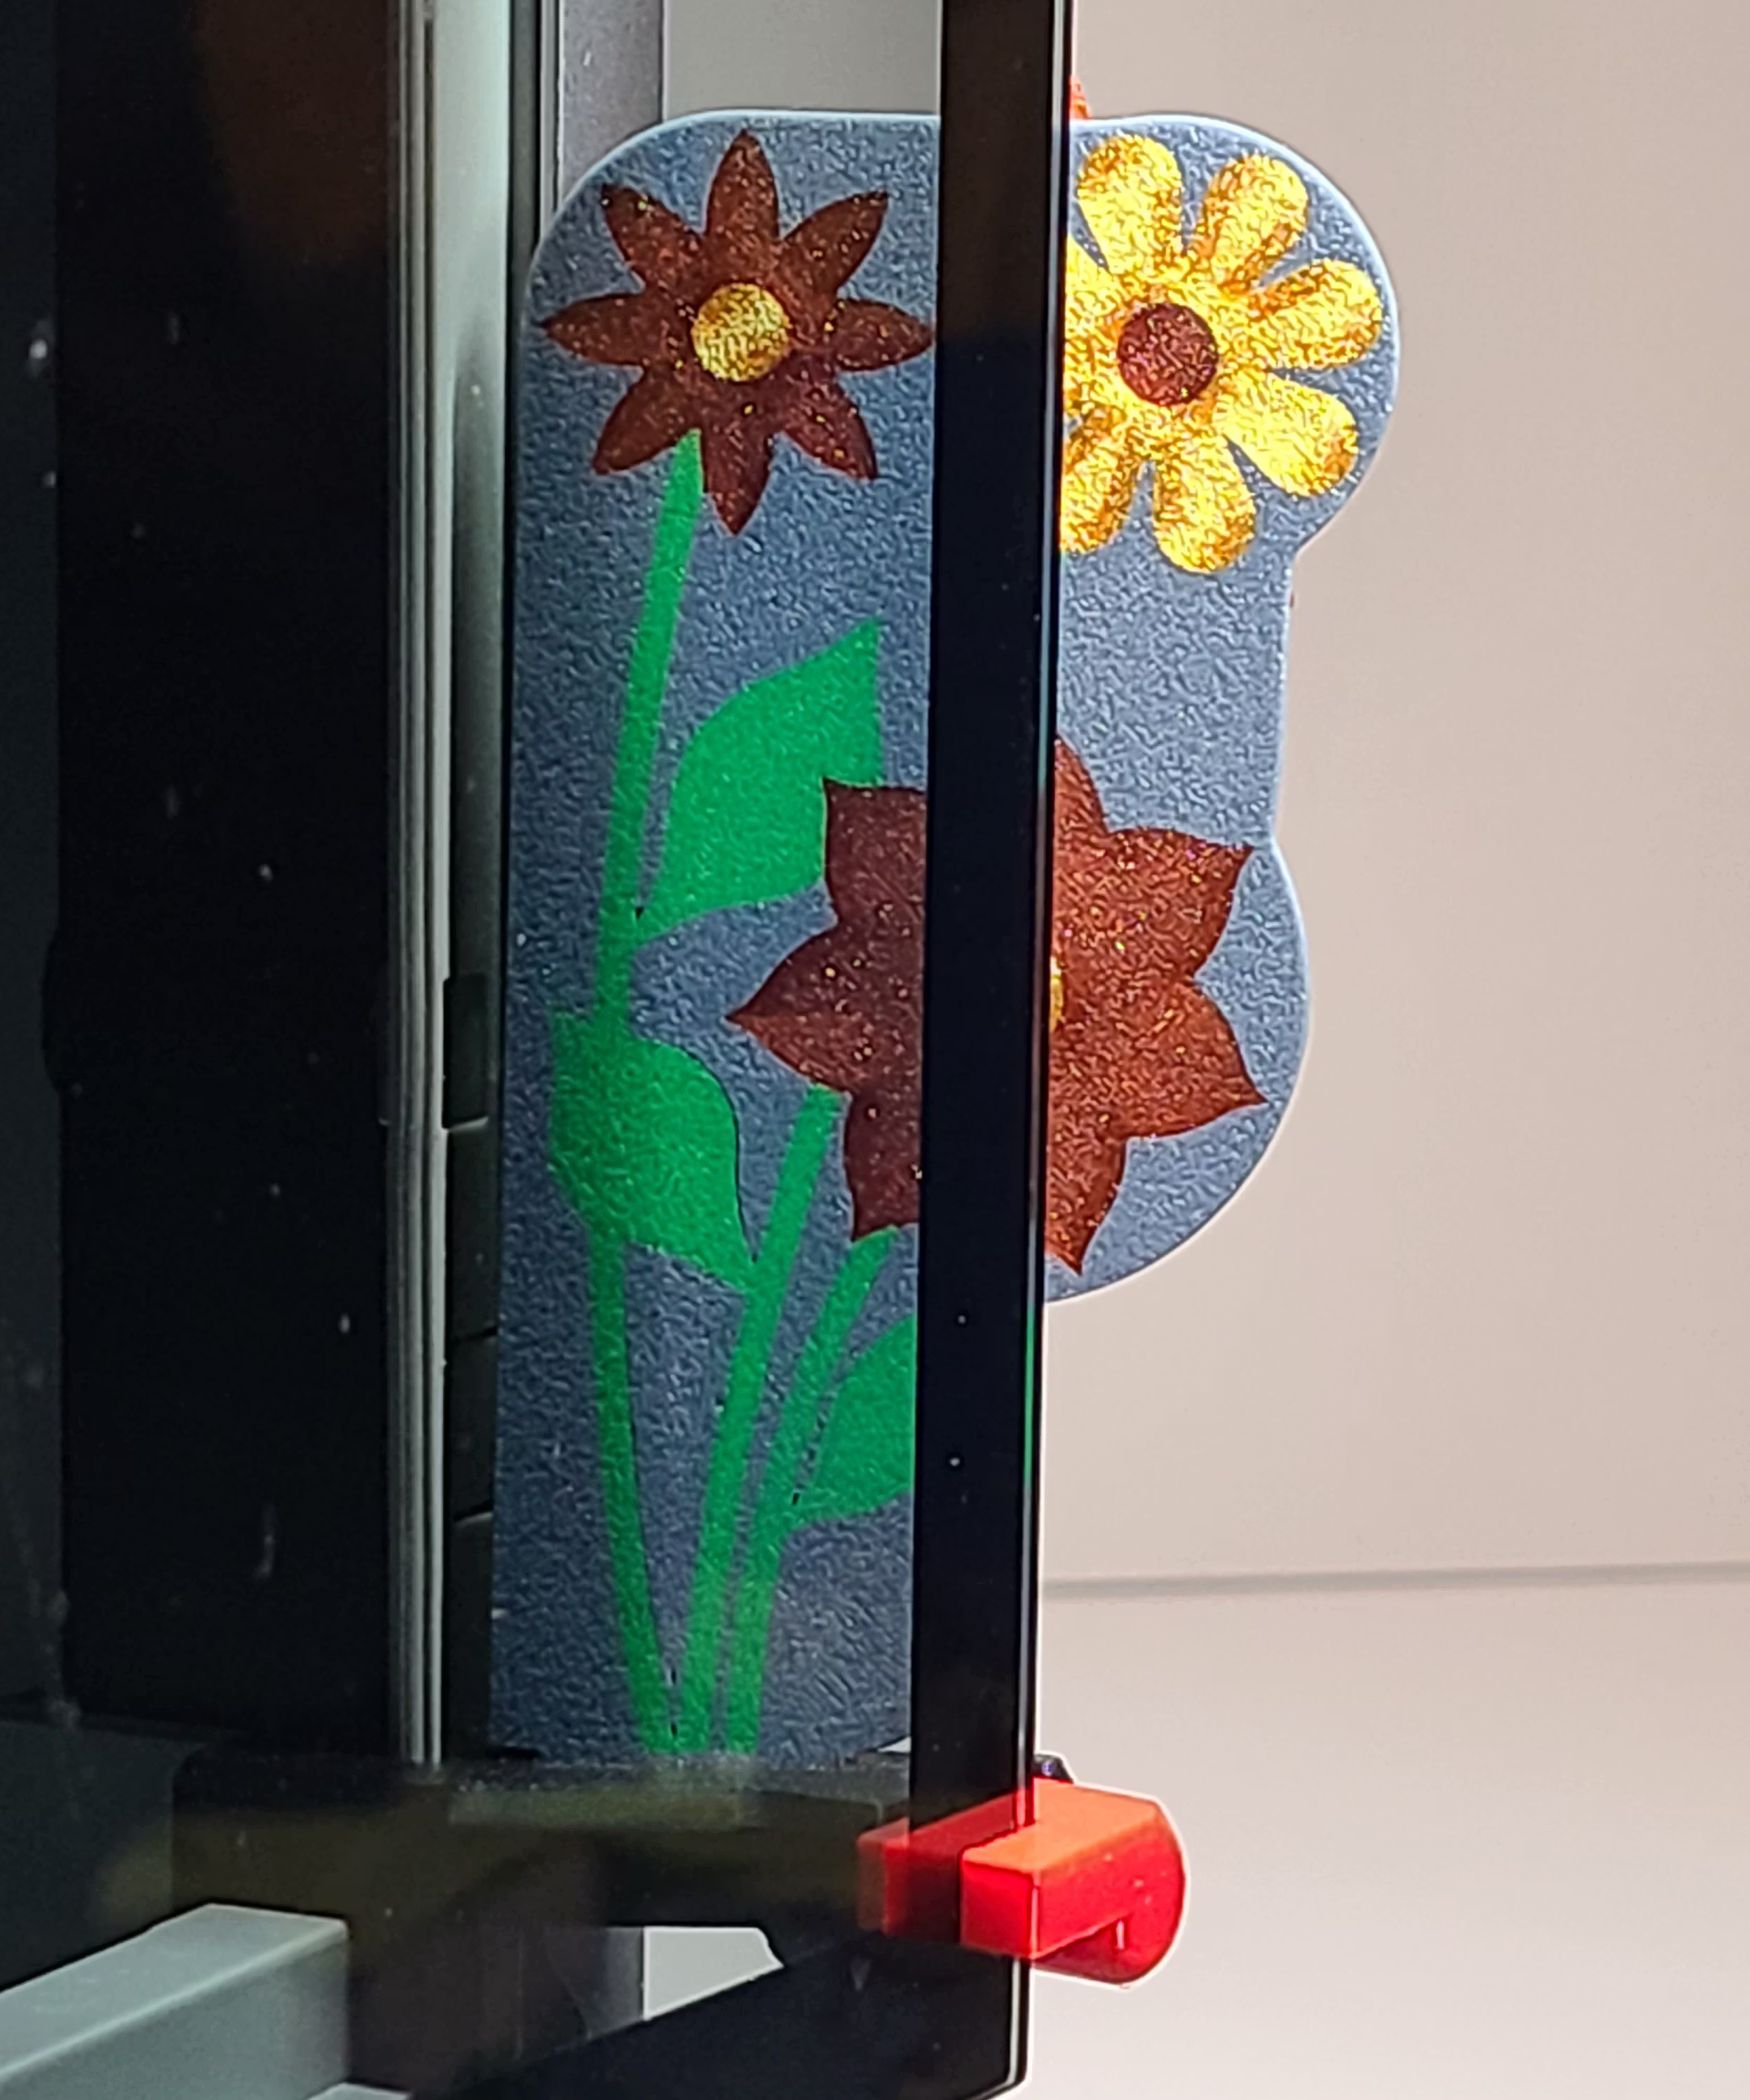
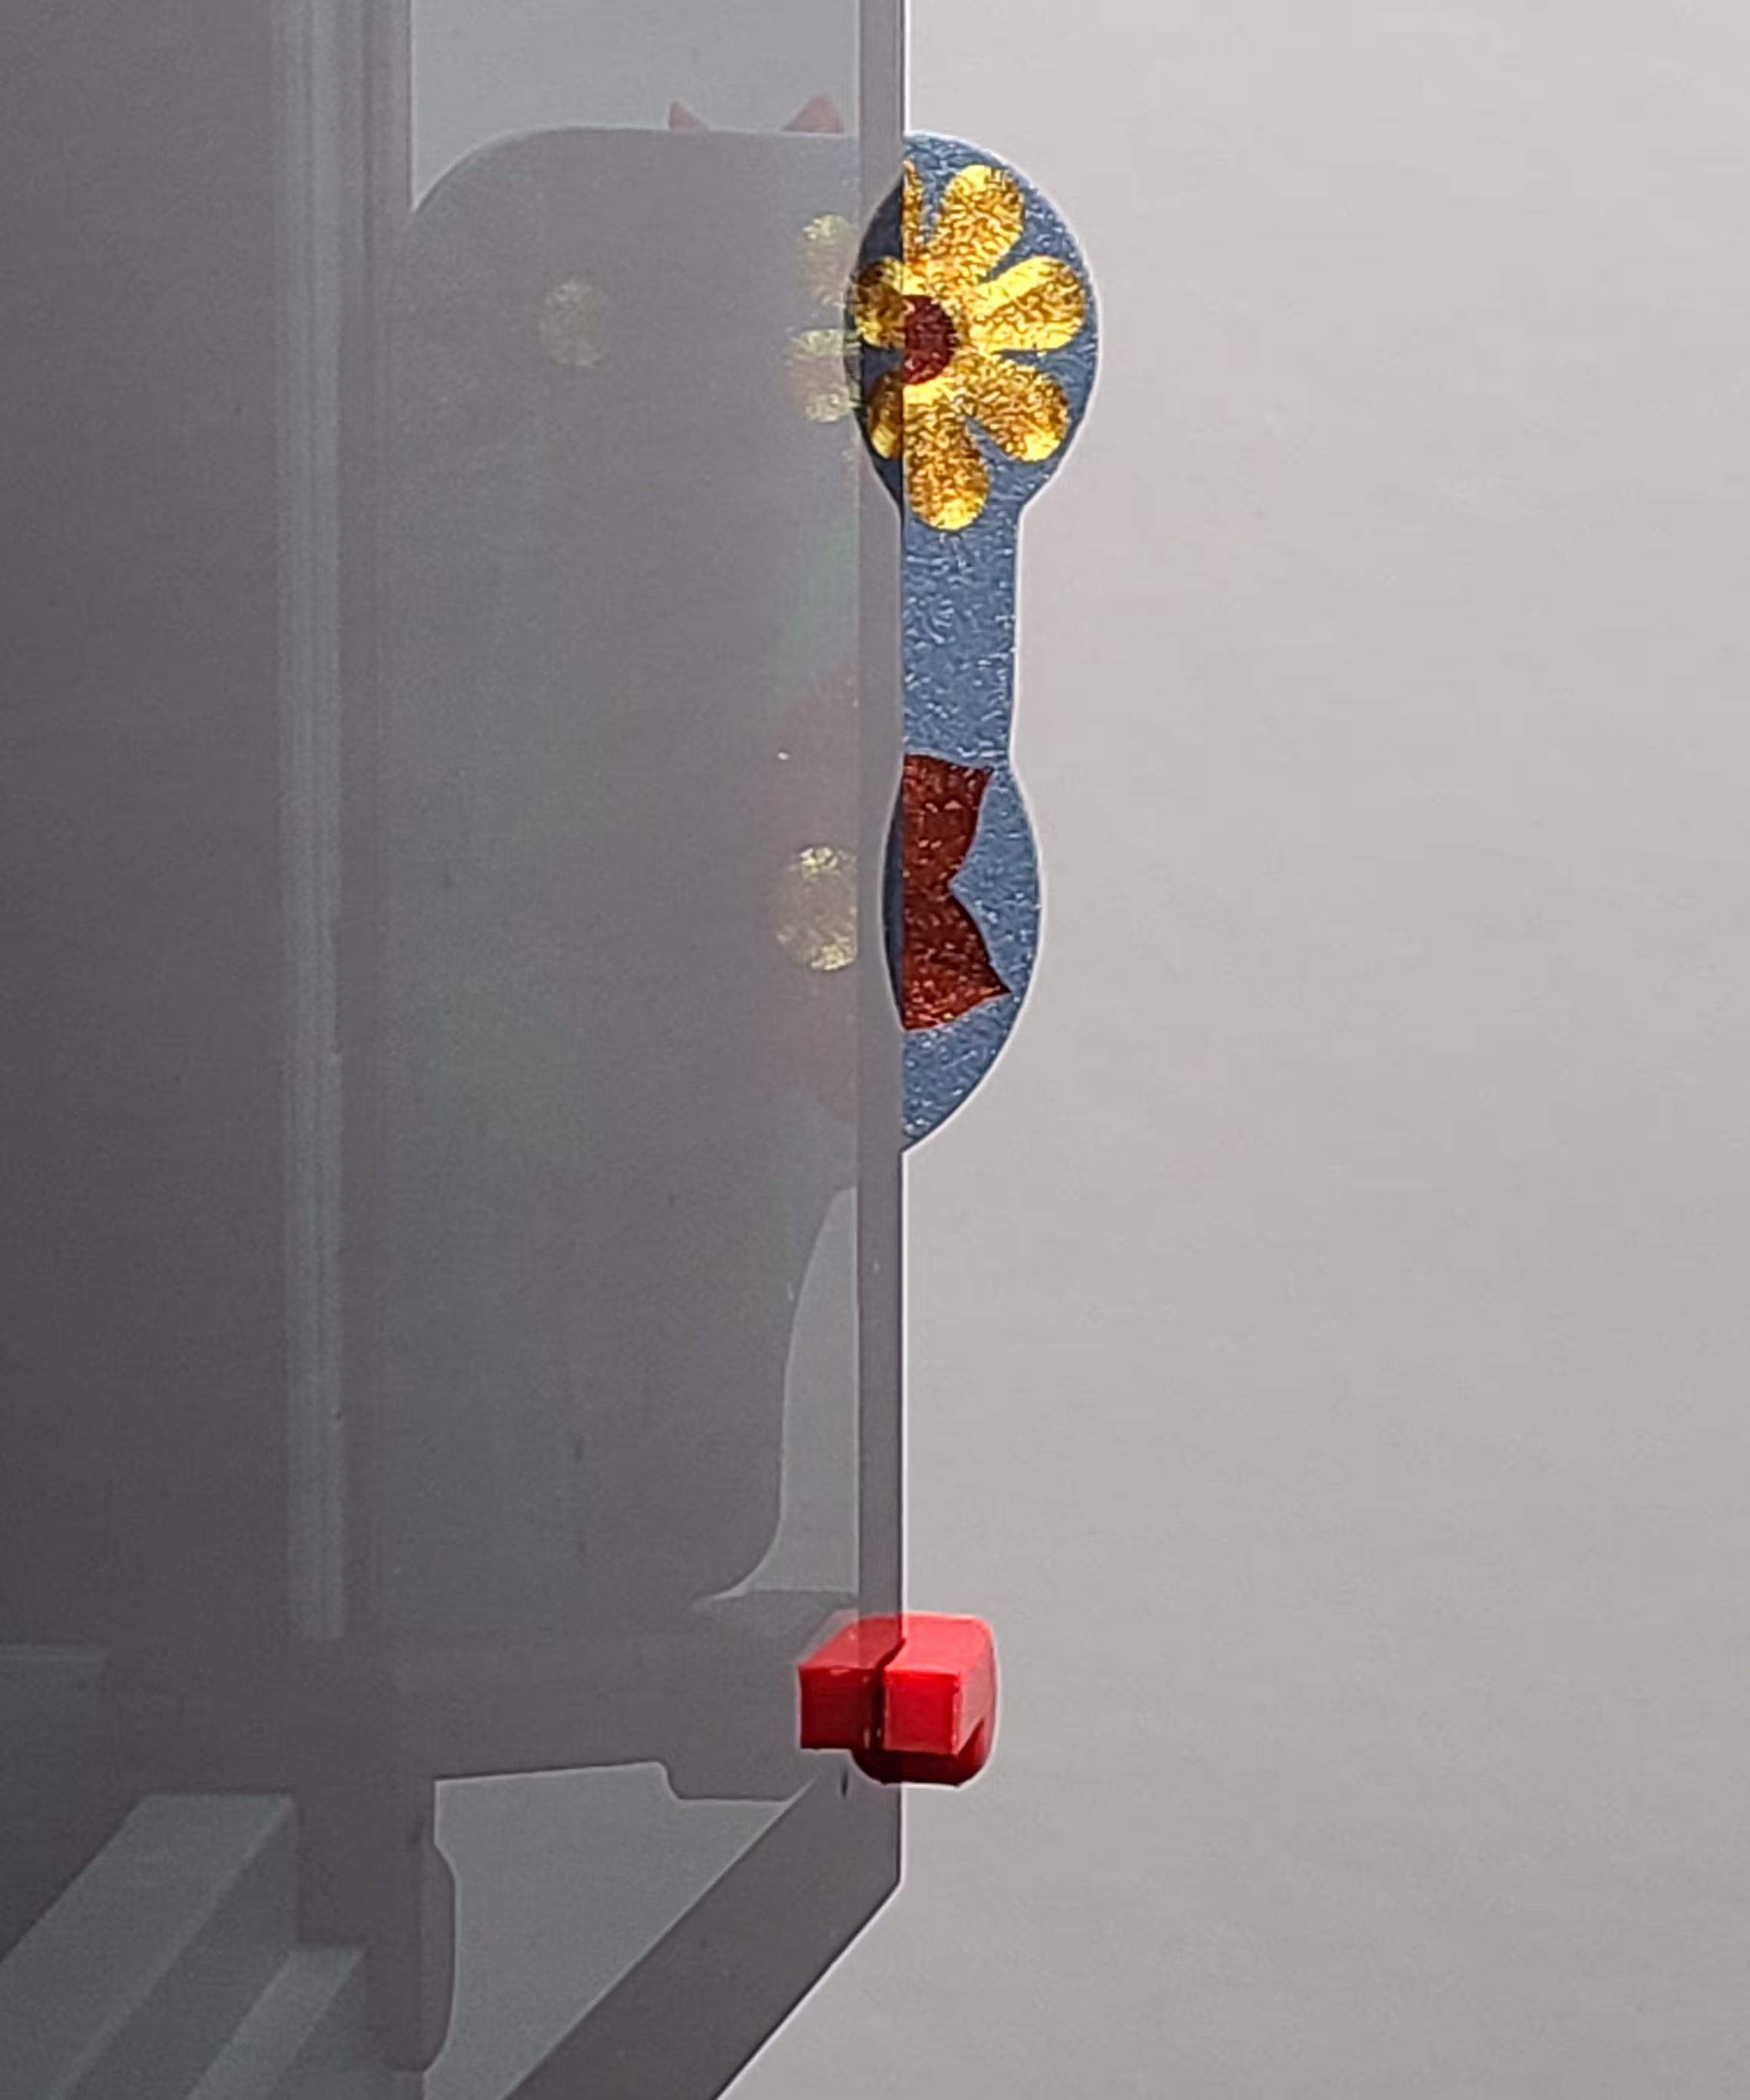
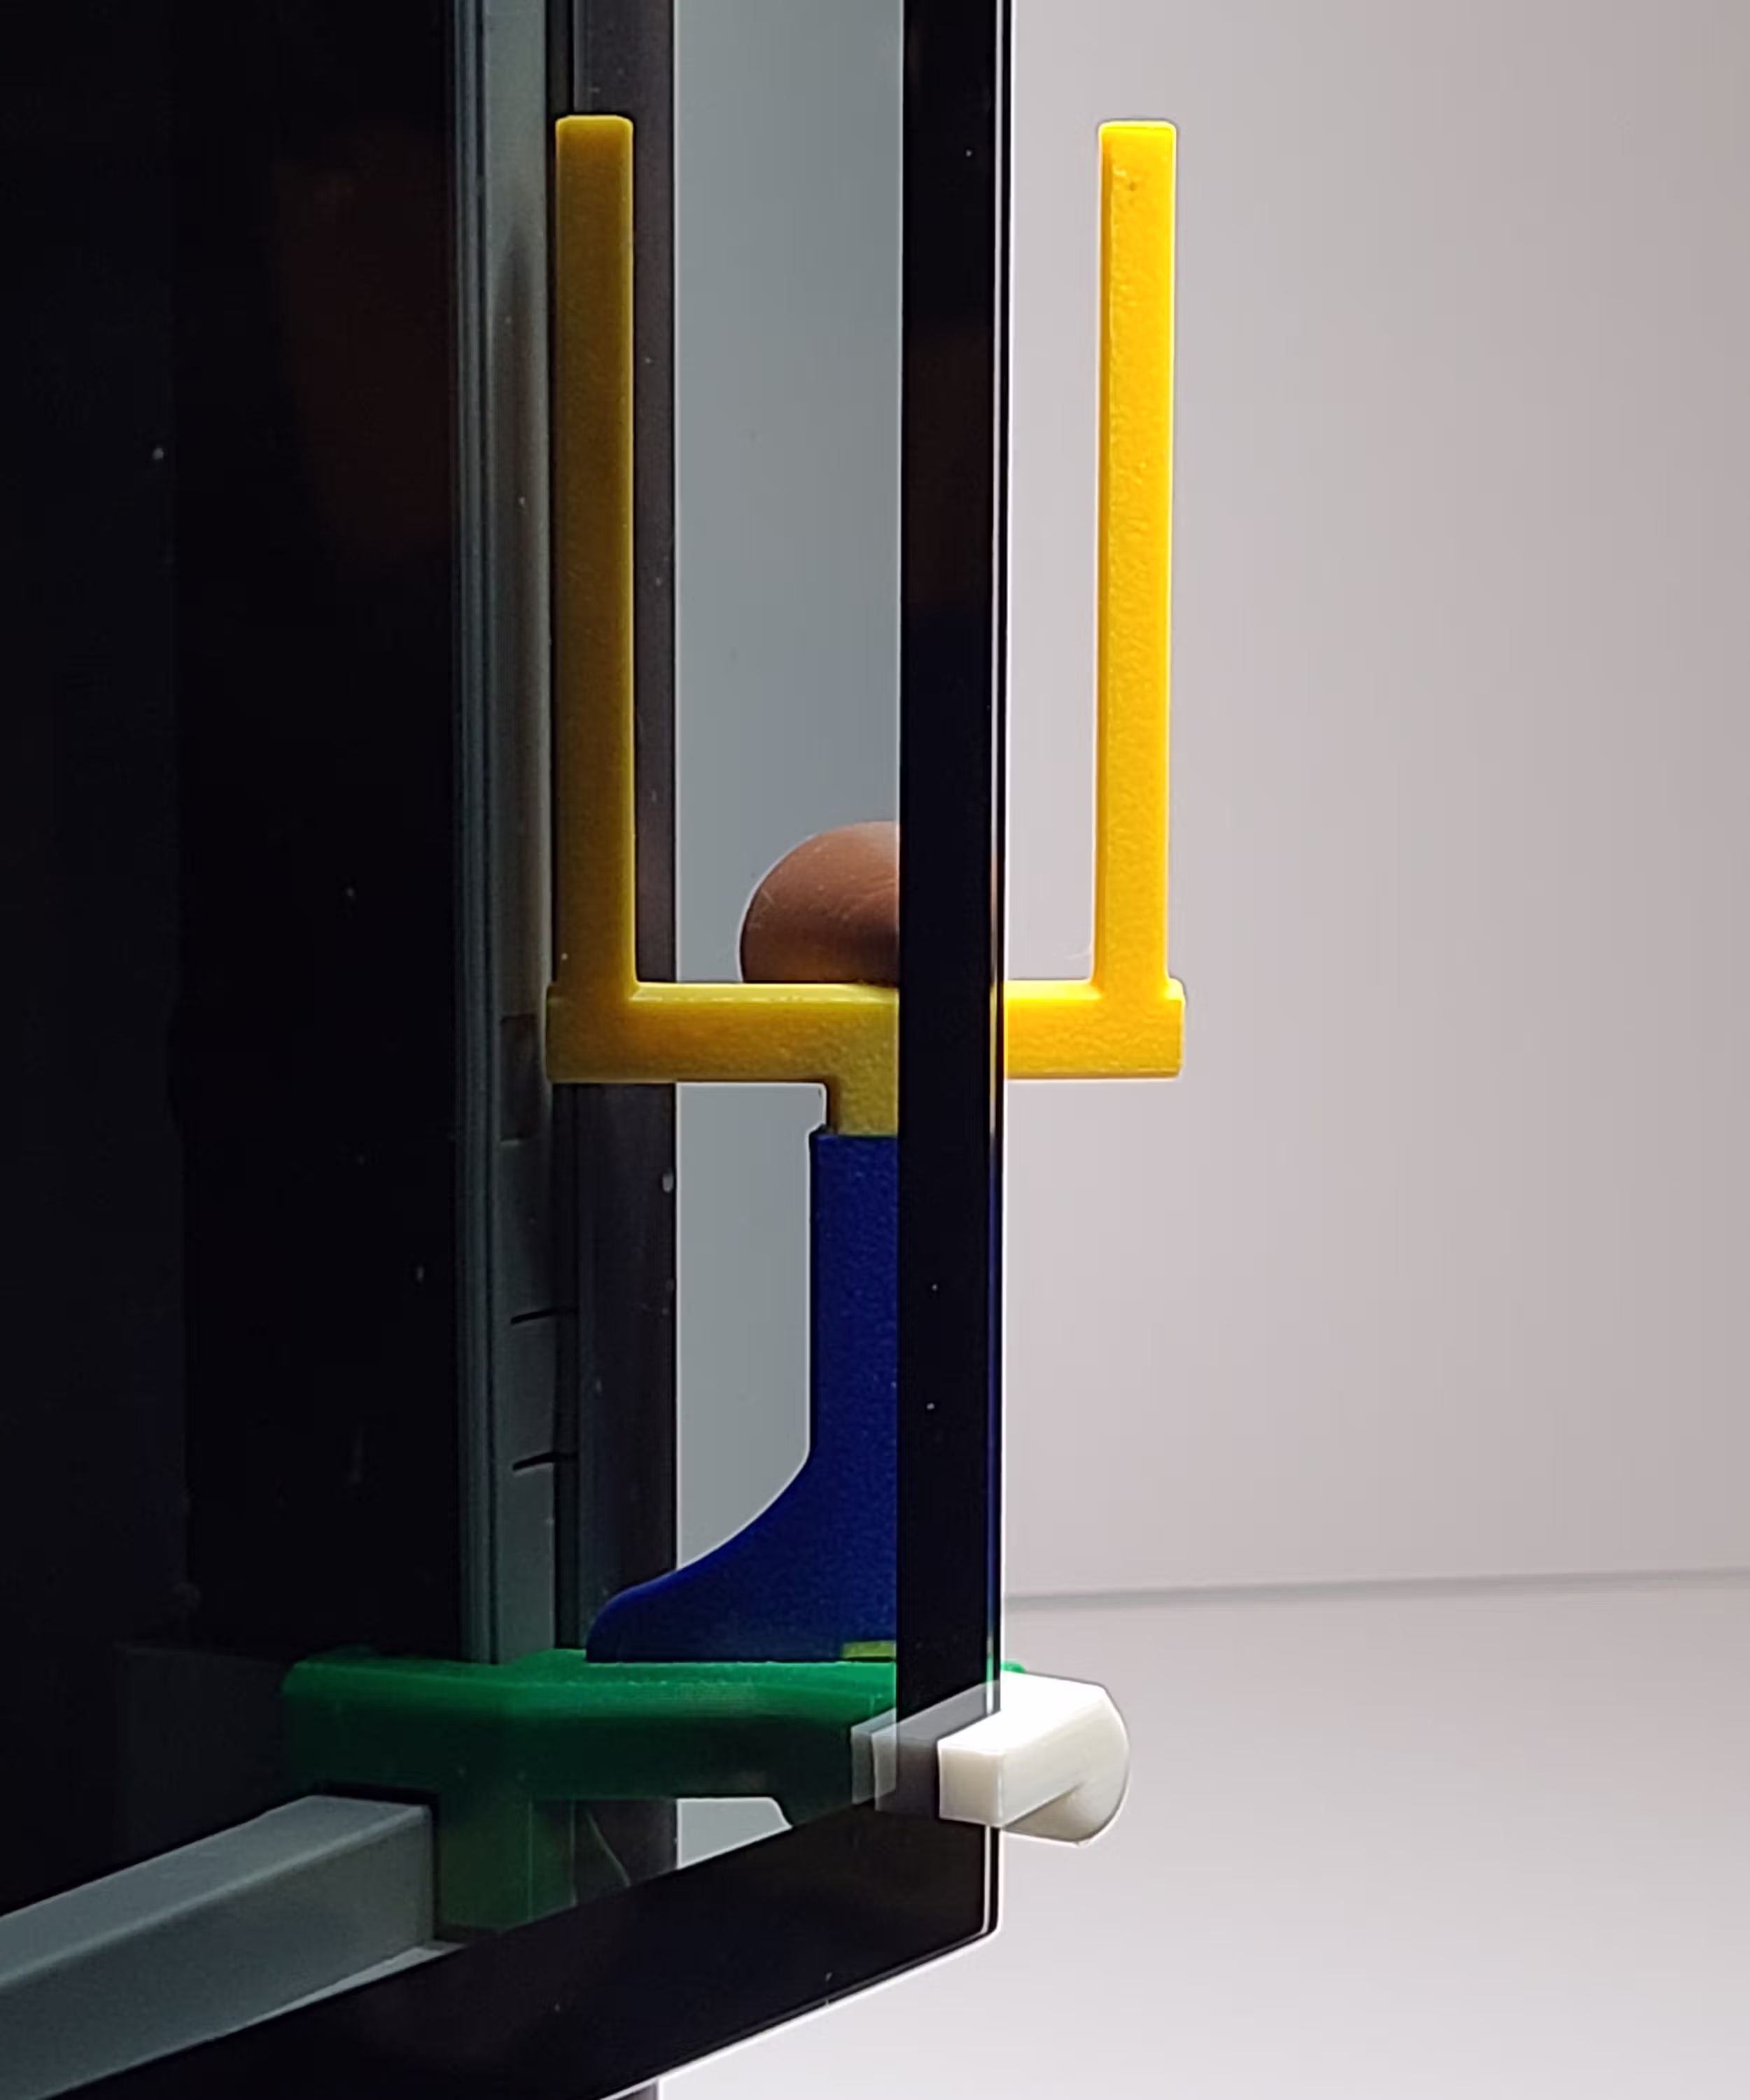
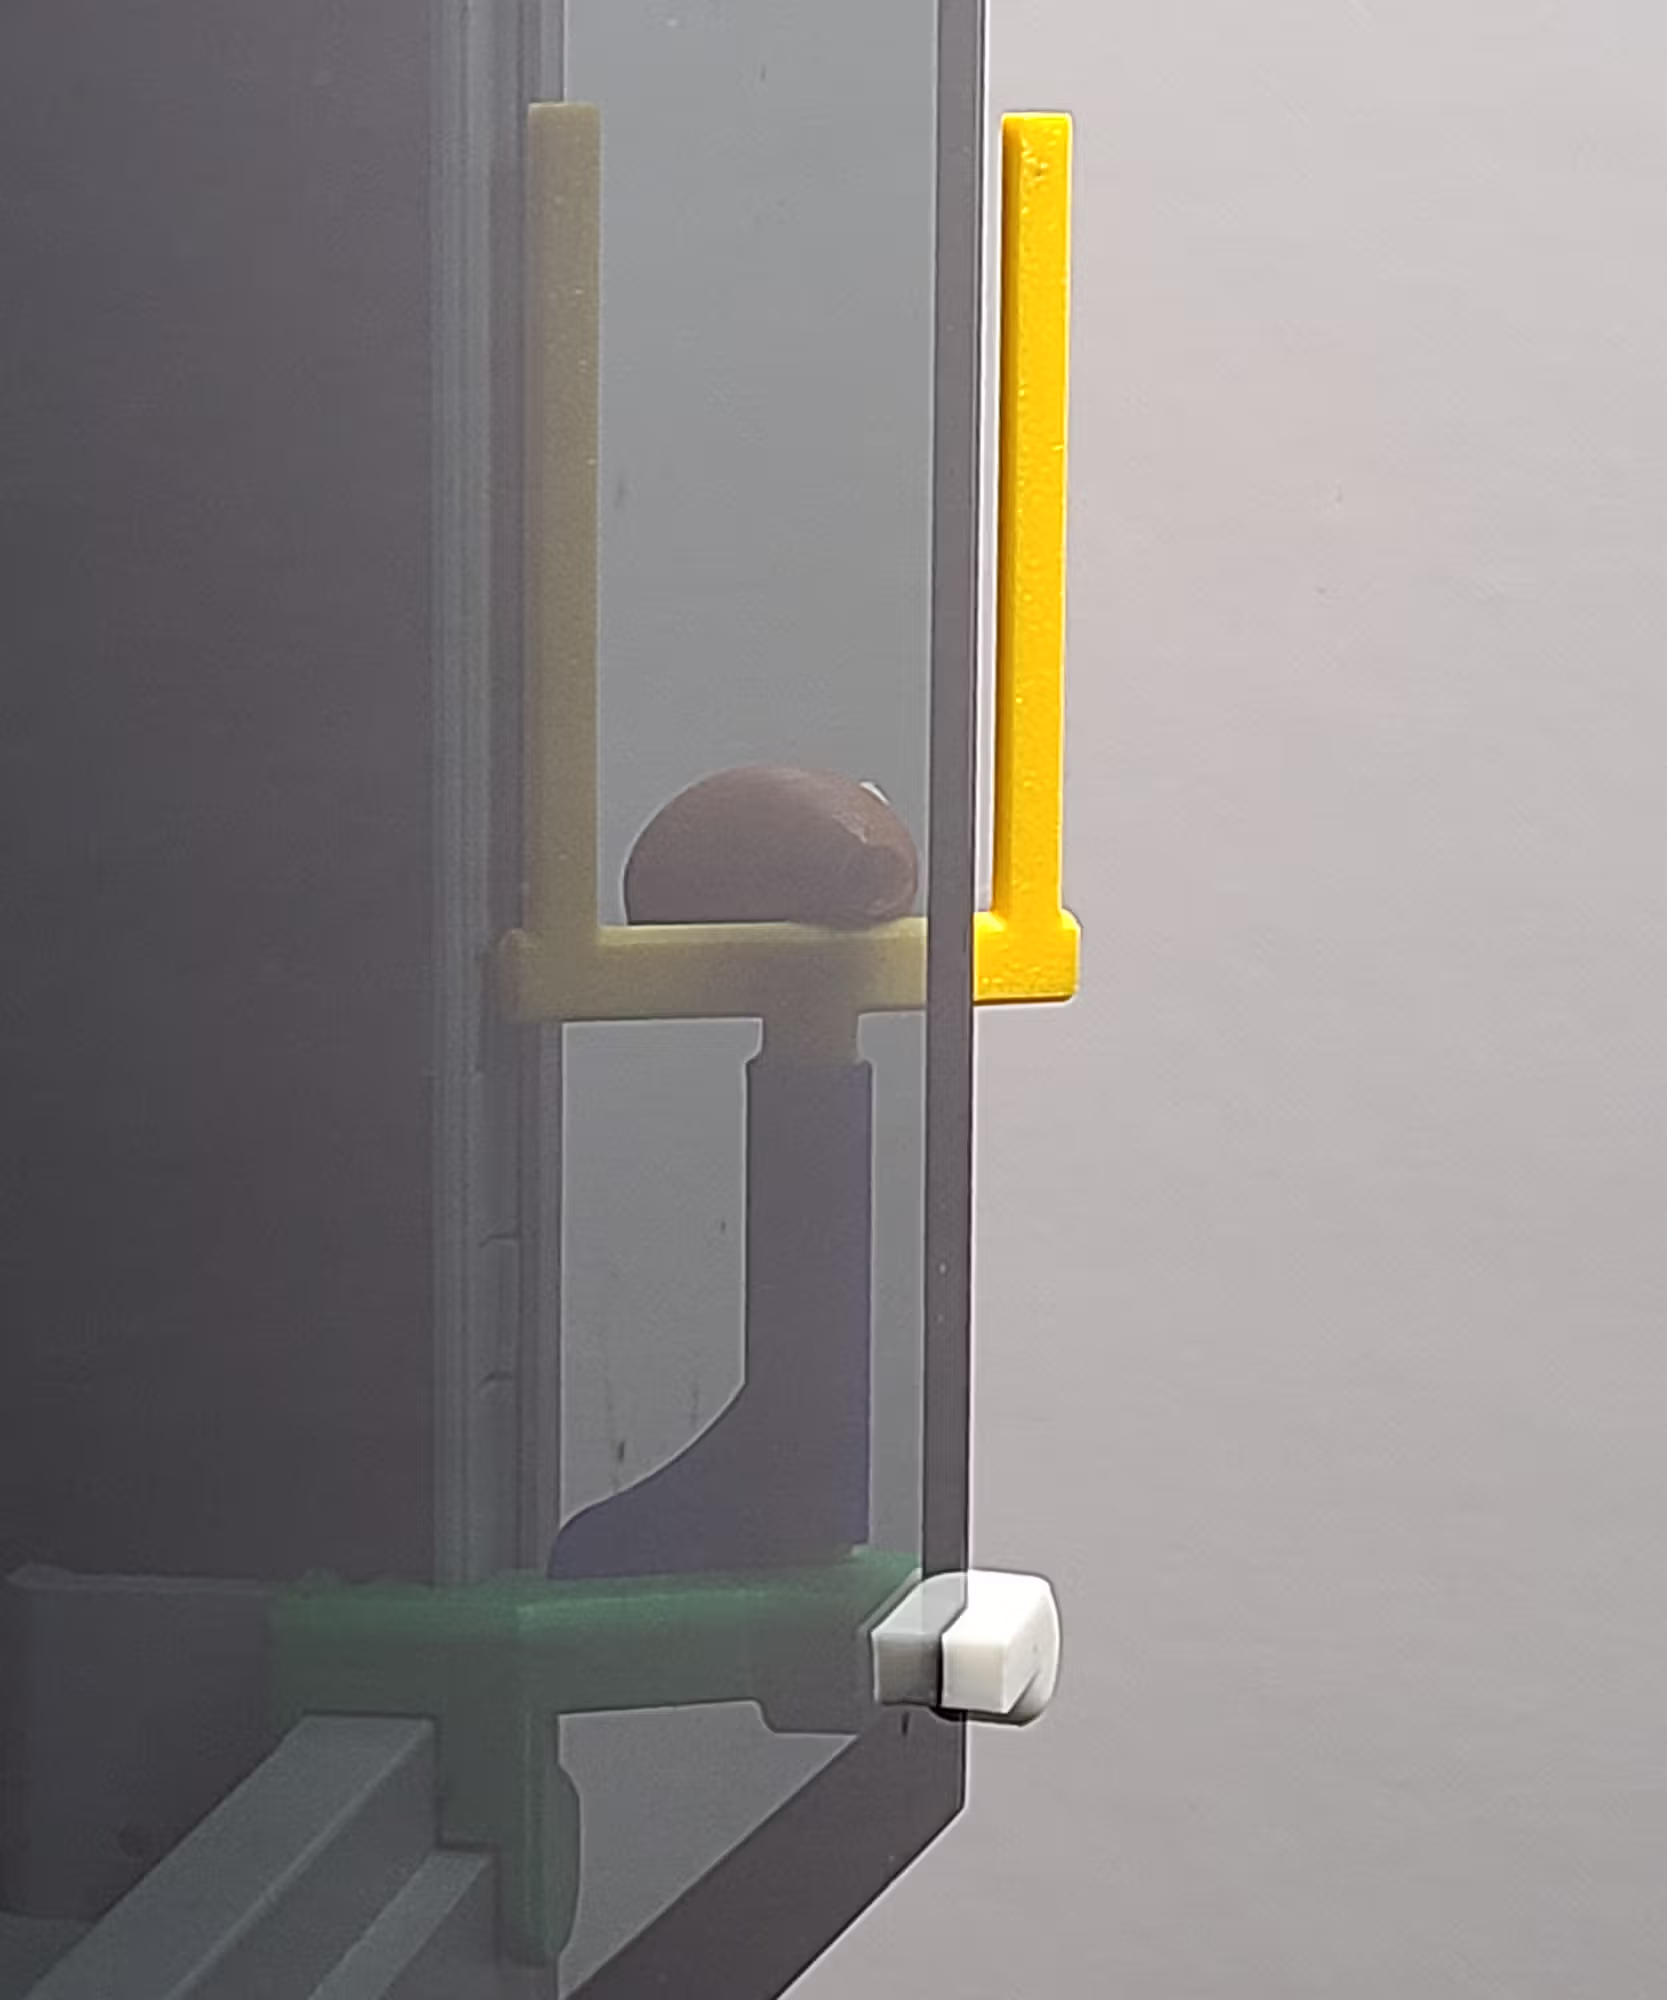
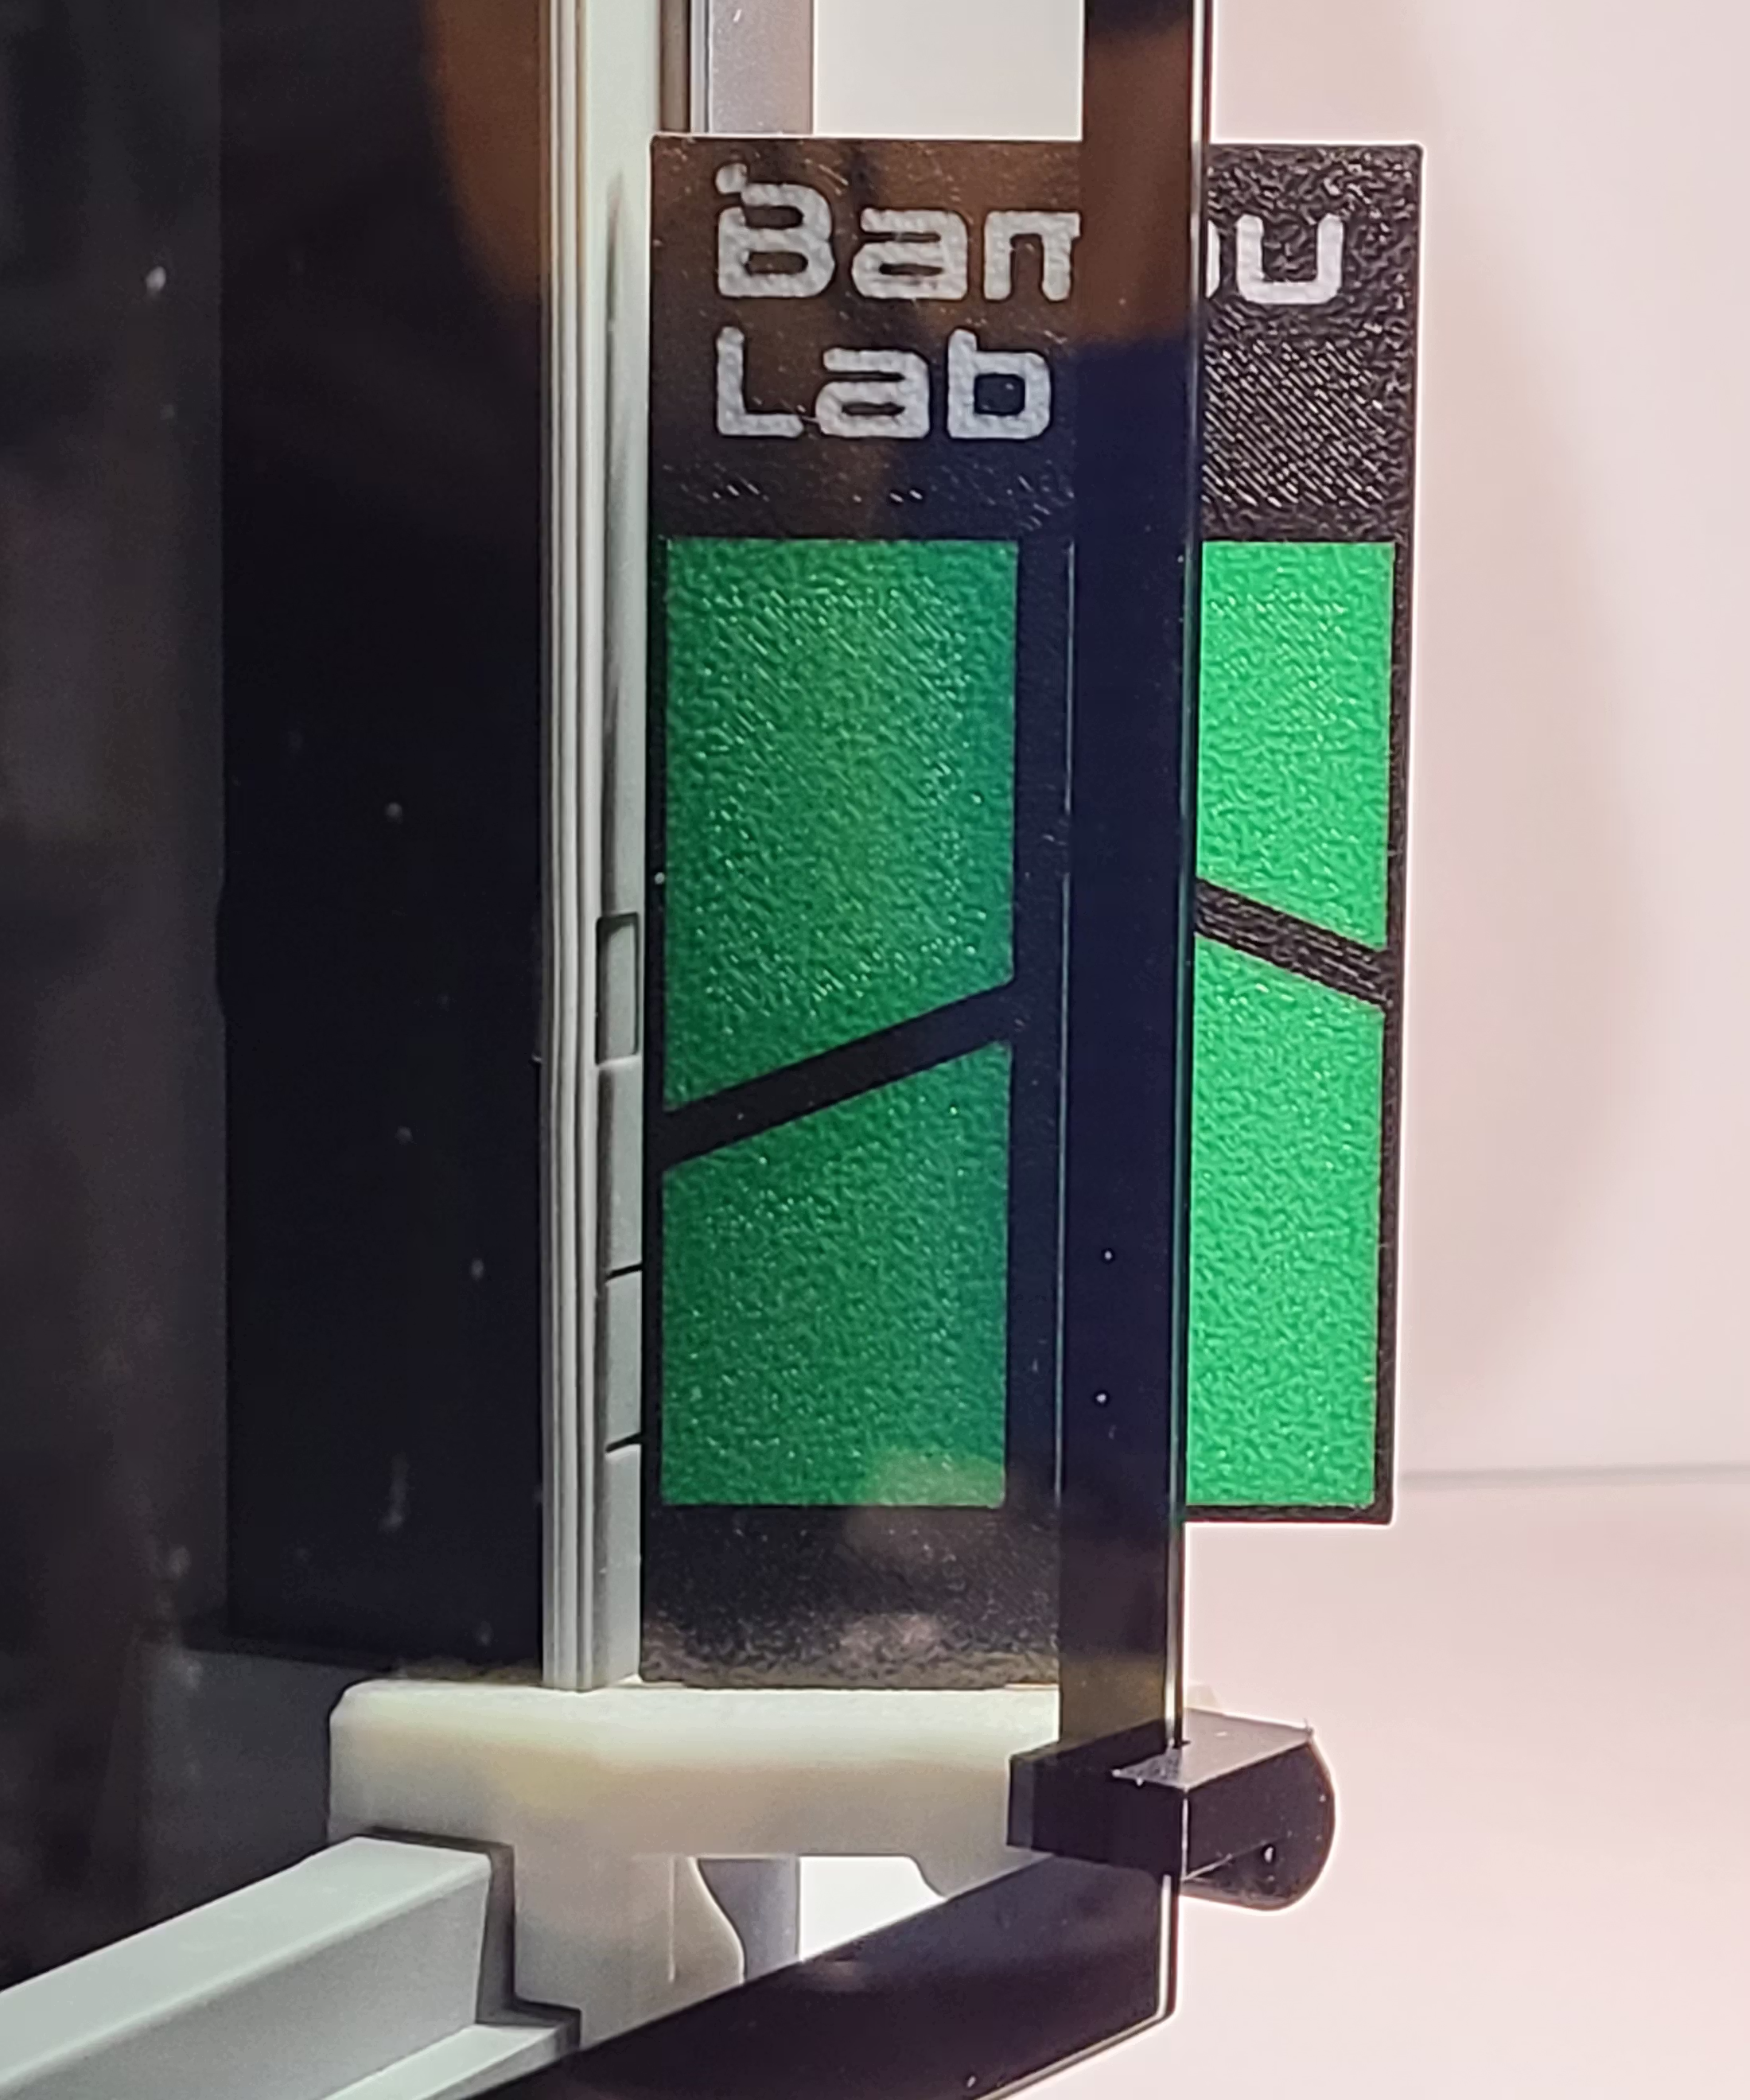
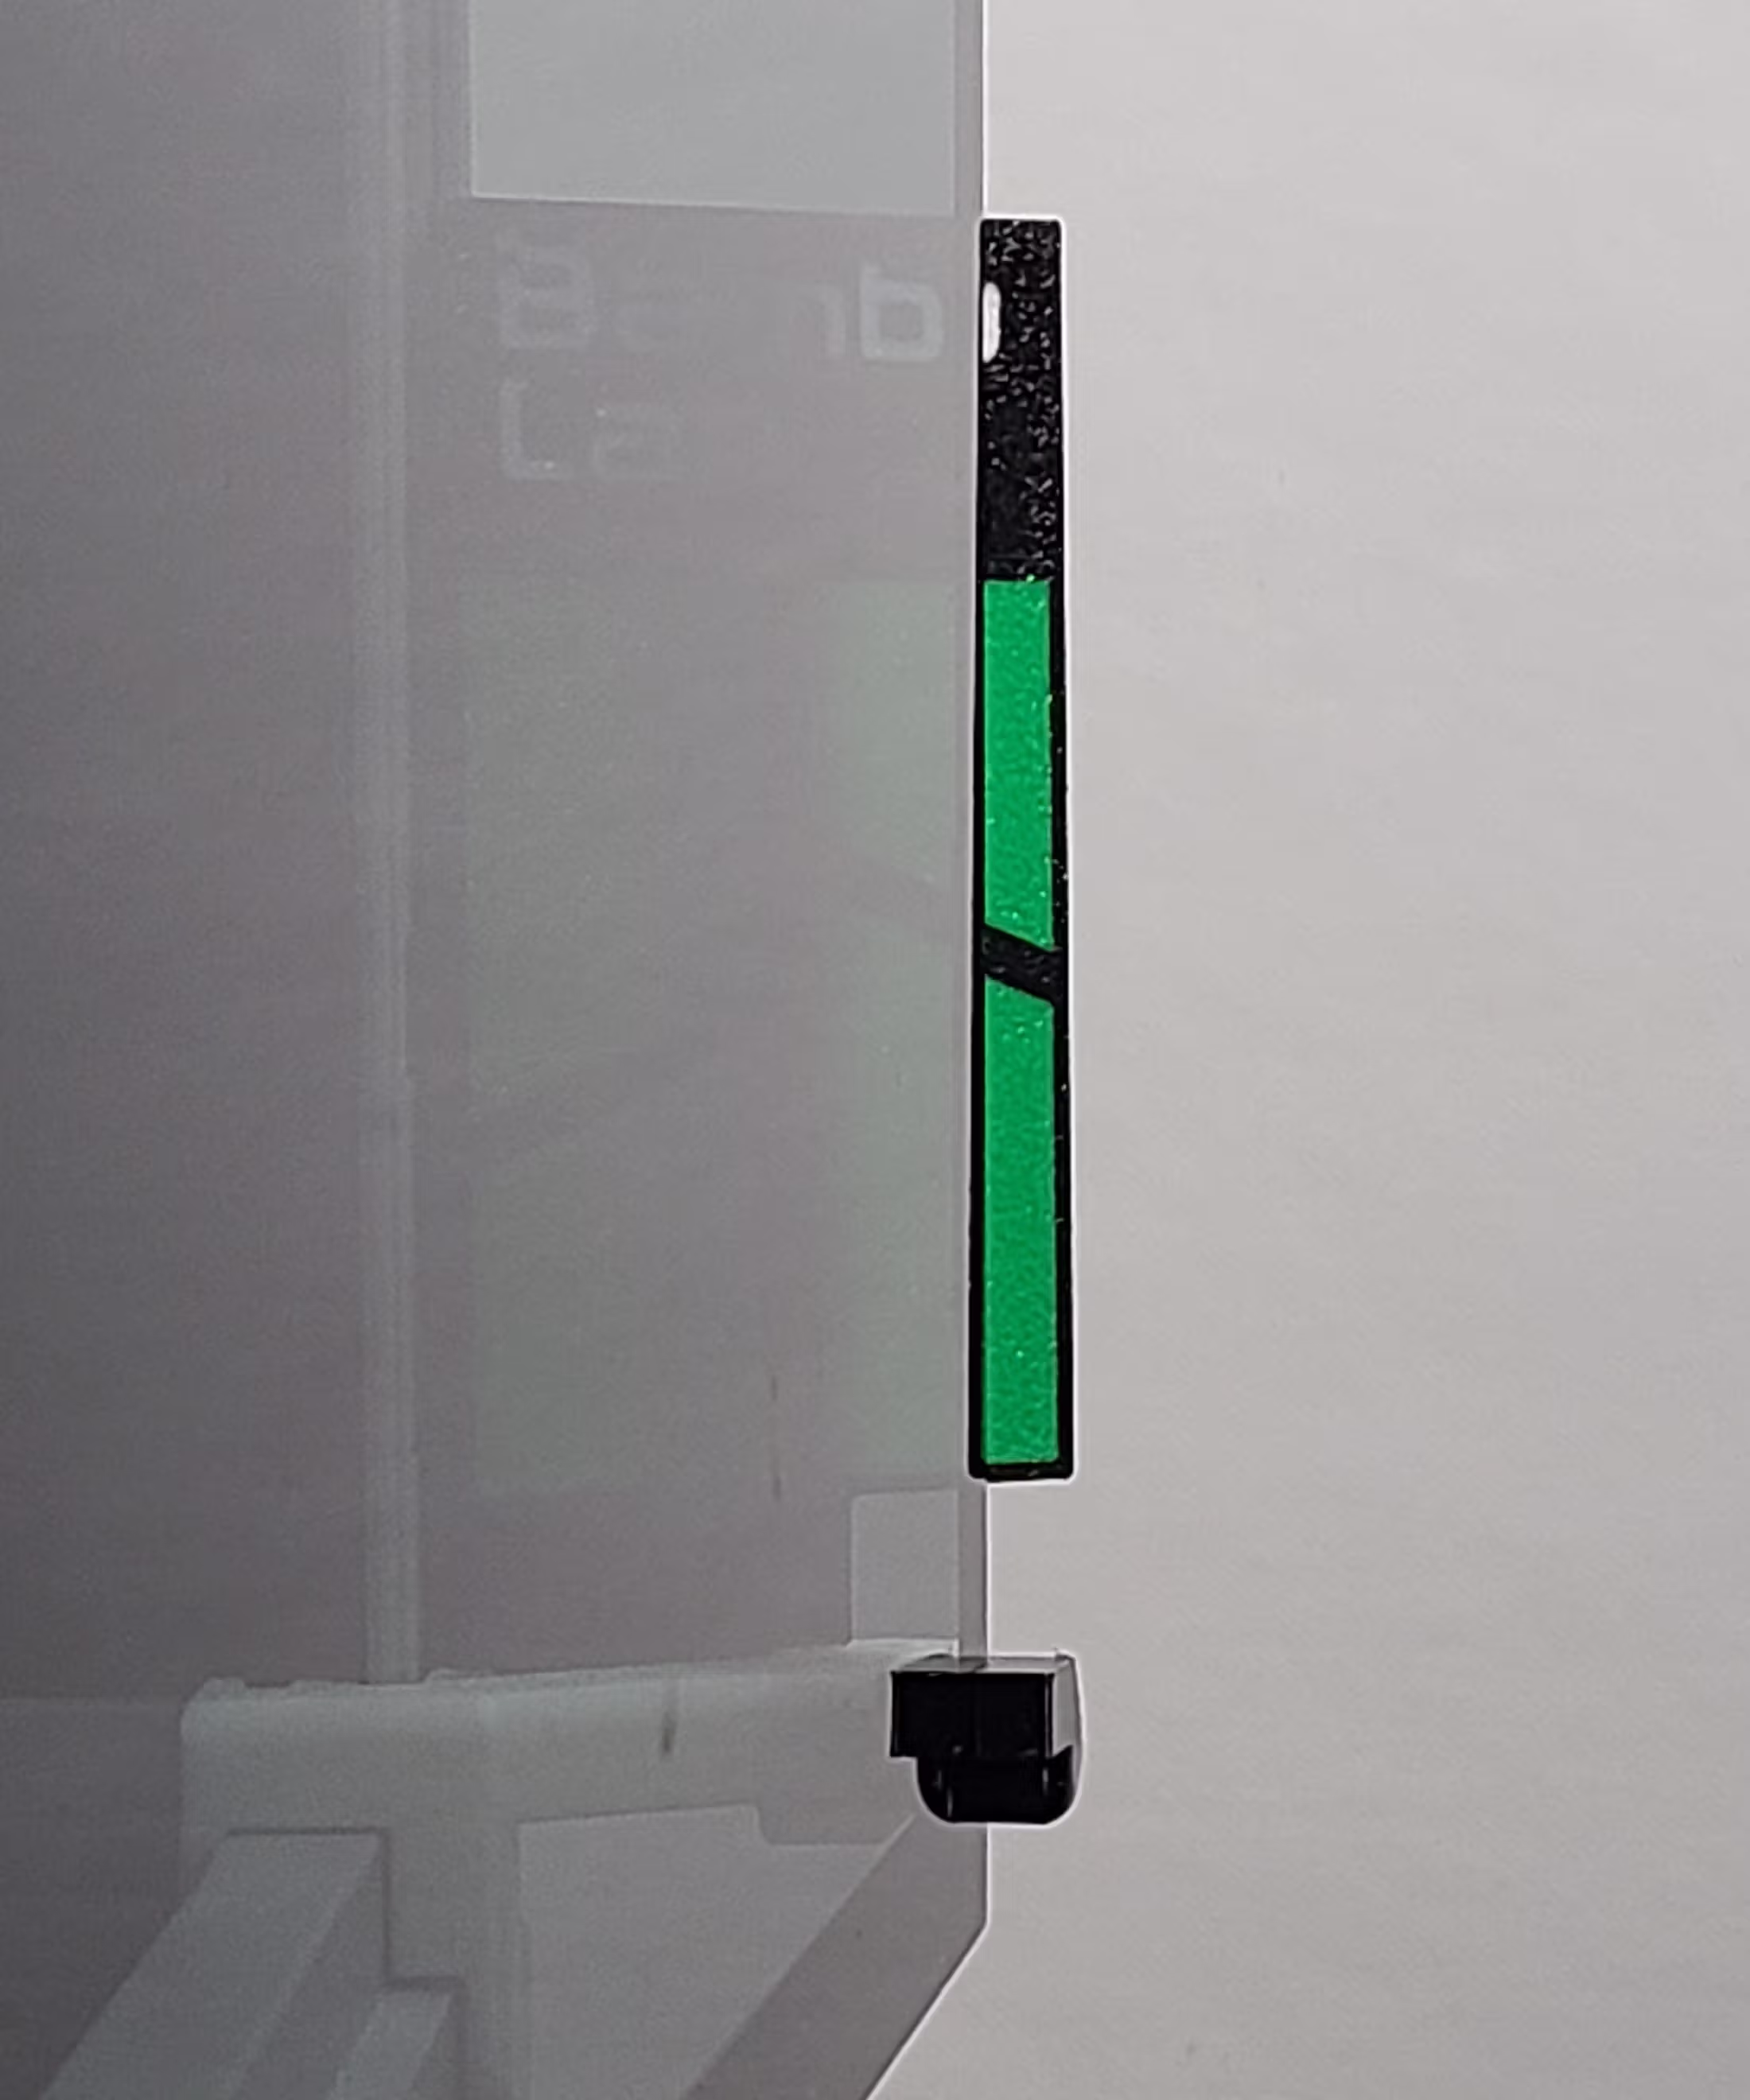
Unlike simple door holders, EmBlazeGuard is intentionally designed to extend beyond the door on both sides, making the open door clearly visible from any angle. Its high-contrast, visually striking design ensures the open door is immediately noticeable, helping prevent accidental bumps, protecting the glass door, and adding a customizable aesthetic element to your printer.
Key Features
- Holds the printer door open at a consistent, repeatable position
- High-visibility design extends beyond the door on both sides
- Decorative EmBlazeGuard Panels act as a visual warning and personalization surface
- Modular system: swap panels without changing the holder
- Secure mechanical engagement — no magnets, tape, or adhesives
- Designed for Bambu Lab X1 & P1 series(H2 & P2 not compatible)
- Fully 3D-printable using standard Bambu profiles
Why Keep the Door Open?
Certain filaments benefit from additional airflow during printing:
- PLA – reduces heat buildup and improves surface quality
- PETG – helps prevent excessive softness and stringing
- TPU – improves consistency and cooling during flexible prints
EmBlazeGuard lets you keep the door open deliberately and safely, rather than relying on improvised solutions.
Back to TopHow It Works
The EmBlazeGuard system consists of three main components:
1) The Holder
Mounts to the lower corner of the printer door frame using an existing rectangular recess—no tools required.
2) The Latch Fork
Engages with the door to hold it open.
⚠️ TPU is strongly recommended for the latch fork to prevent rattling or tapping noise during printing.
3) EmBlazeGuard Panels
Decorative and functional panels that extend beyond the door, acting as a visual alert and customization surface. Panels are interchangeable and can be swapped without changing the holder.

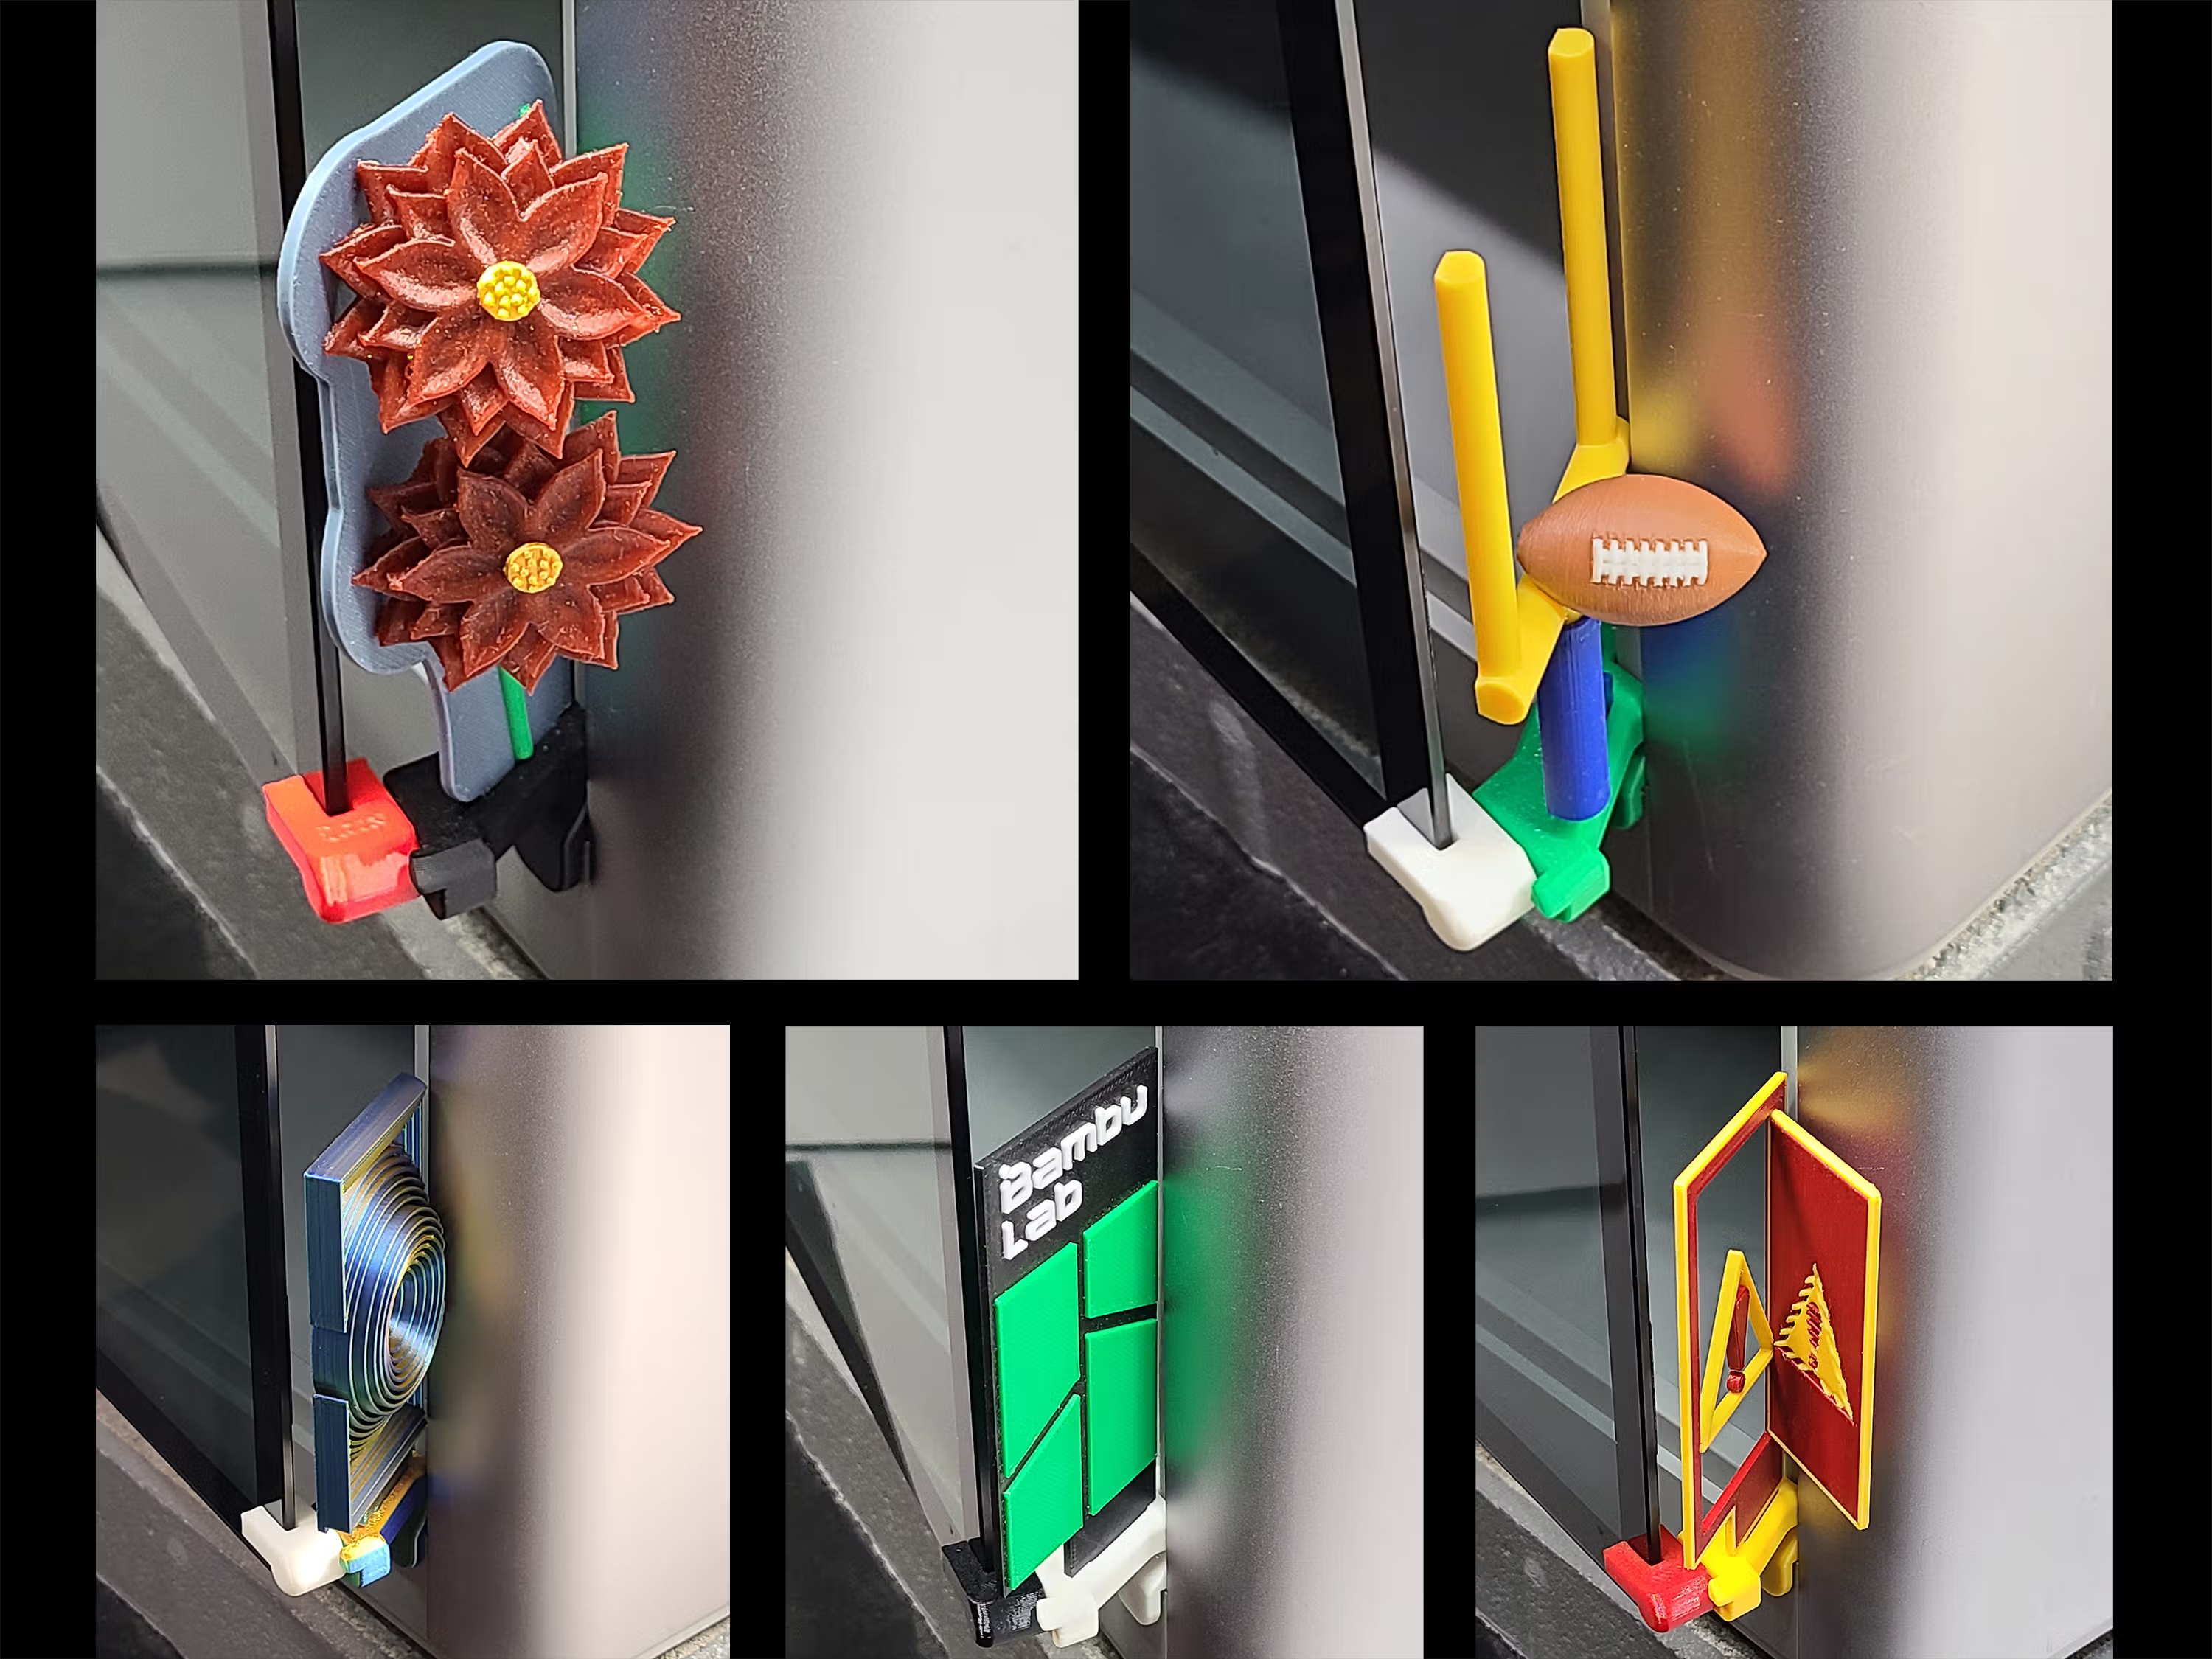
EmBlazeGuard Panels
EmBlazeGuard Panels are designed to:
- Extend visibly past the door
- Act as a clear visual warning
- Provide personalization and style
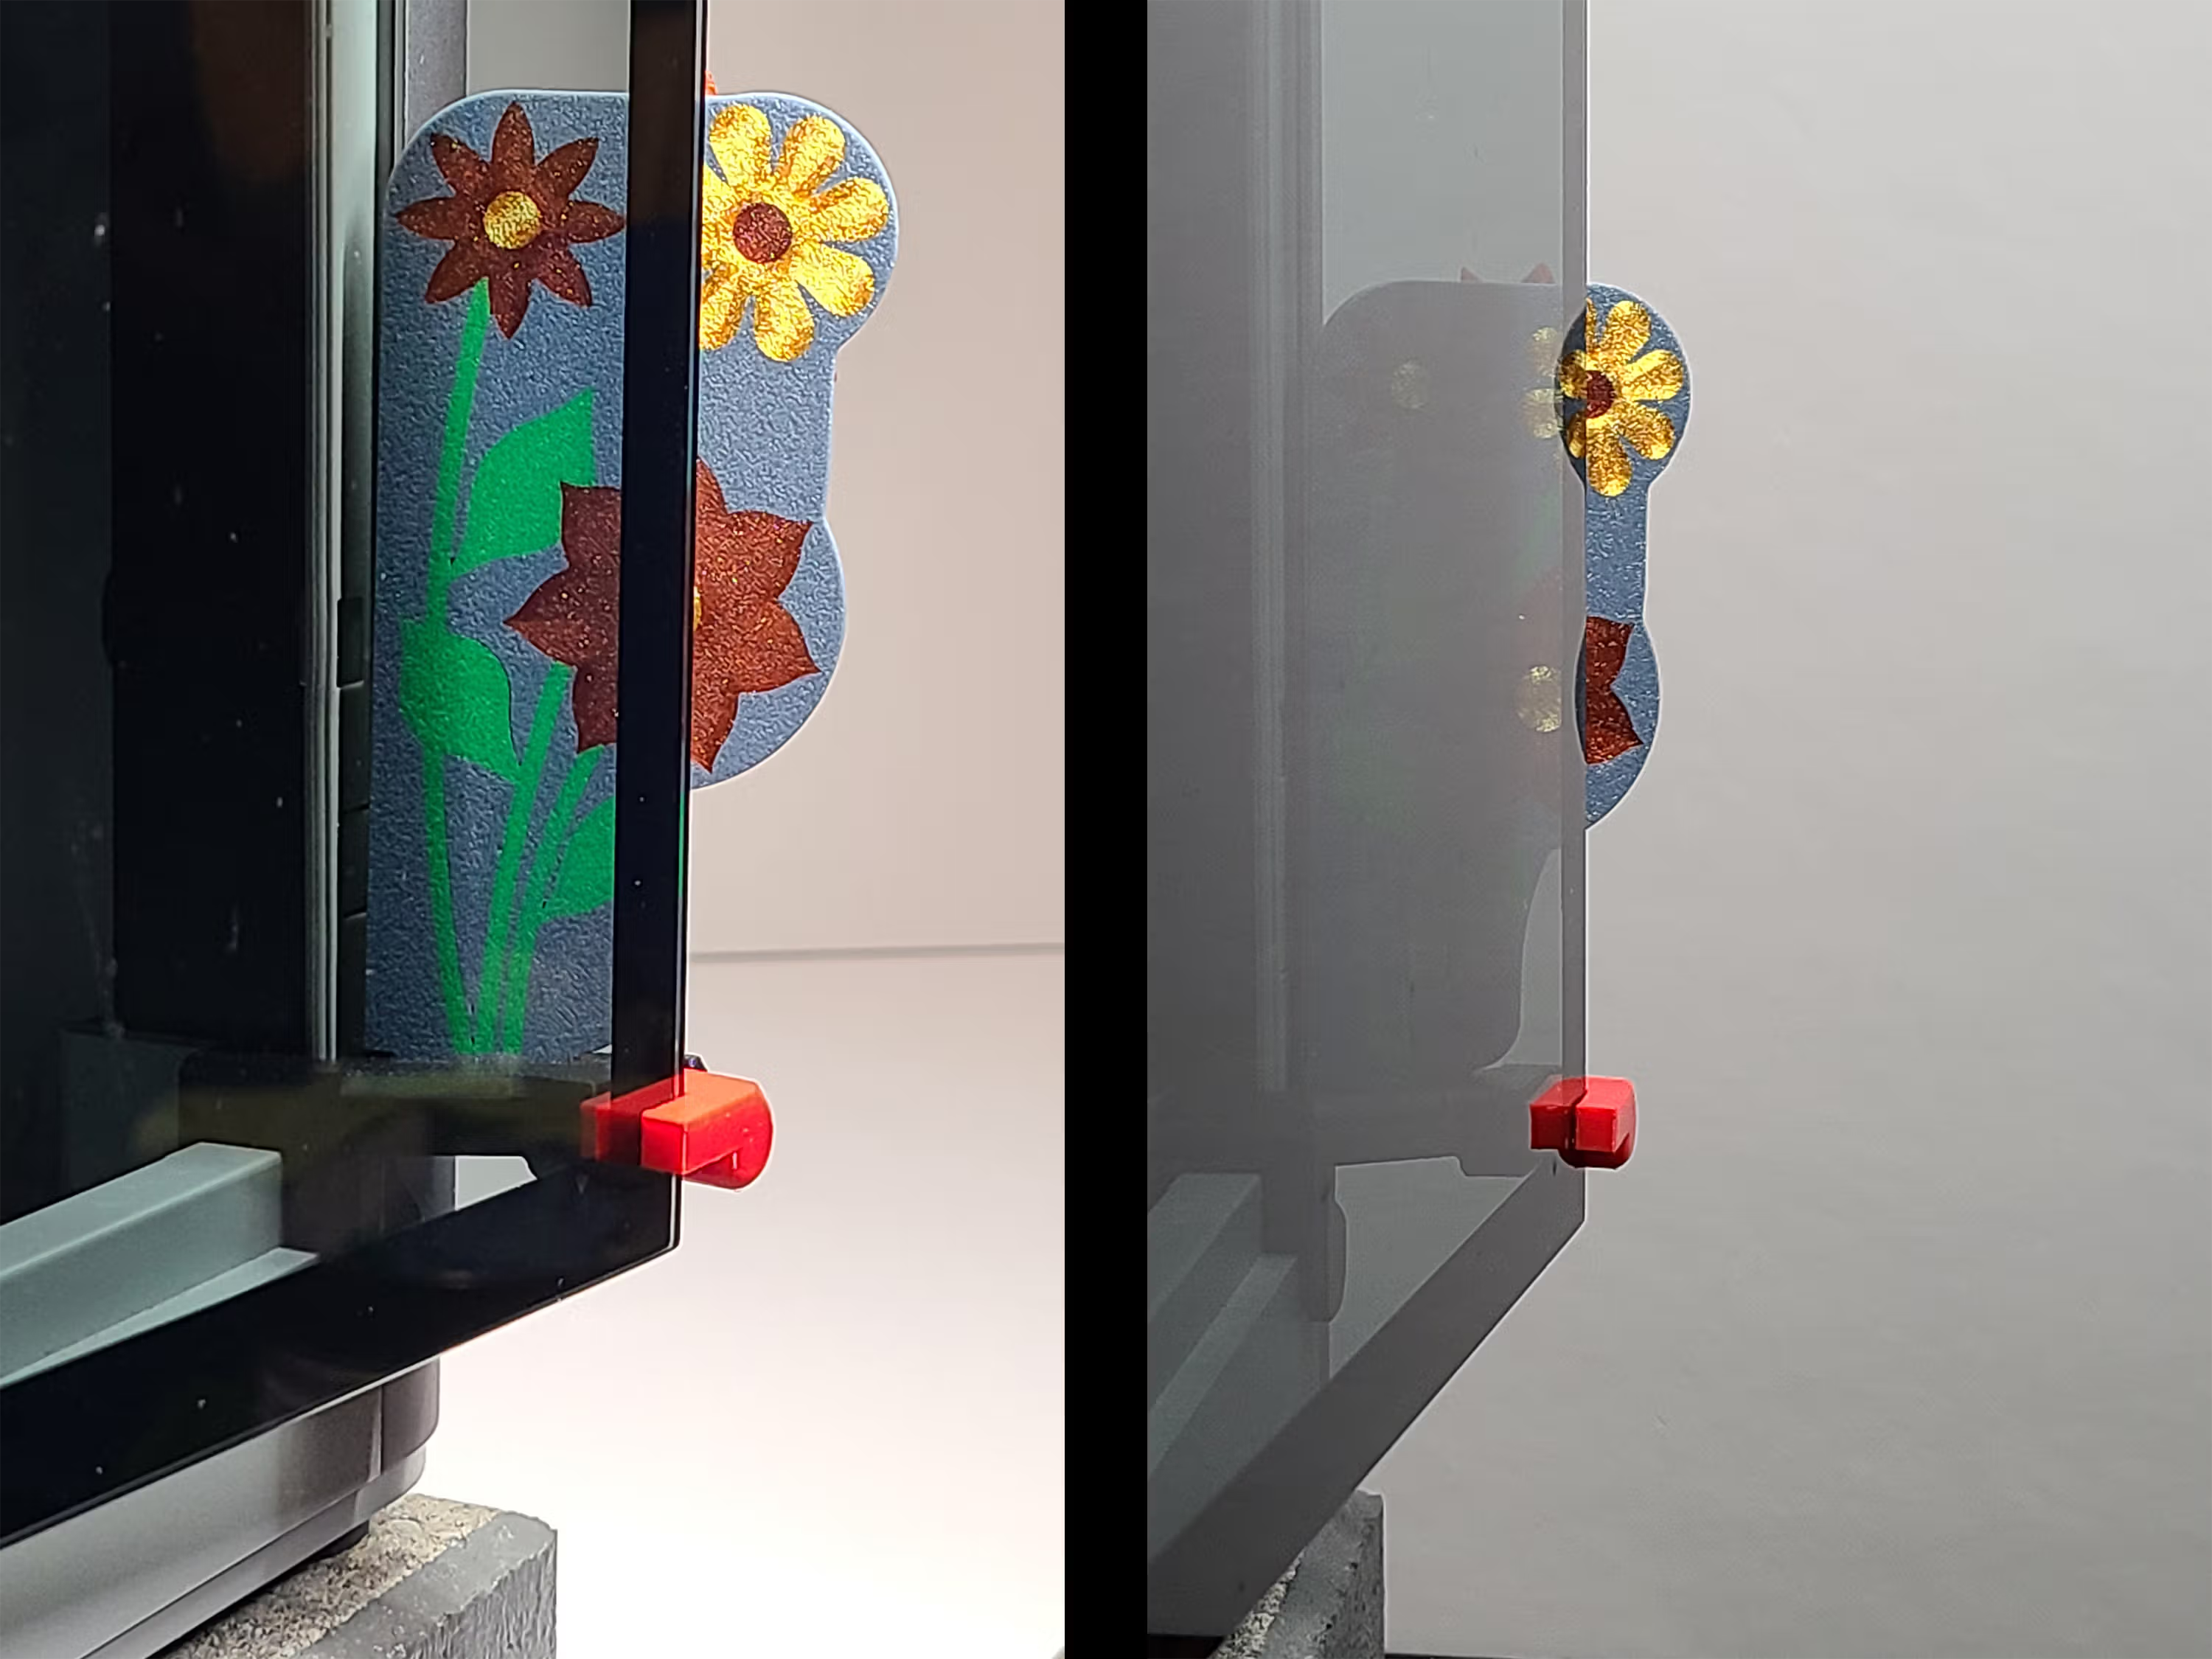
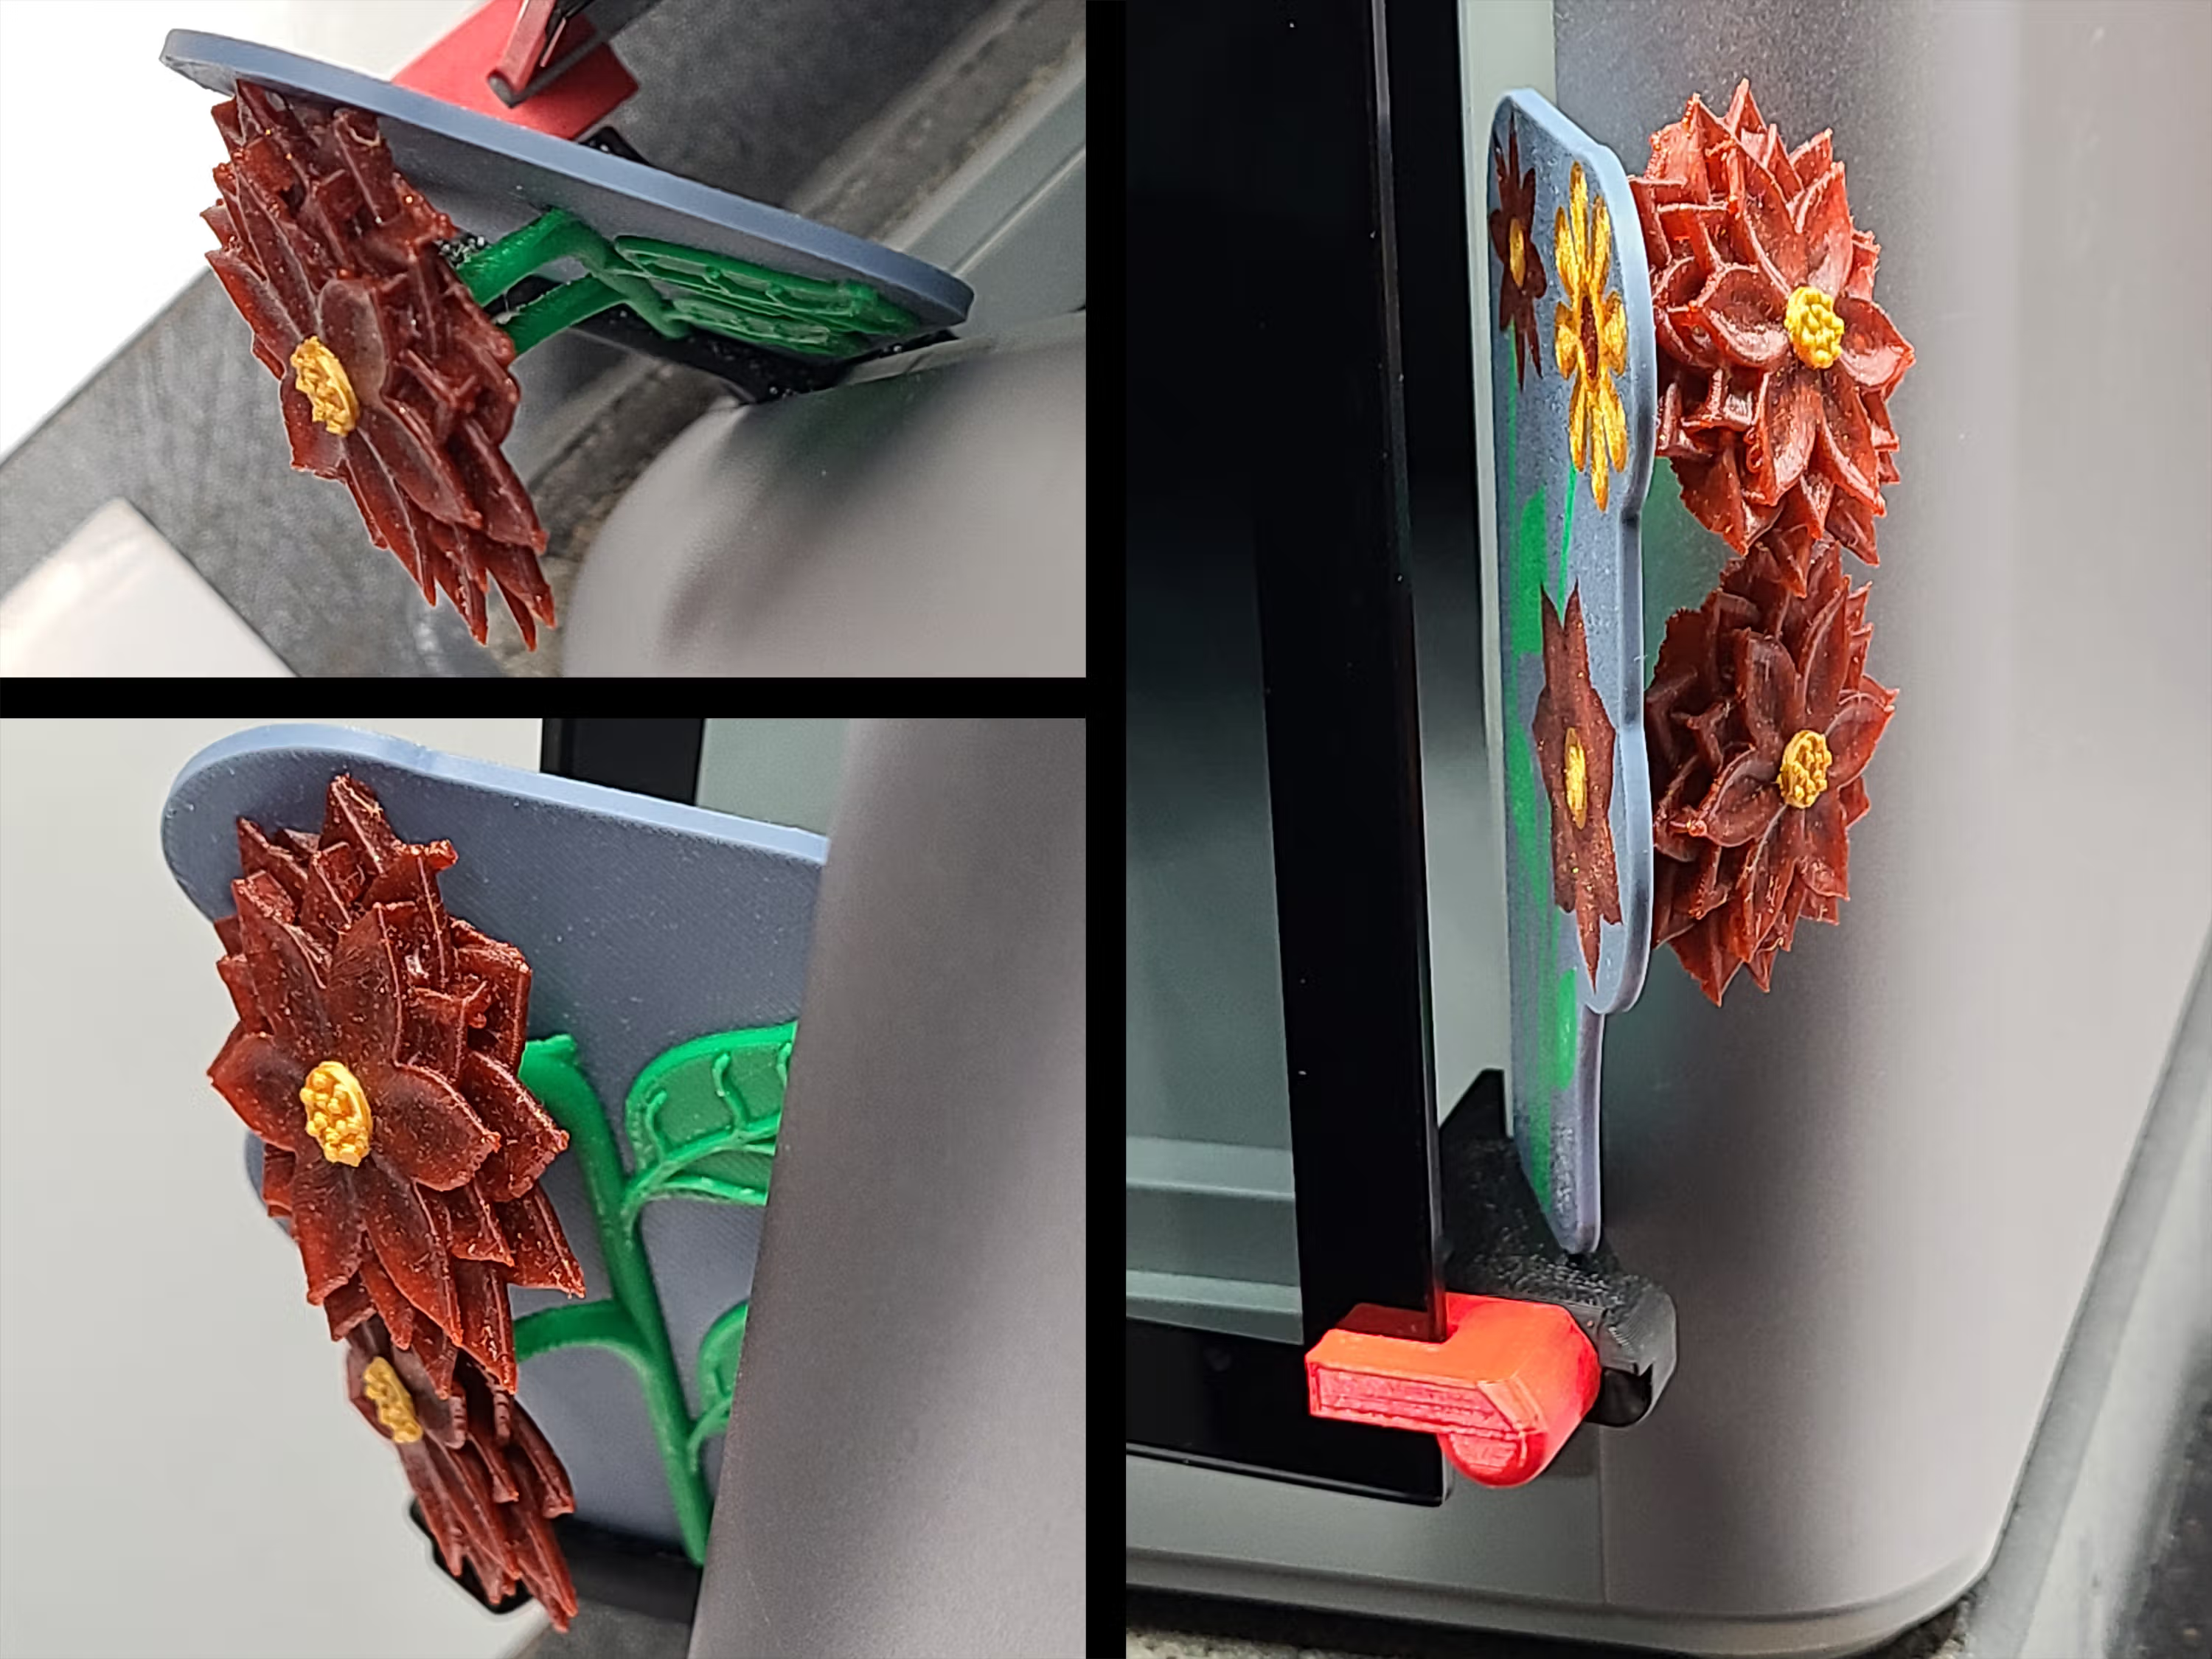
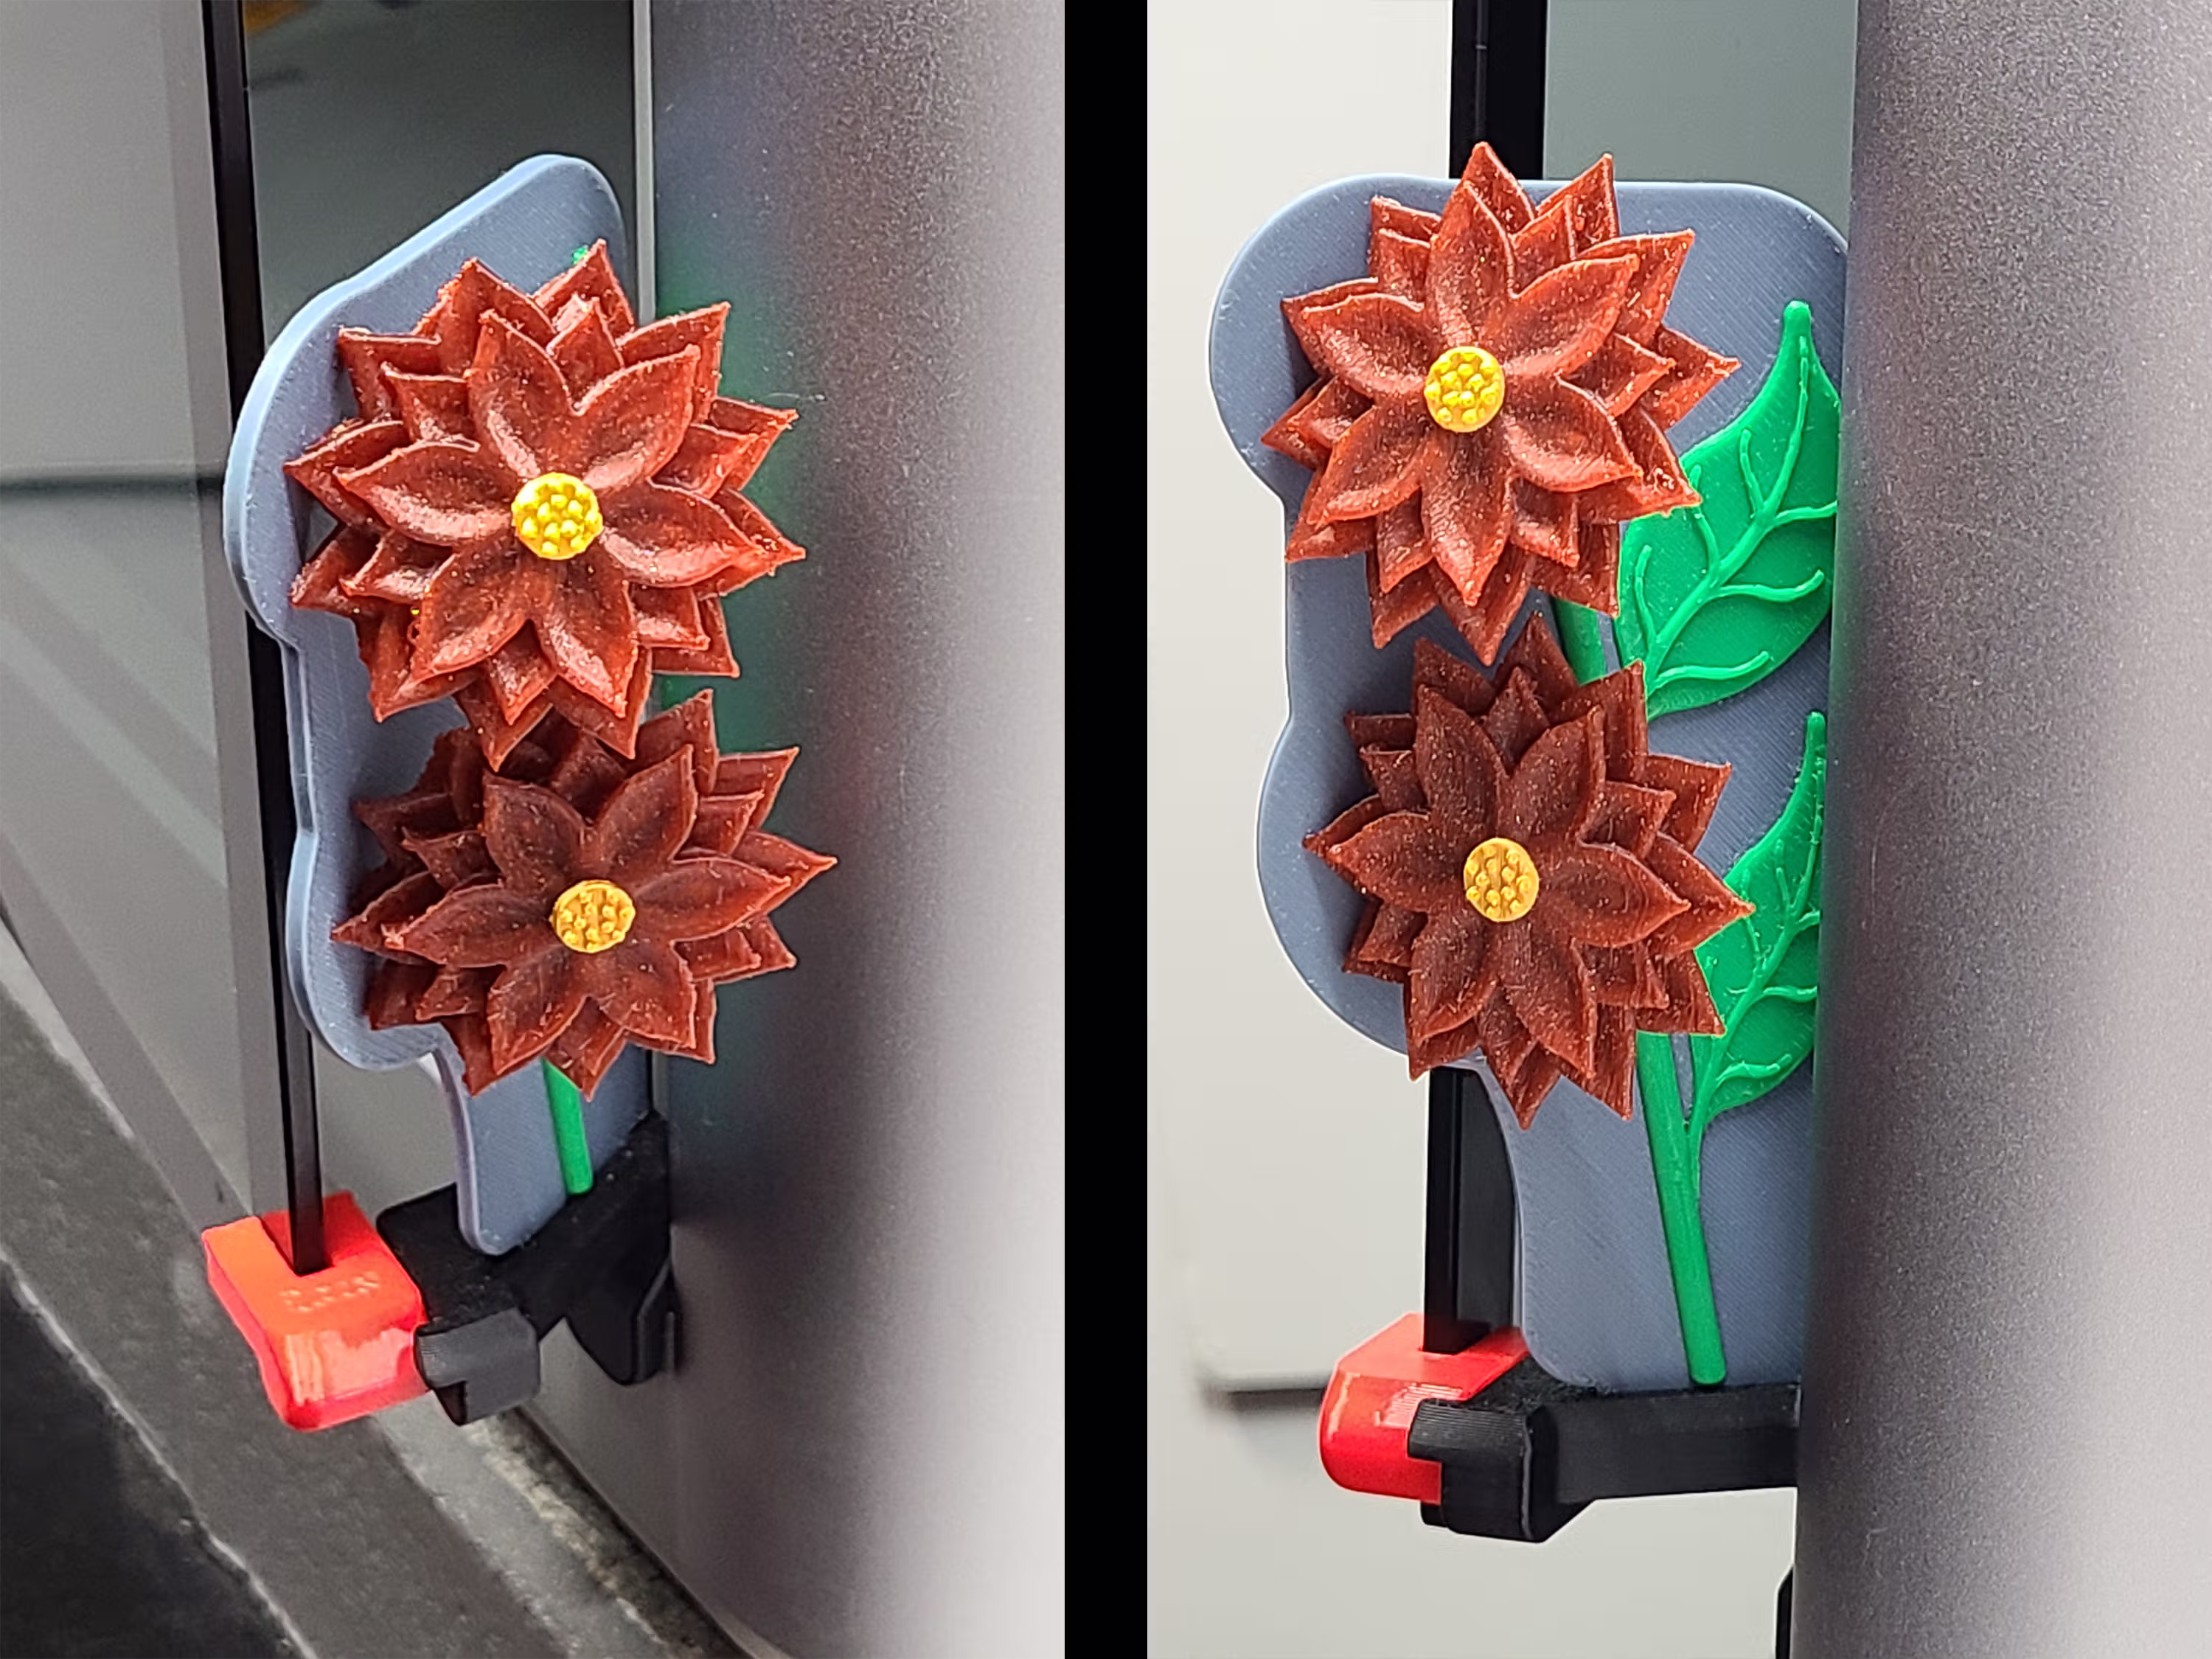
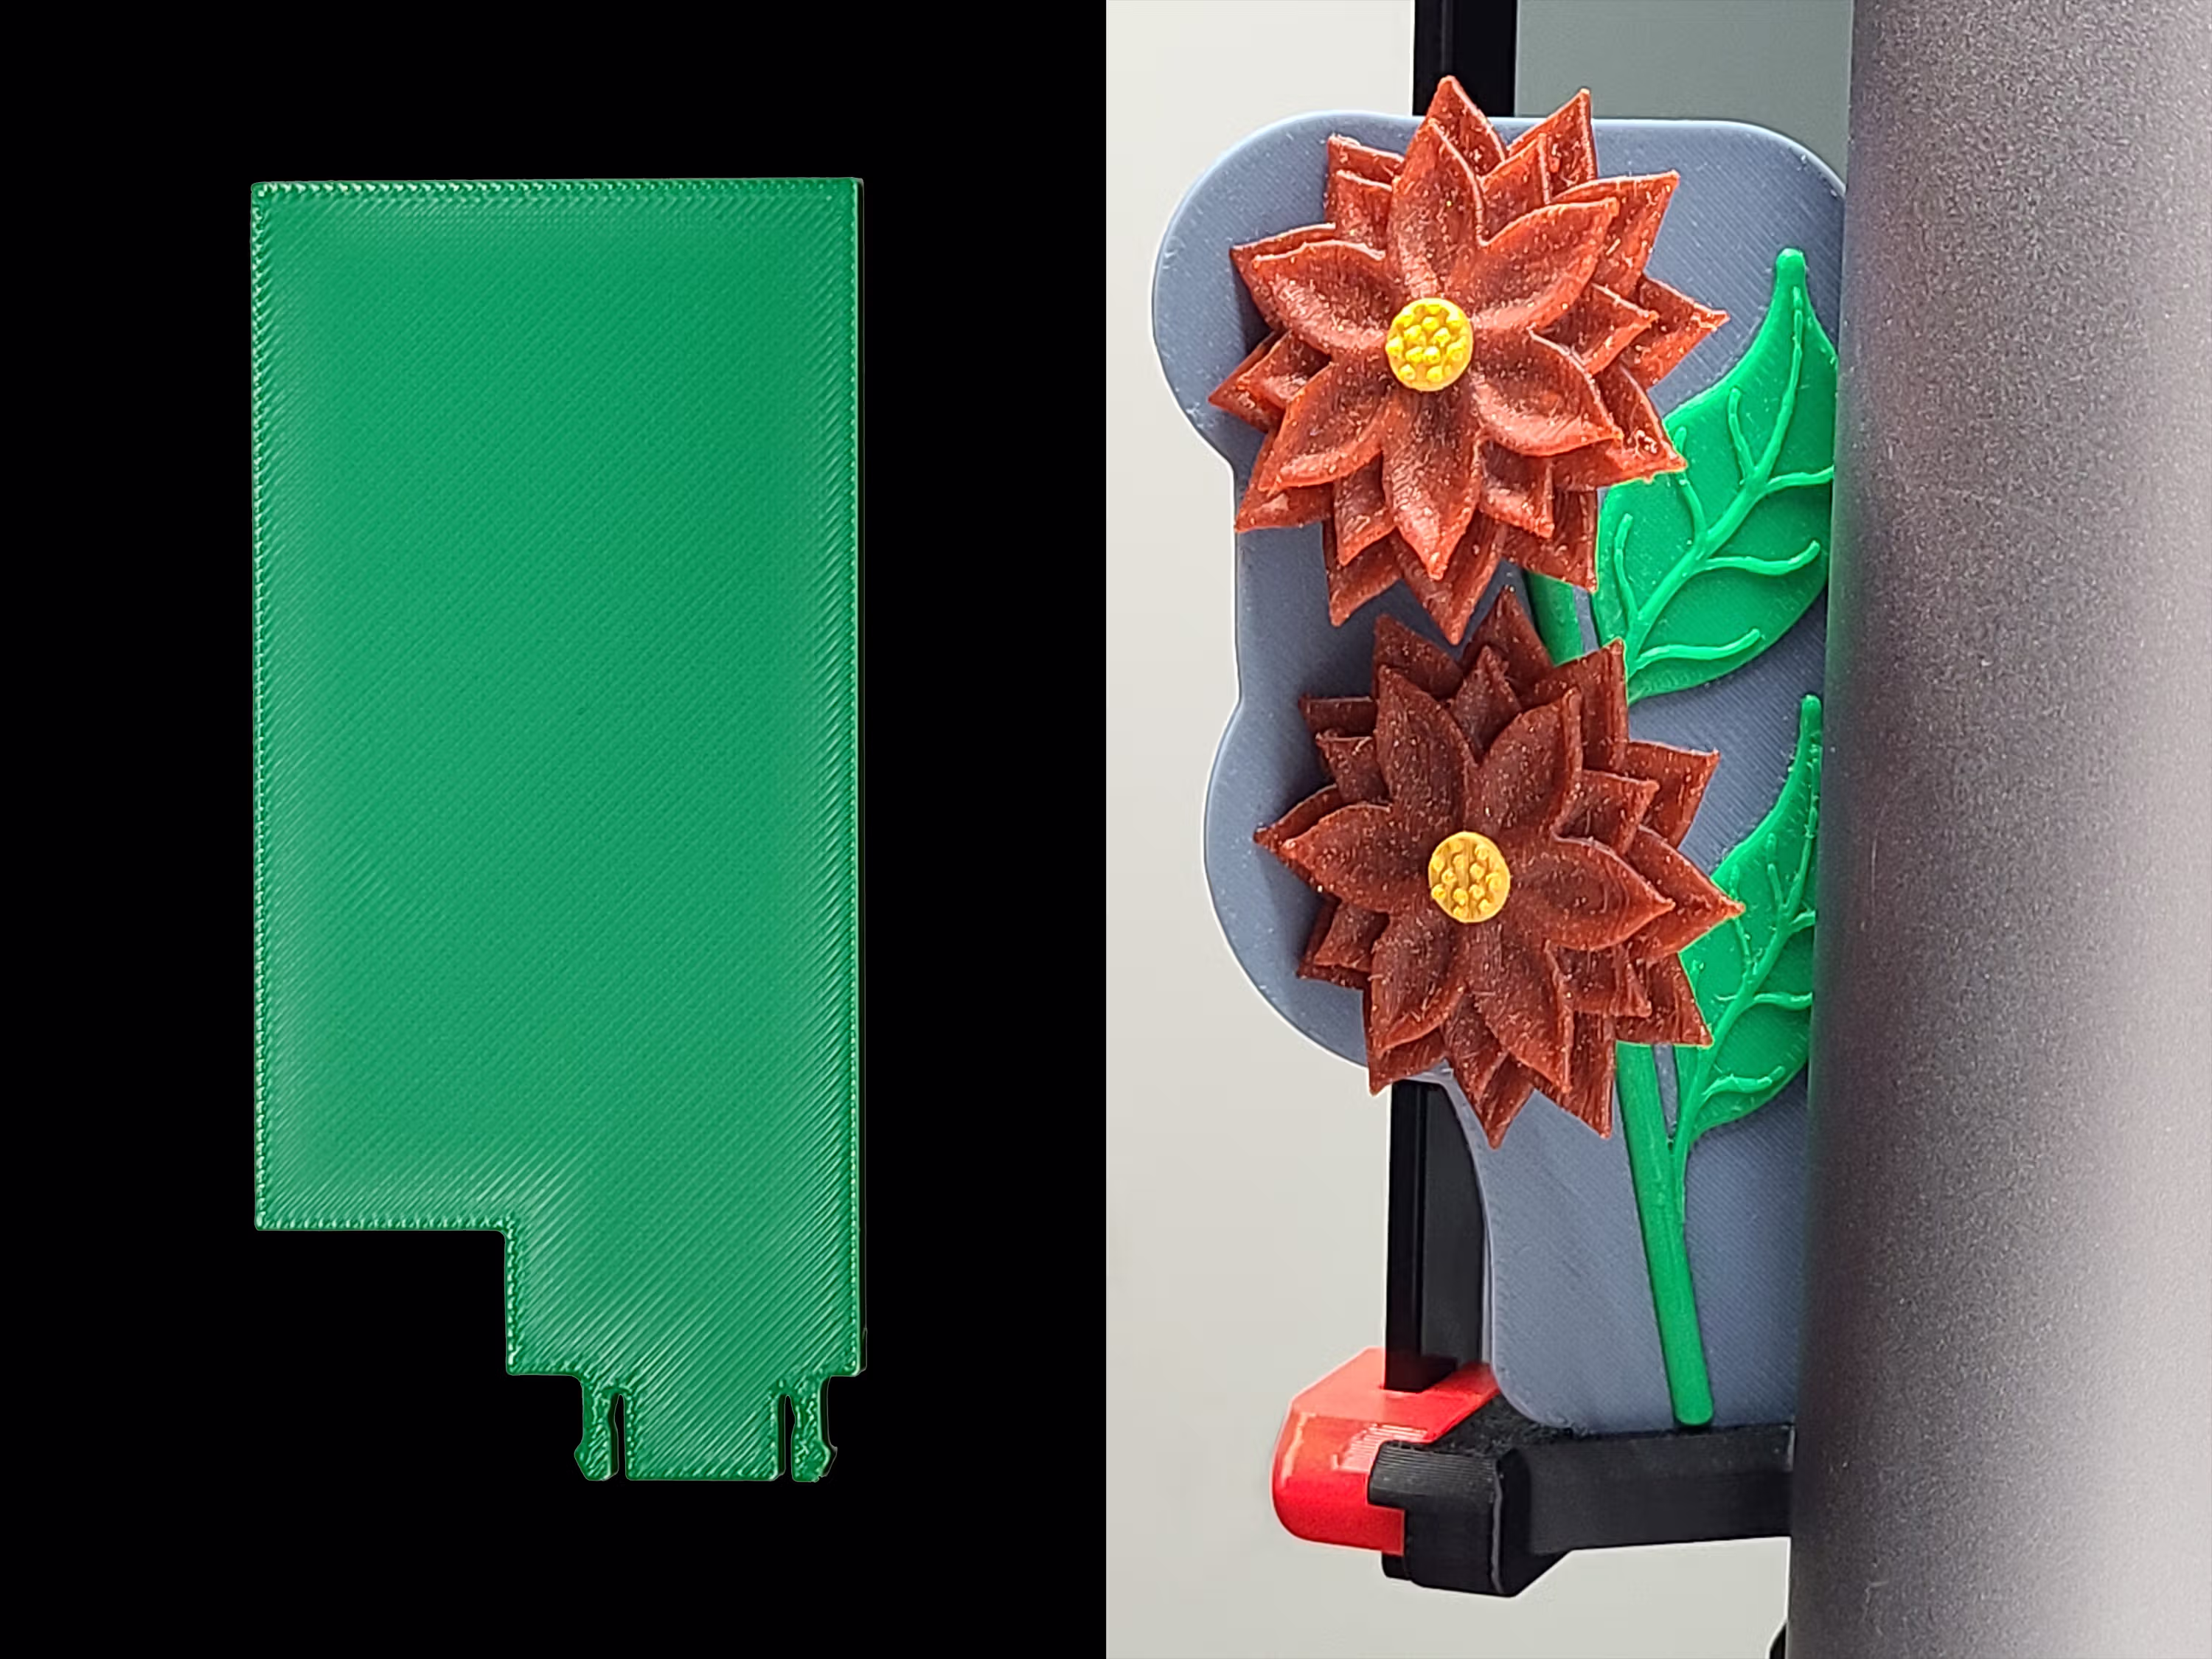
Floral Gate EmBlazeGuard Panel
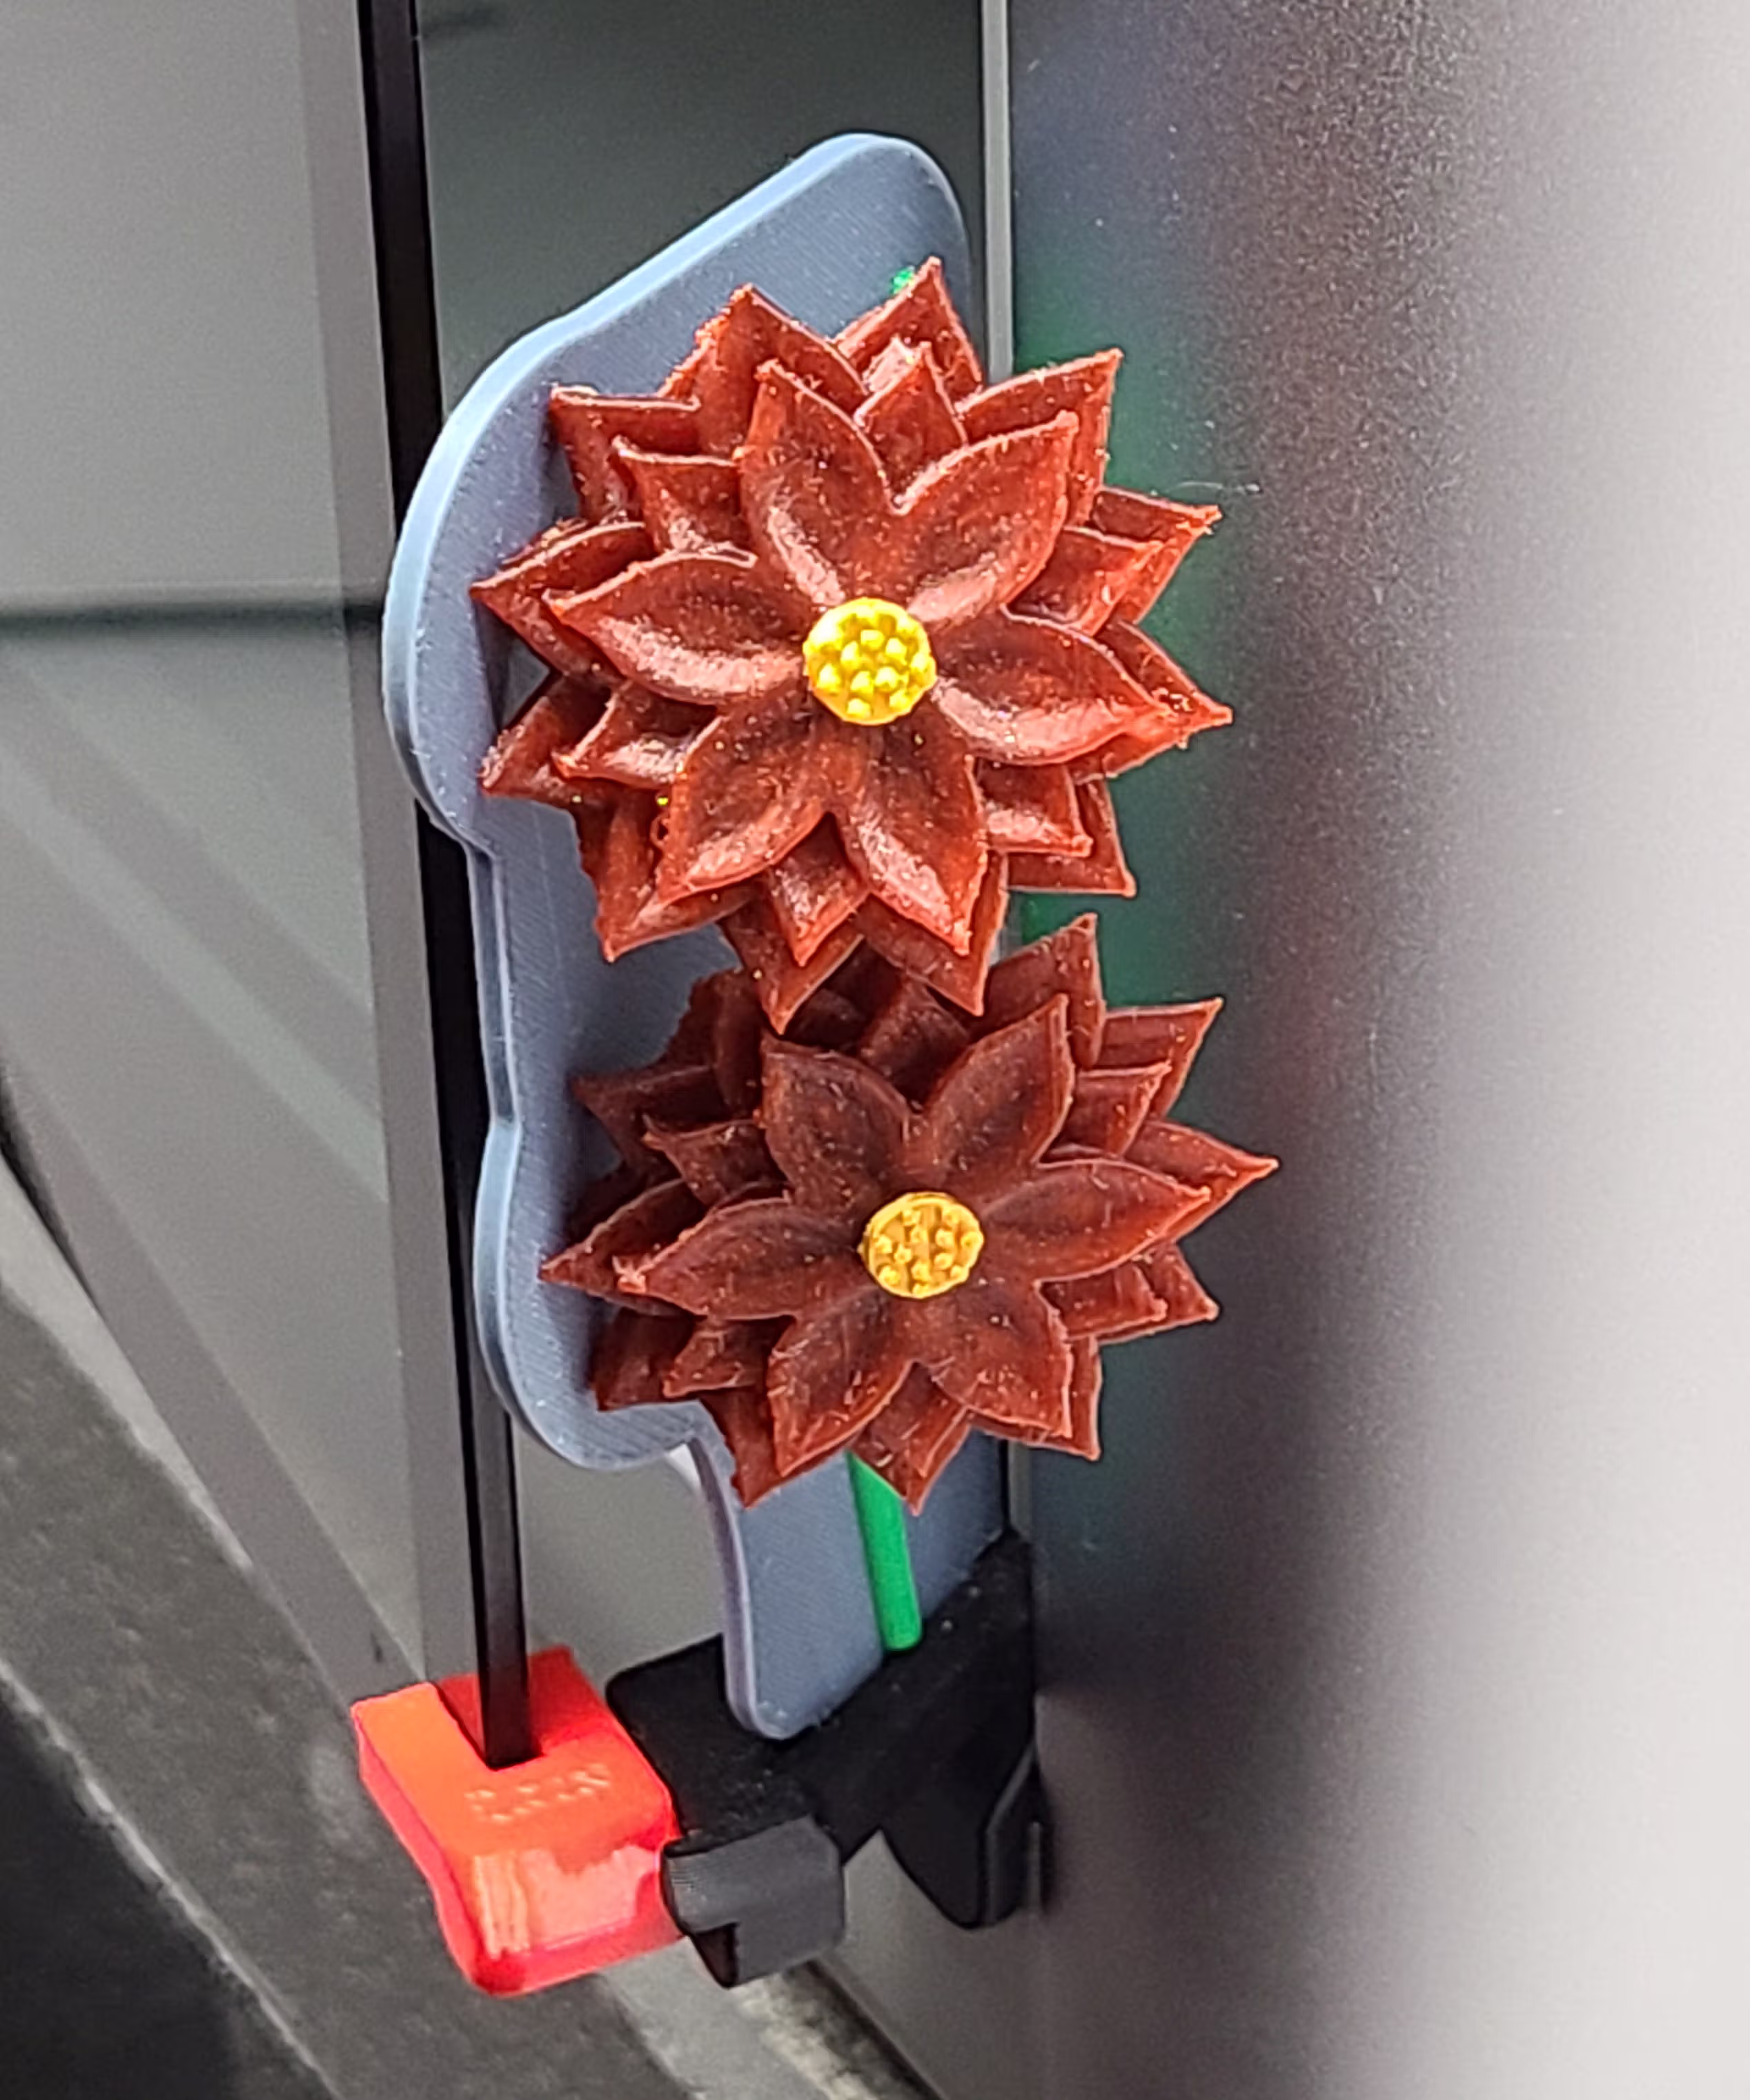
The Floral Gate panel adds warmth and organic character with layered petals and flowing stems—decorative, highly visible, and home-friendly. View the Floral Gate panel page for printing notes and WarpShield details.
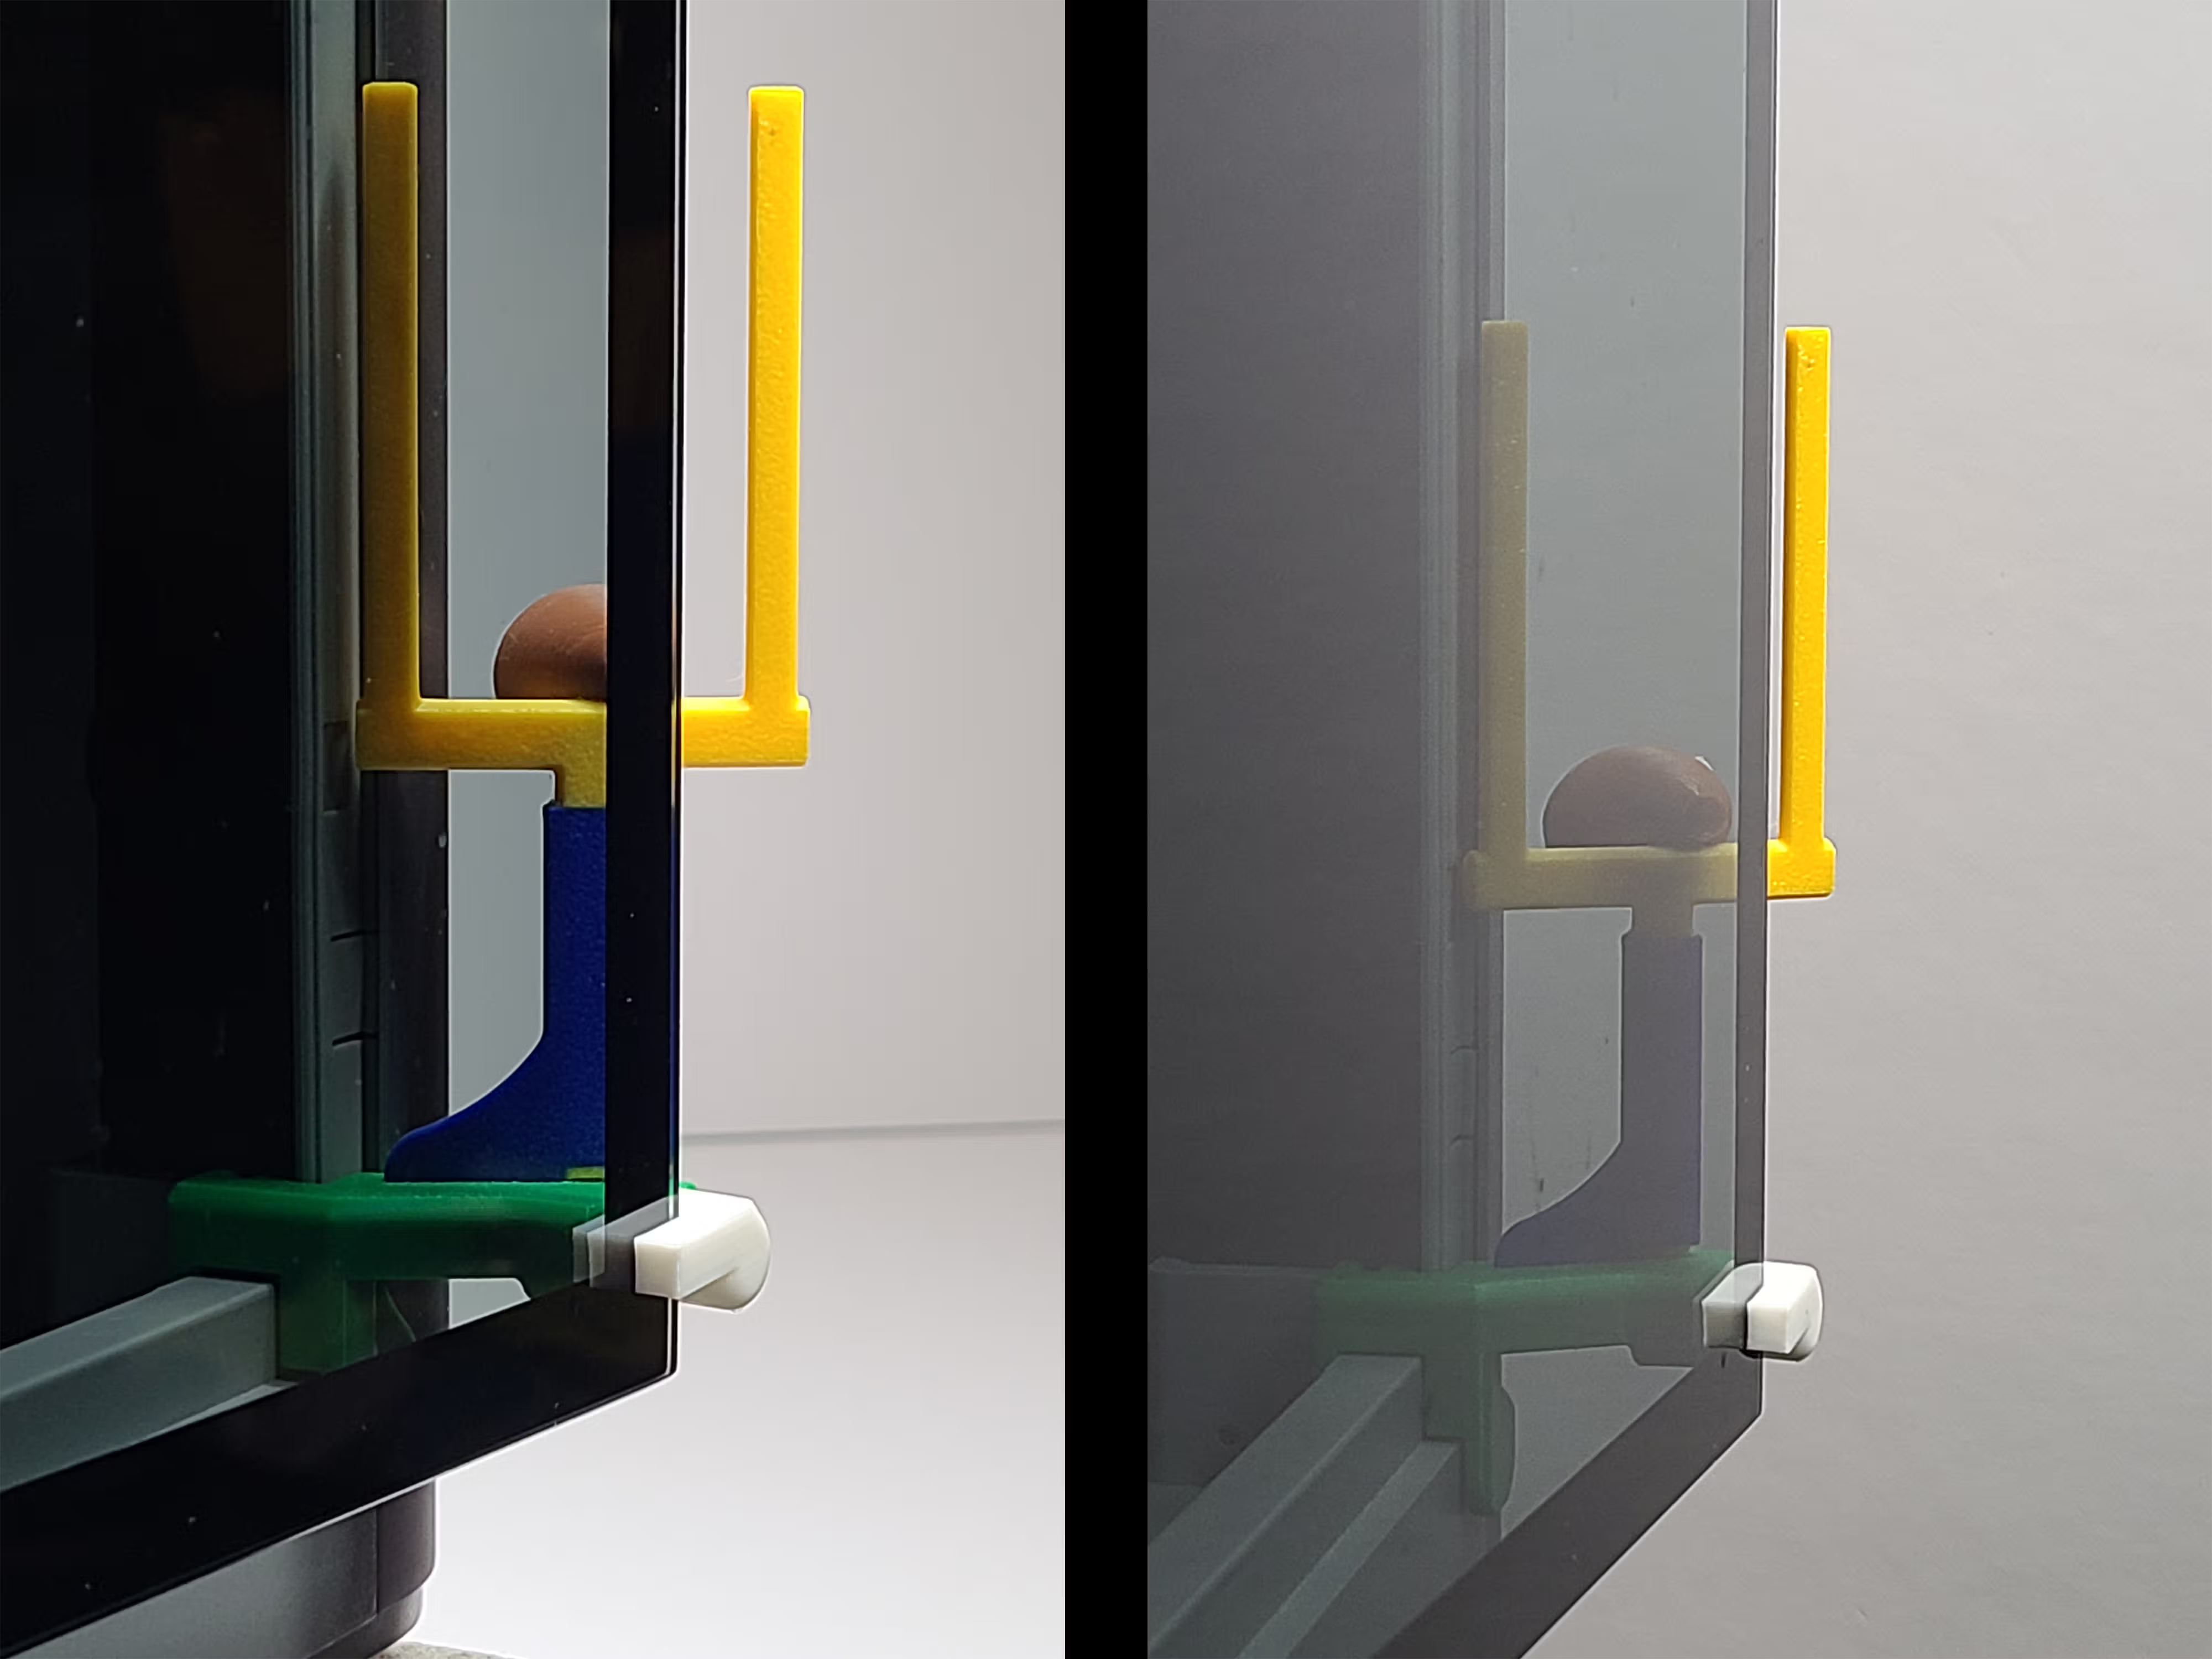
Field Goal EmBlazeGuard Panel
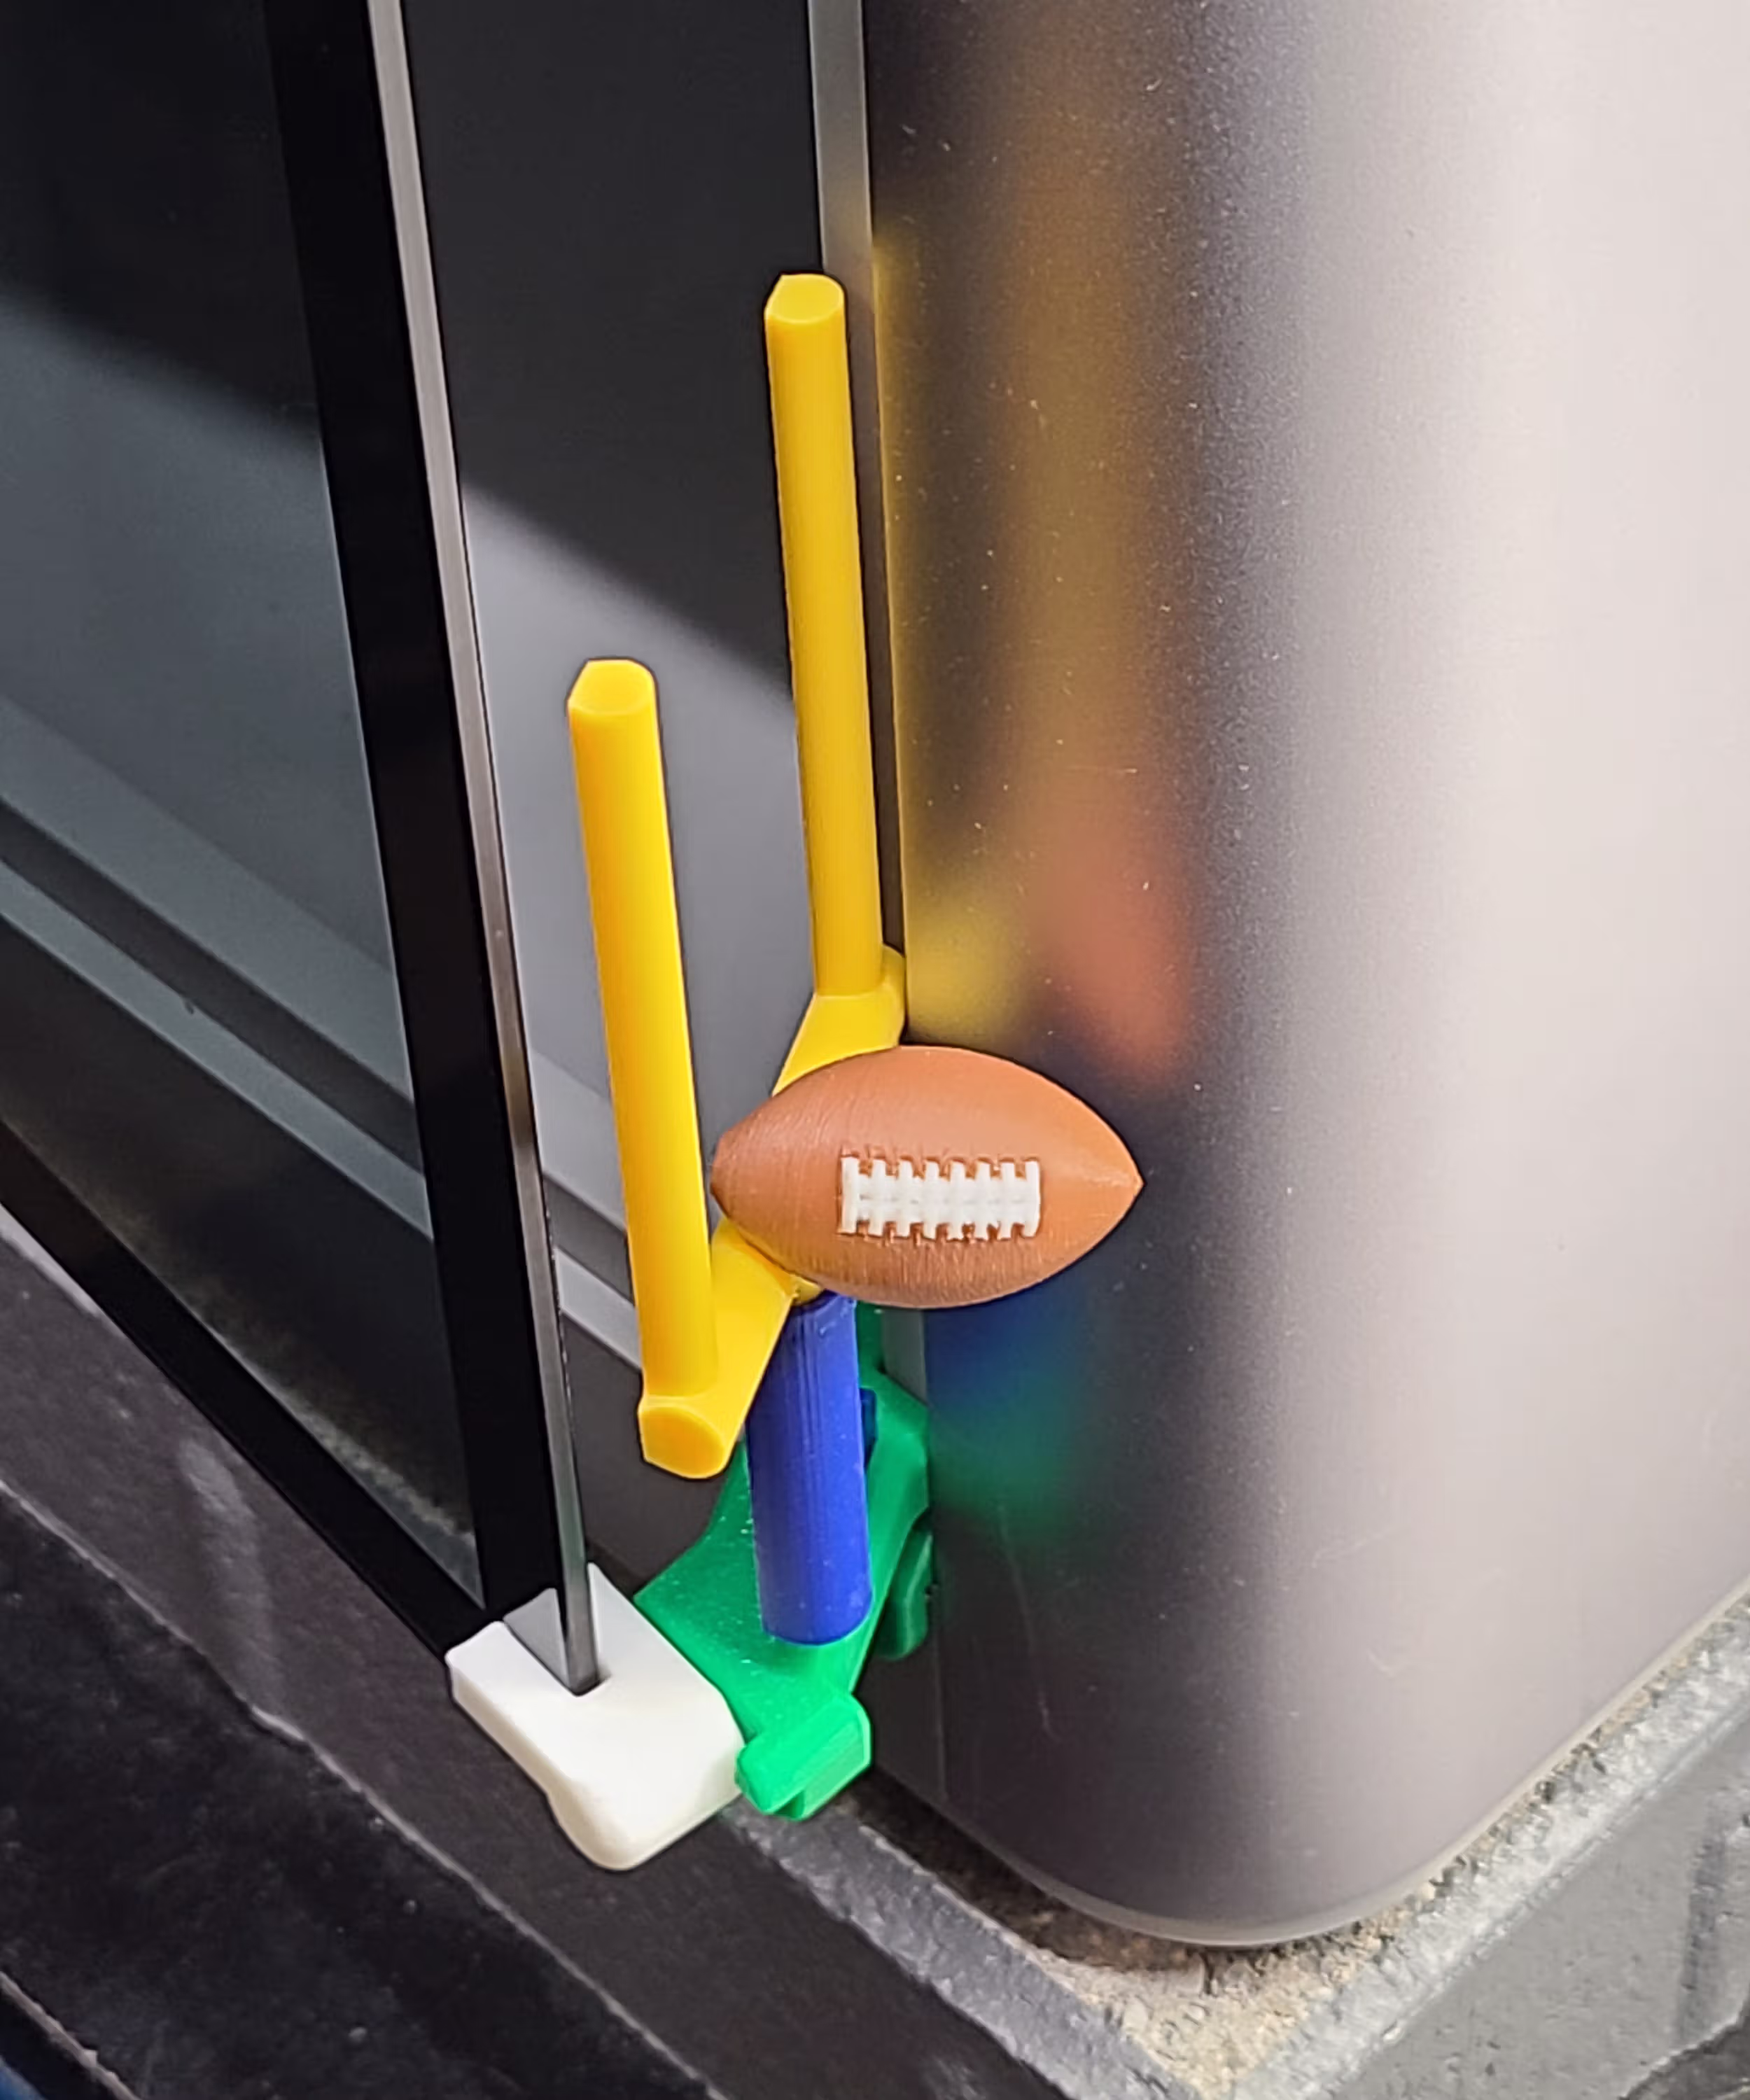
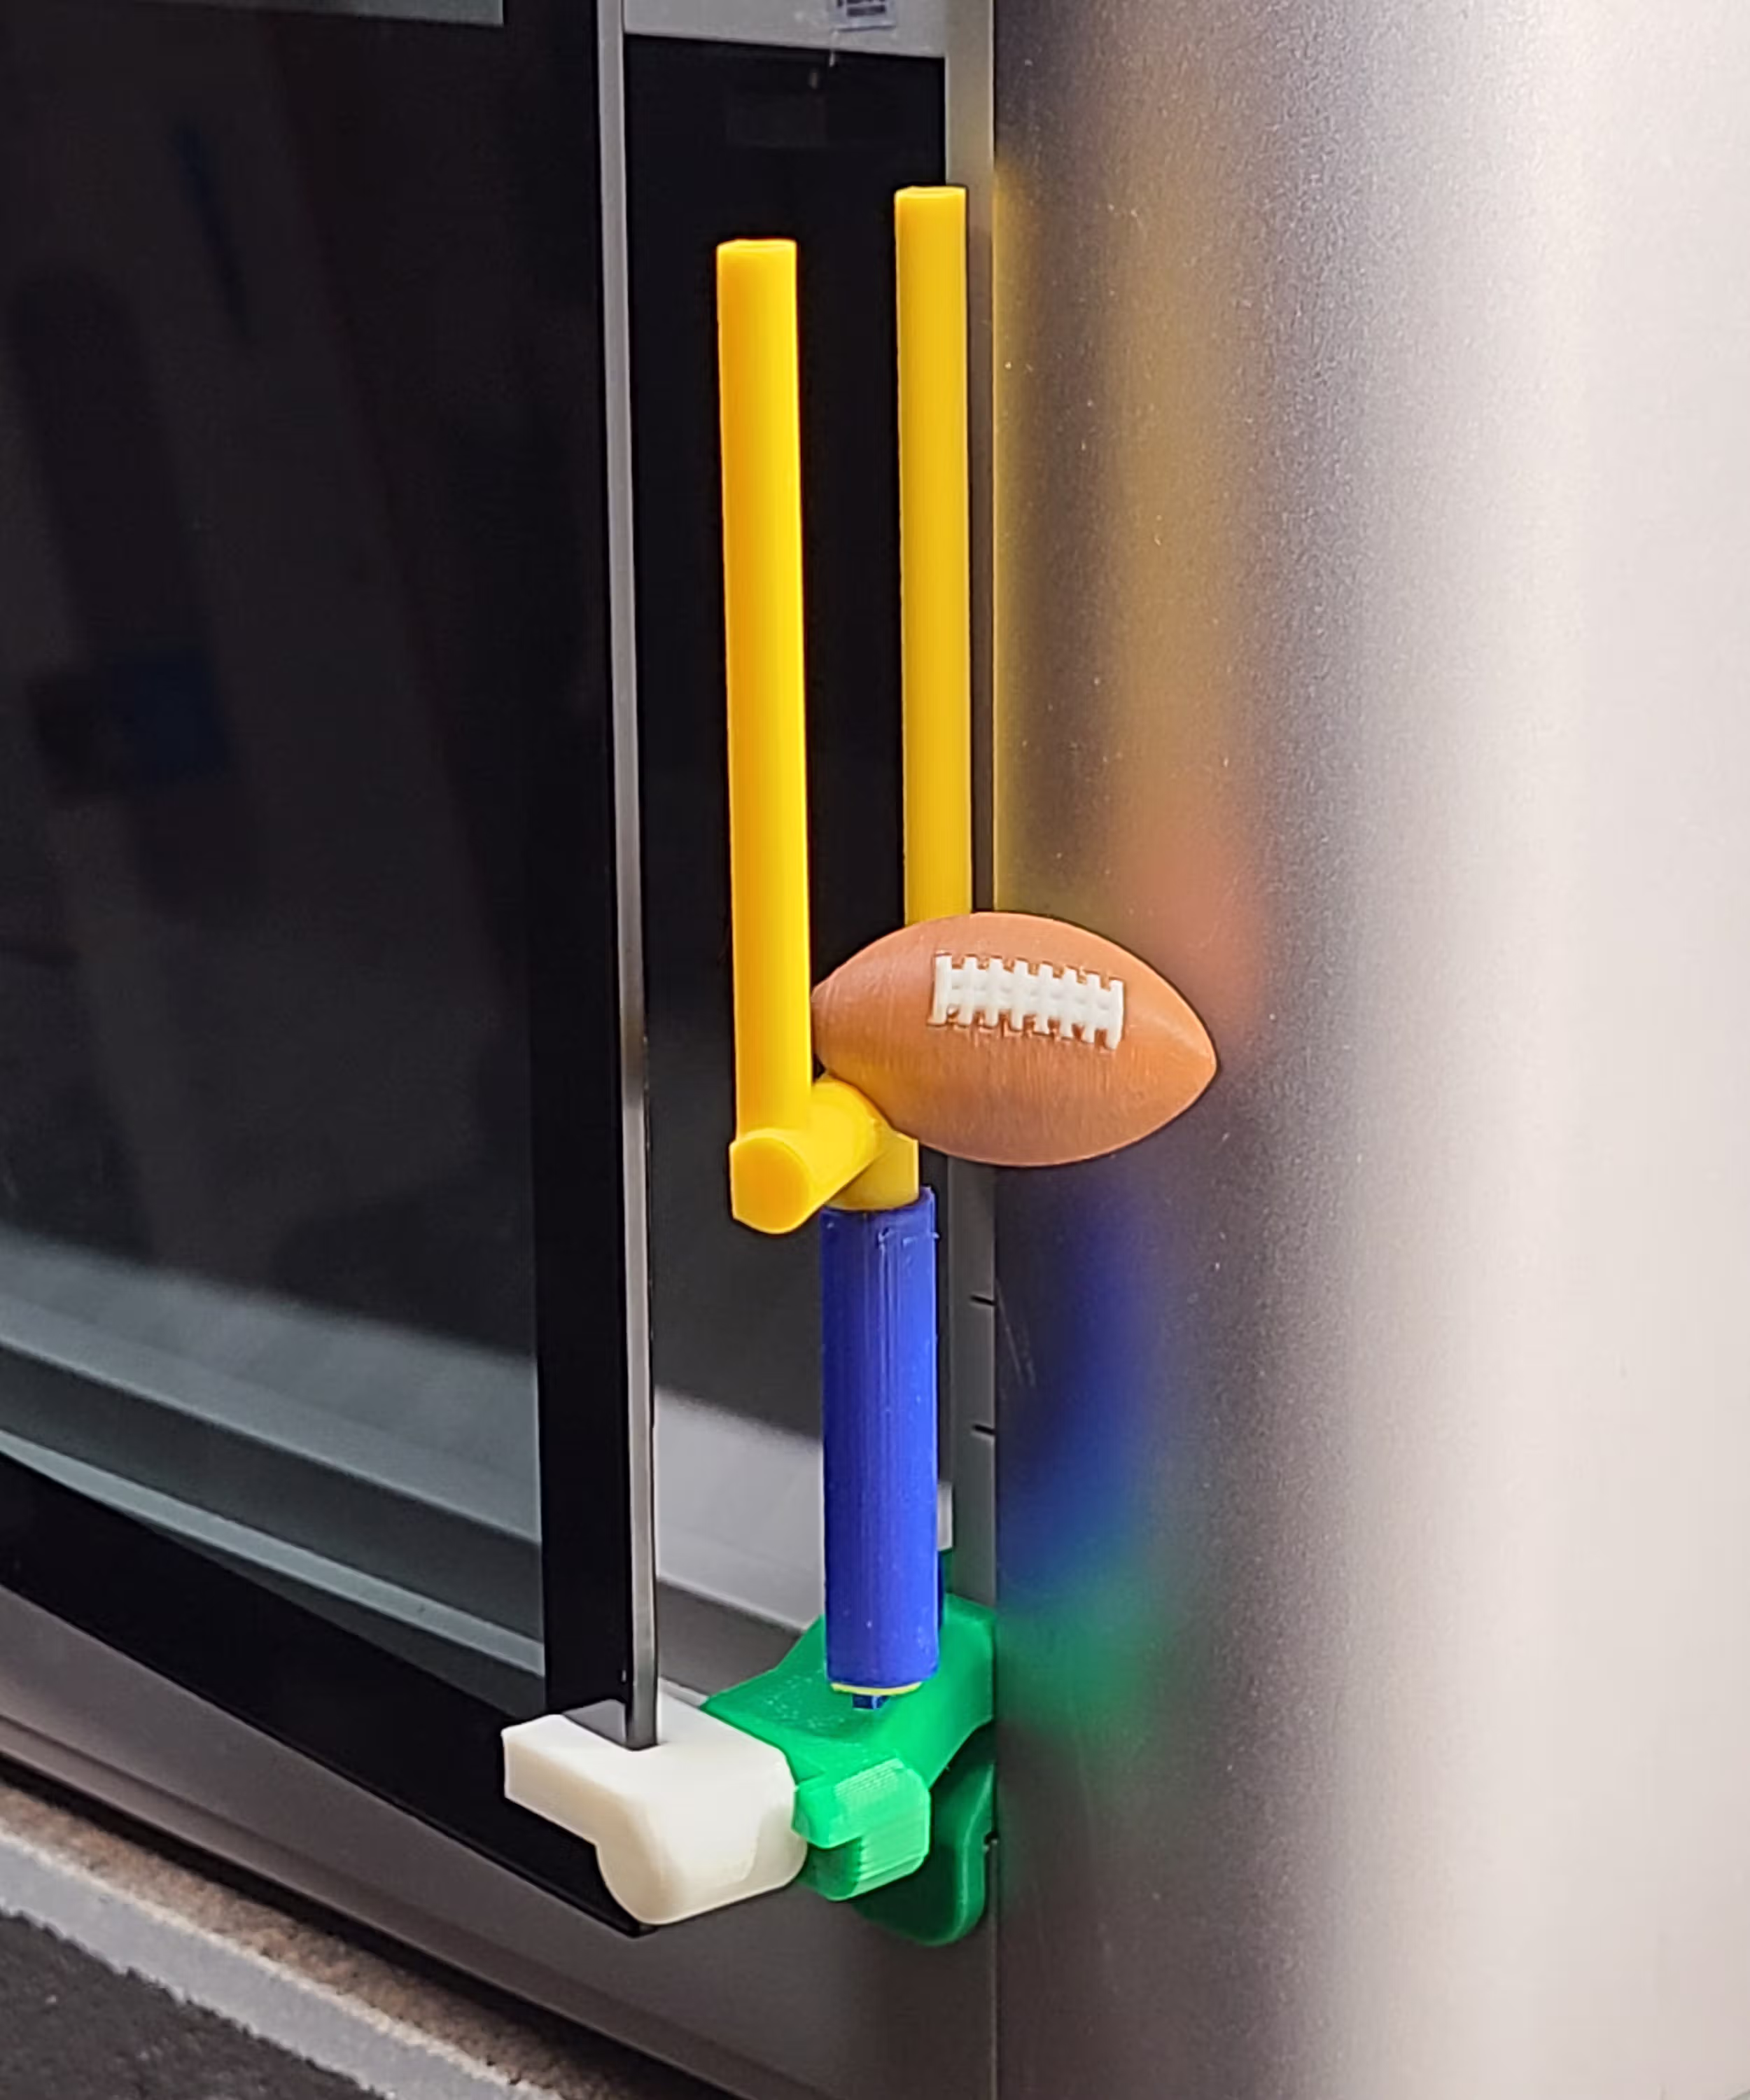
The Field Goal panel adds a sports theme with a classic goalpost silhouette and 3D football—fun, recognizable, and visible from both sides. View the Field Goal panel page for printing notes and WarpShield details.
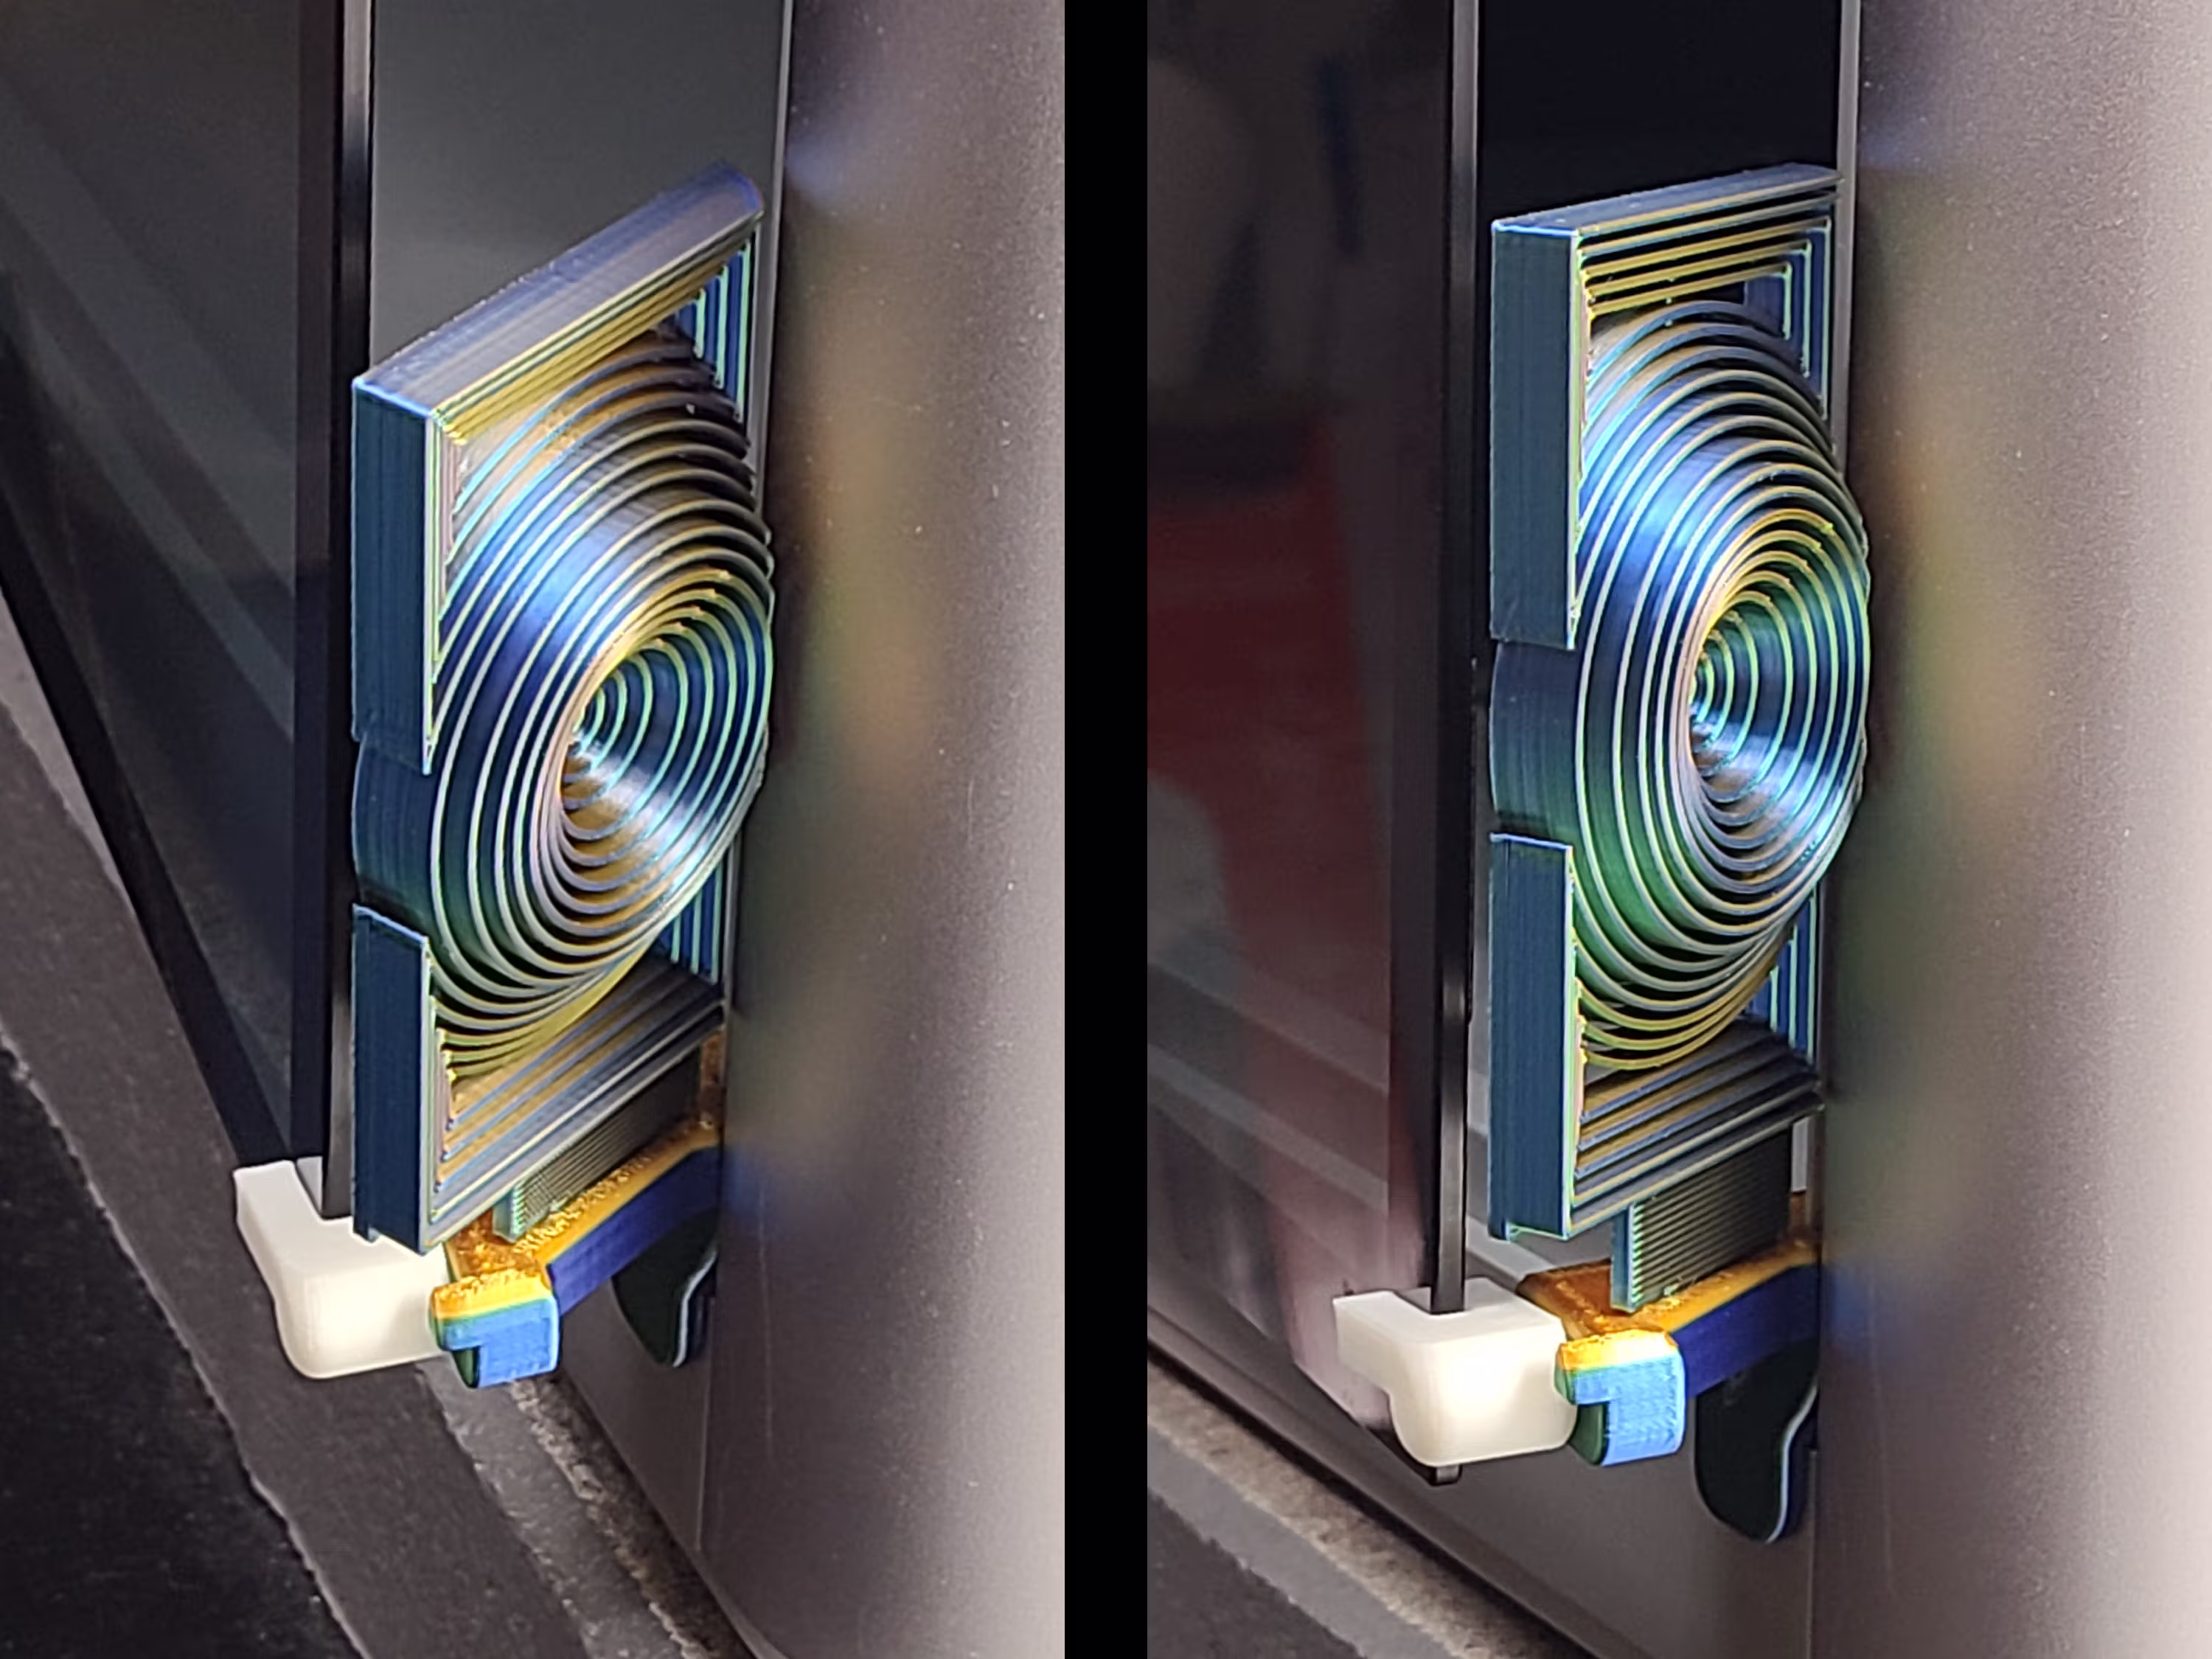
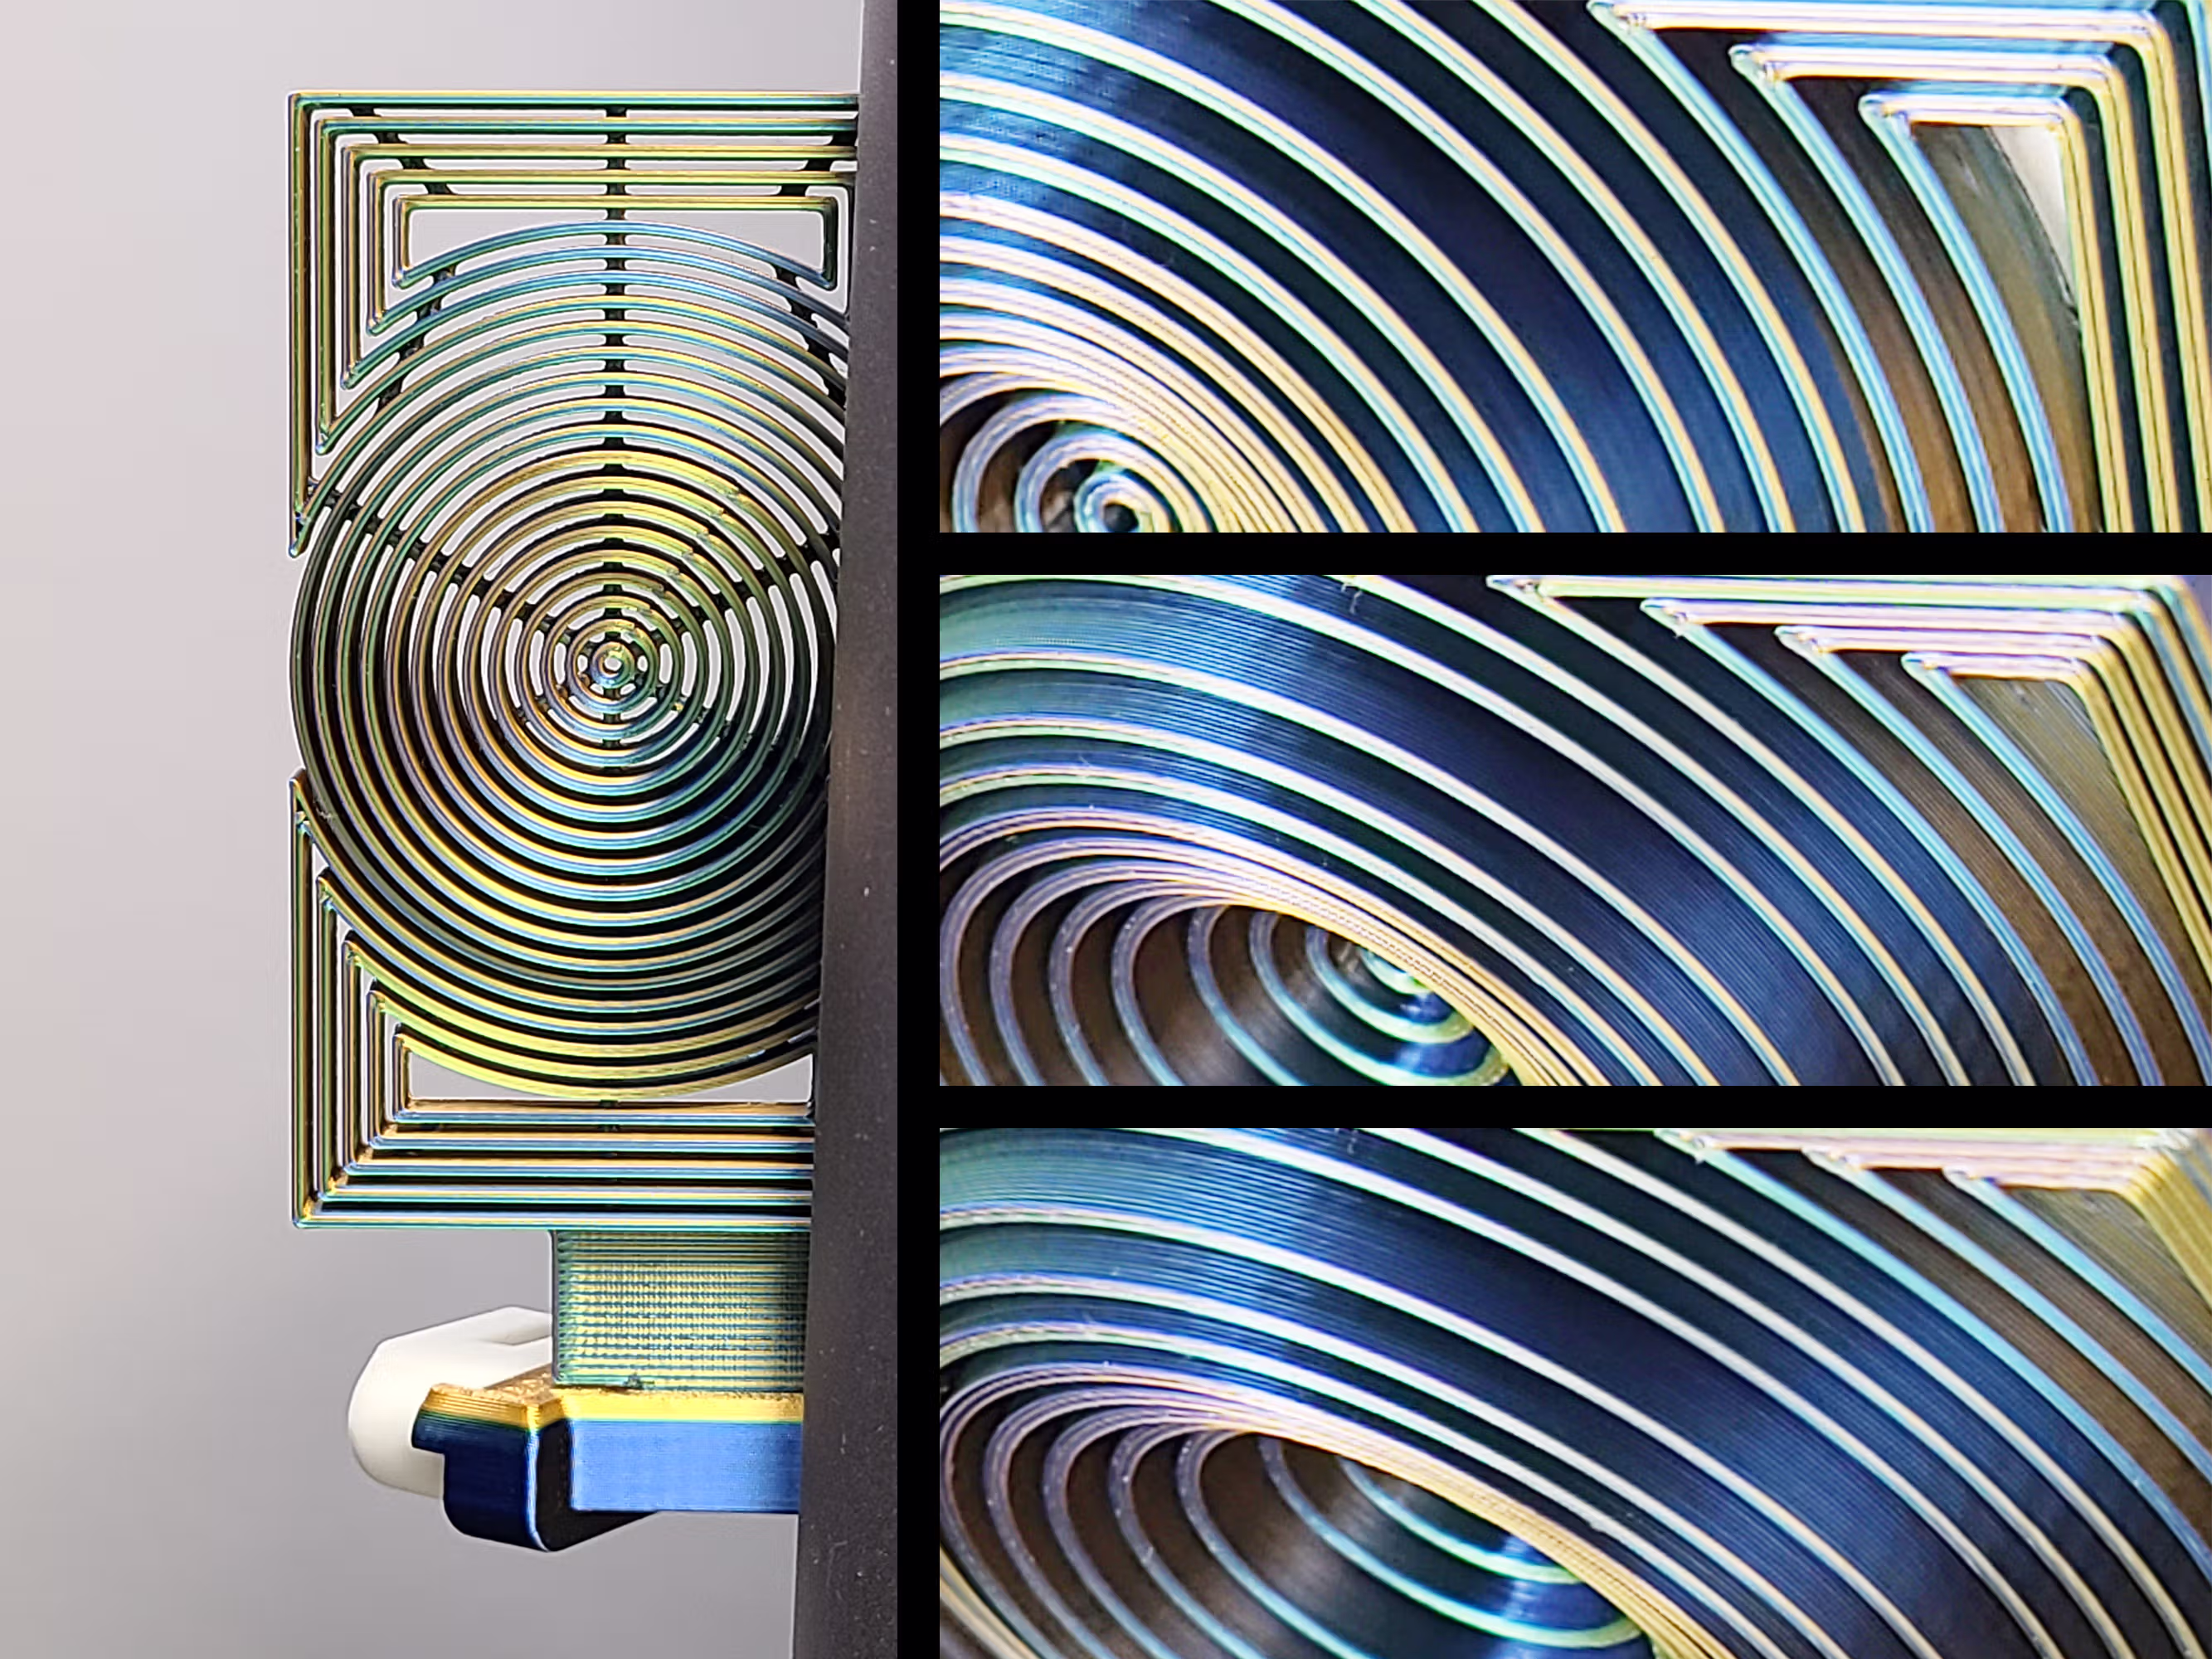
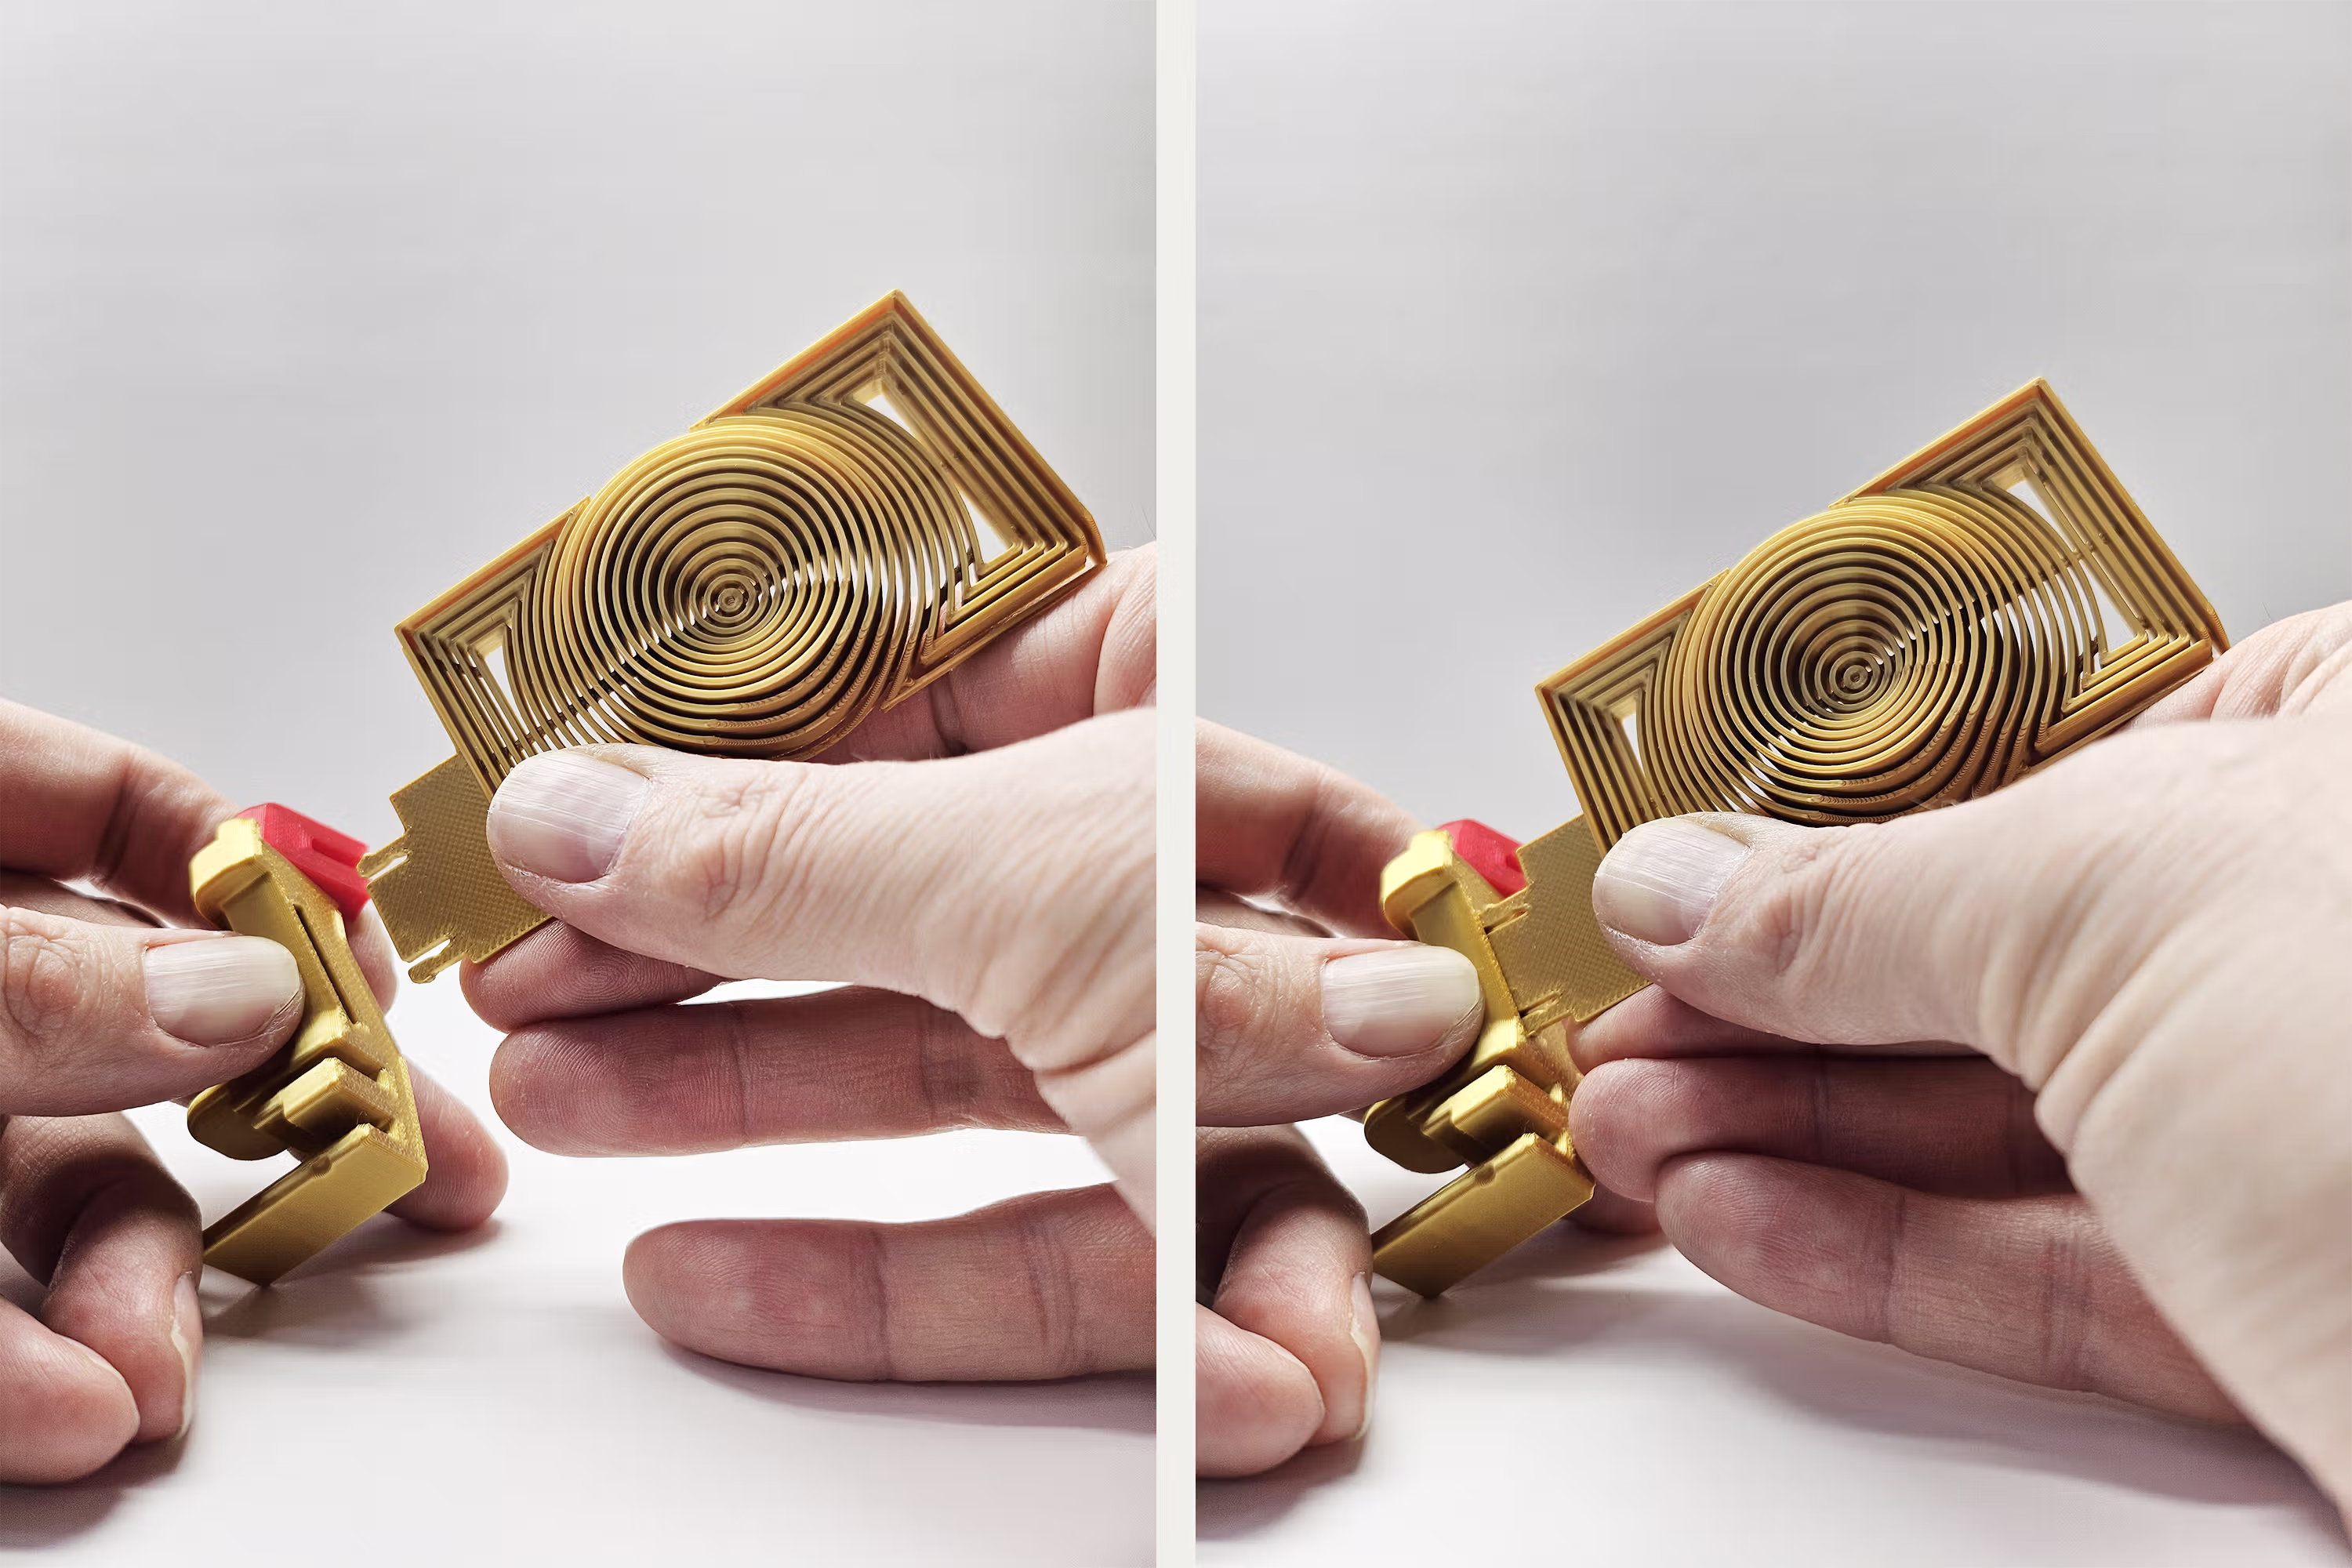
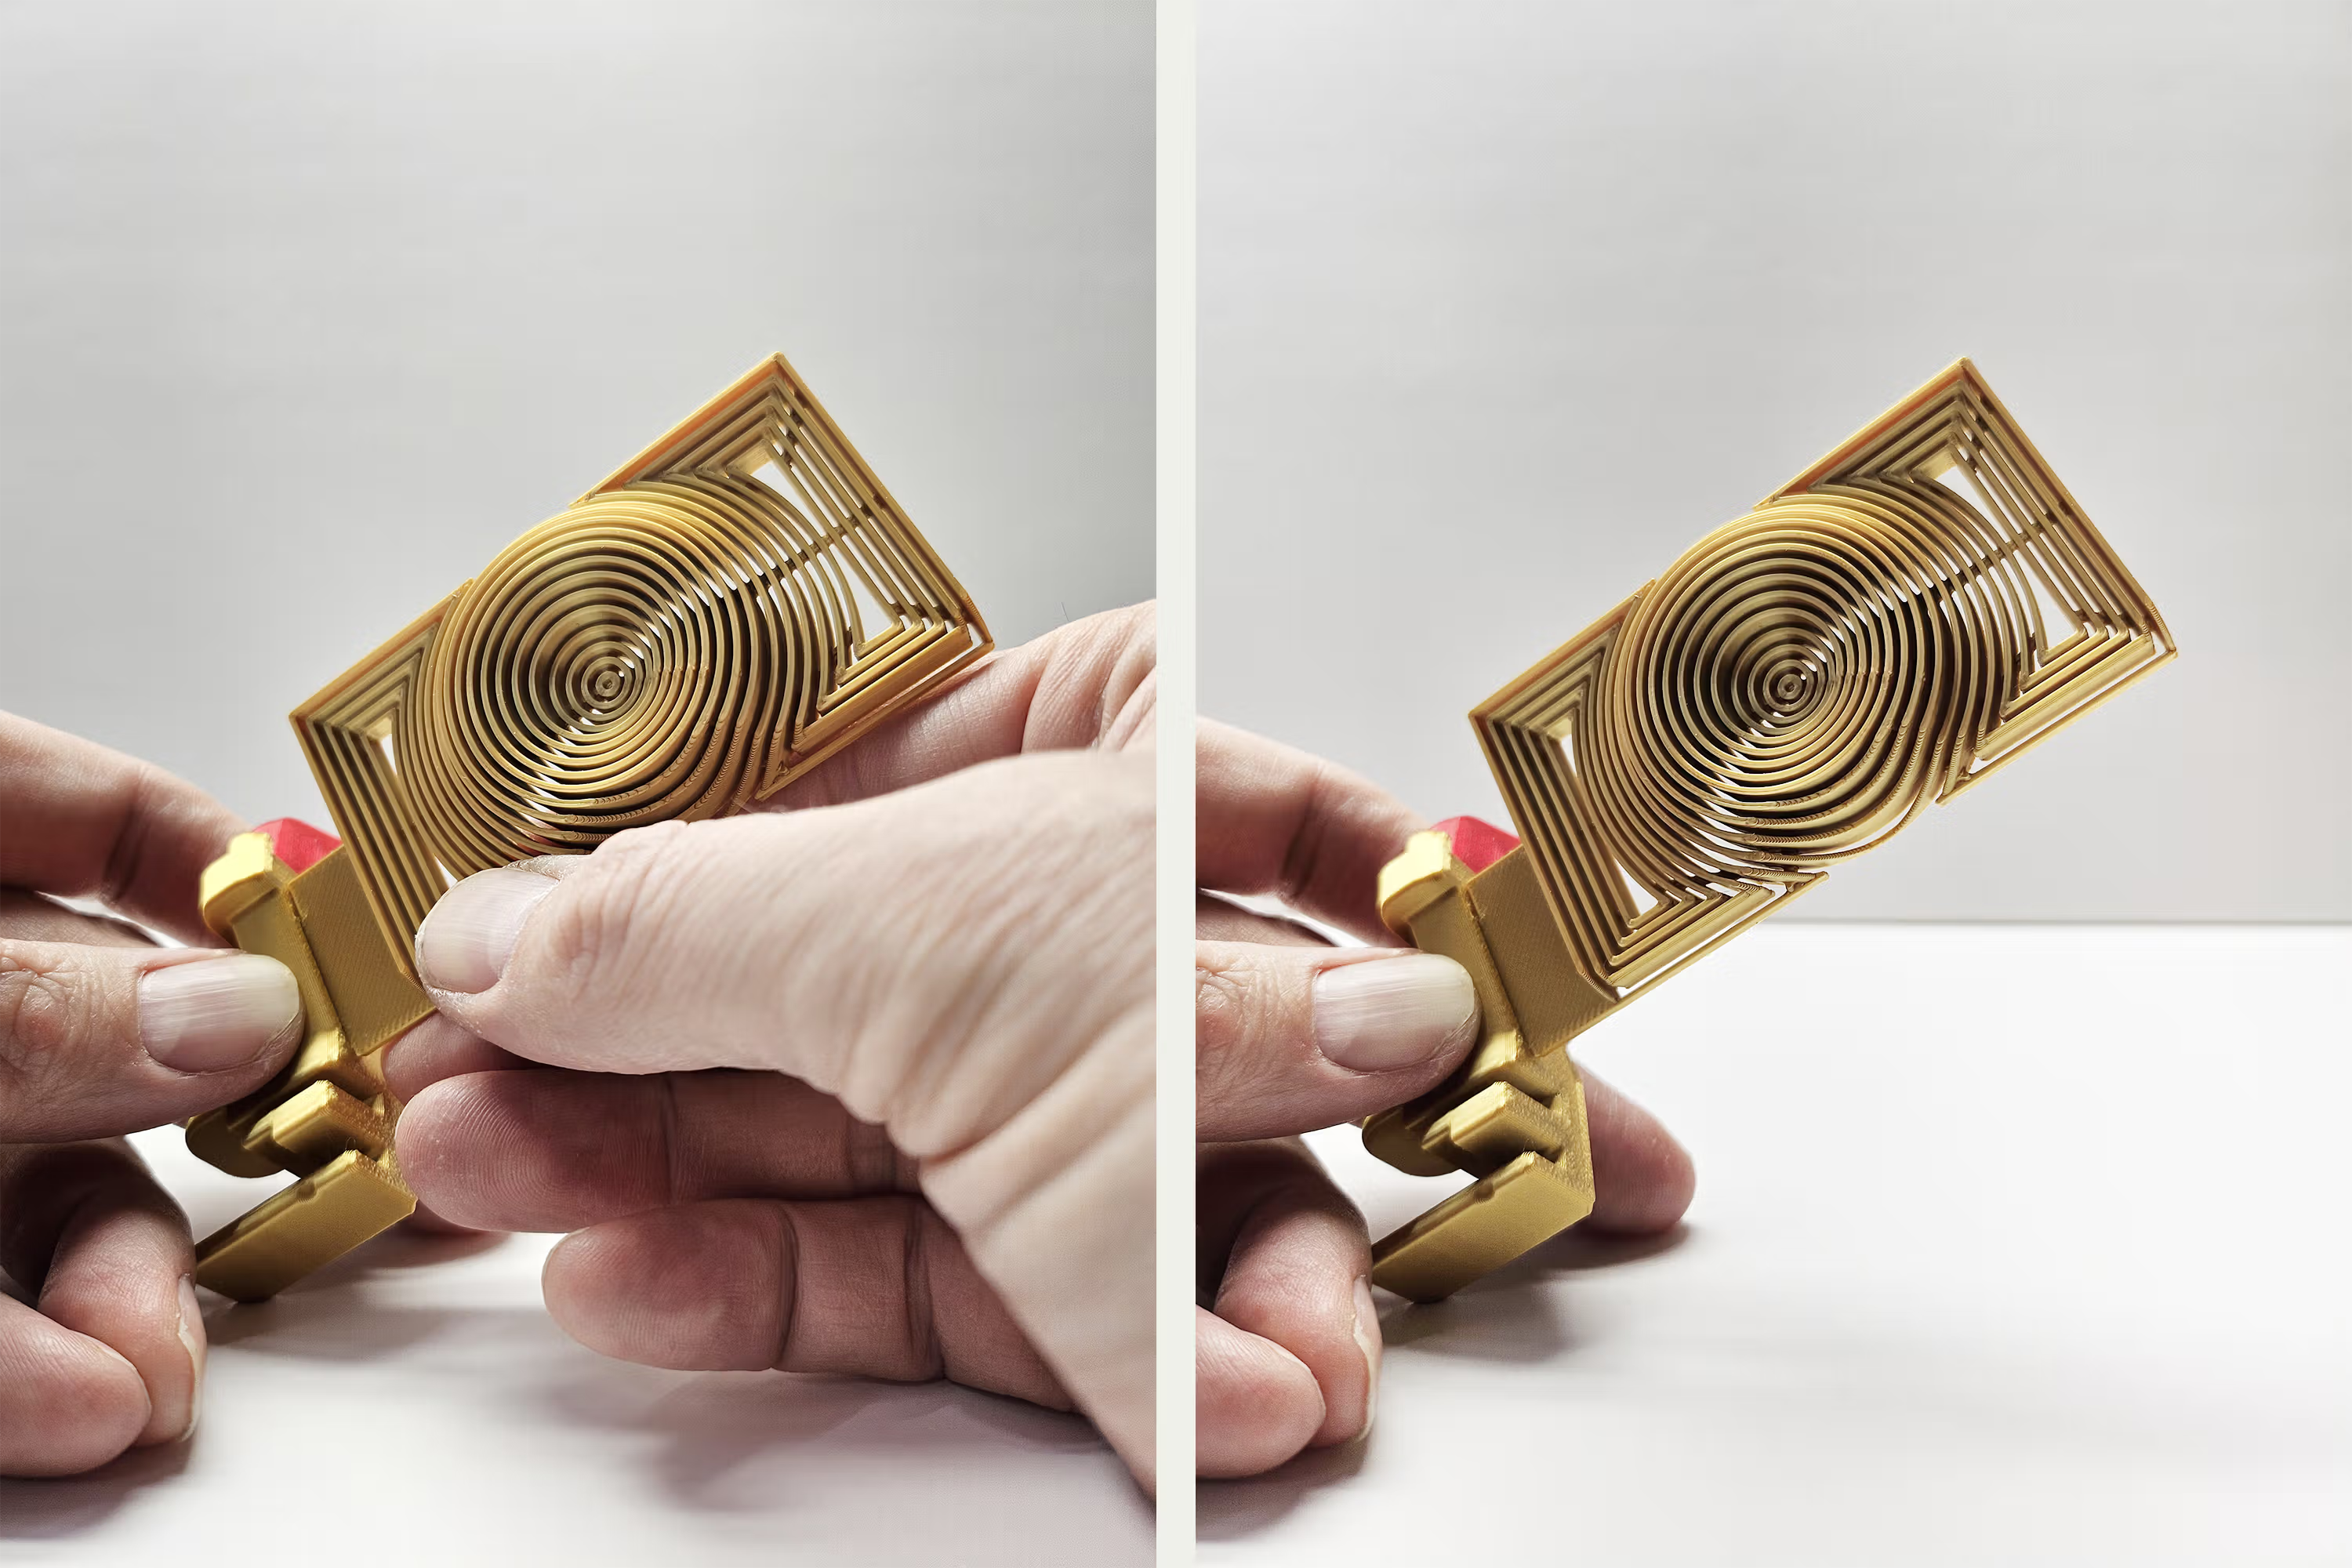
Vortex-Matrix EmBlazeGuard Panel
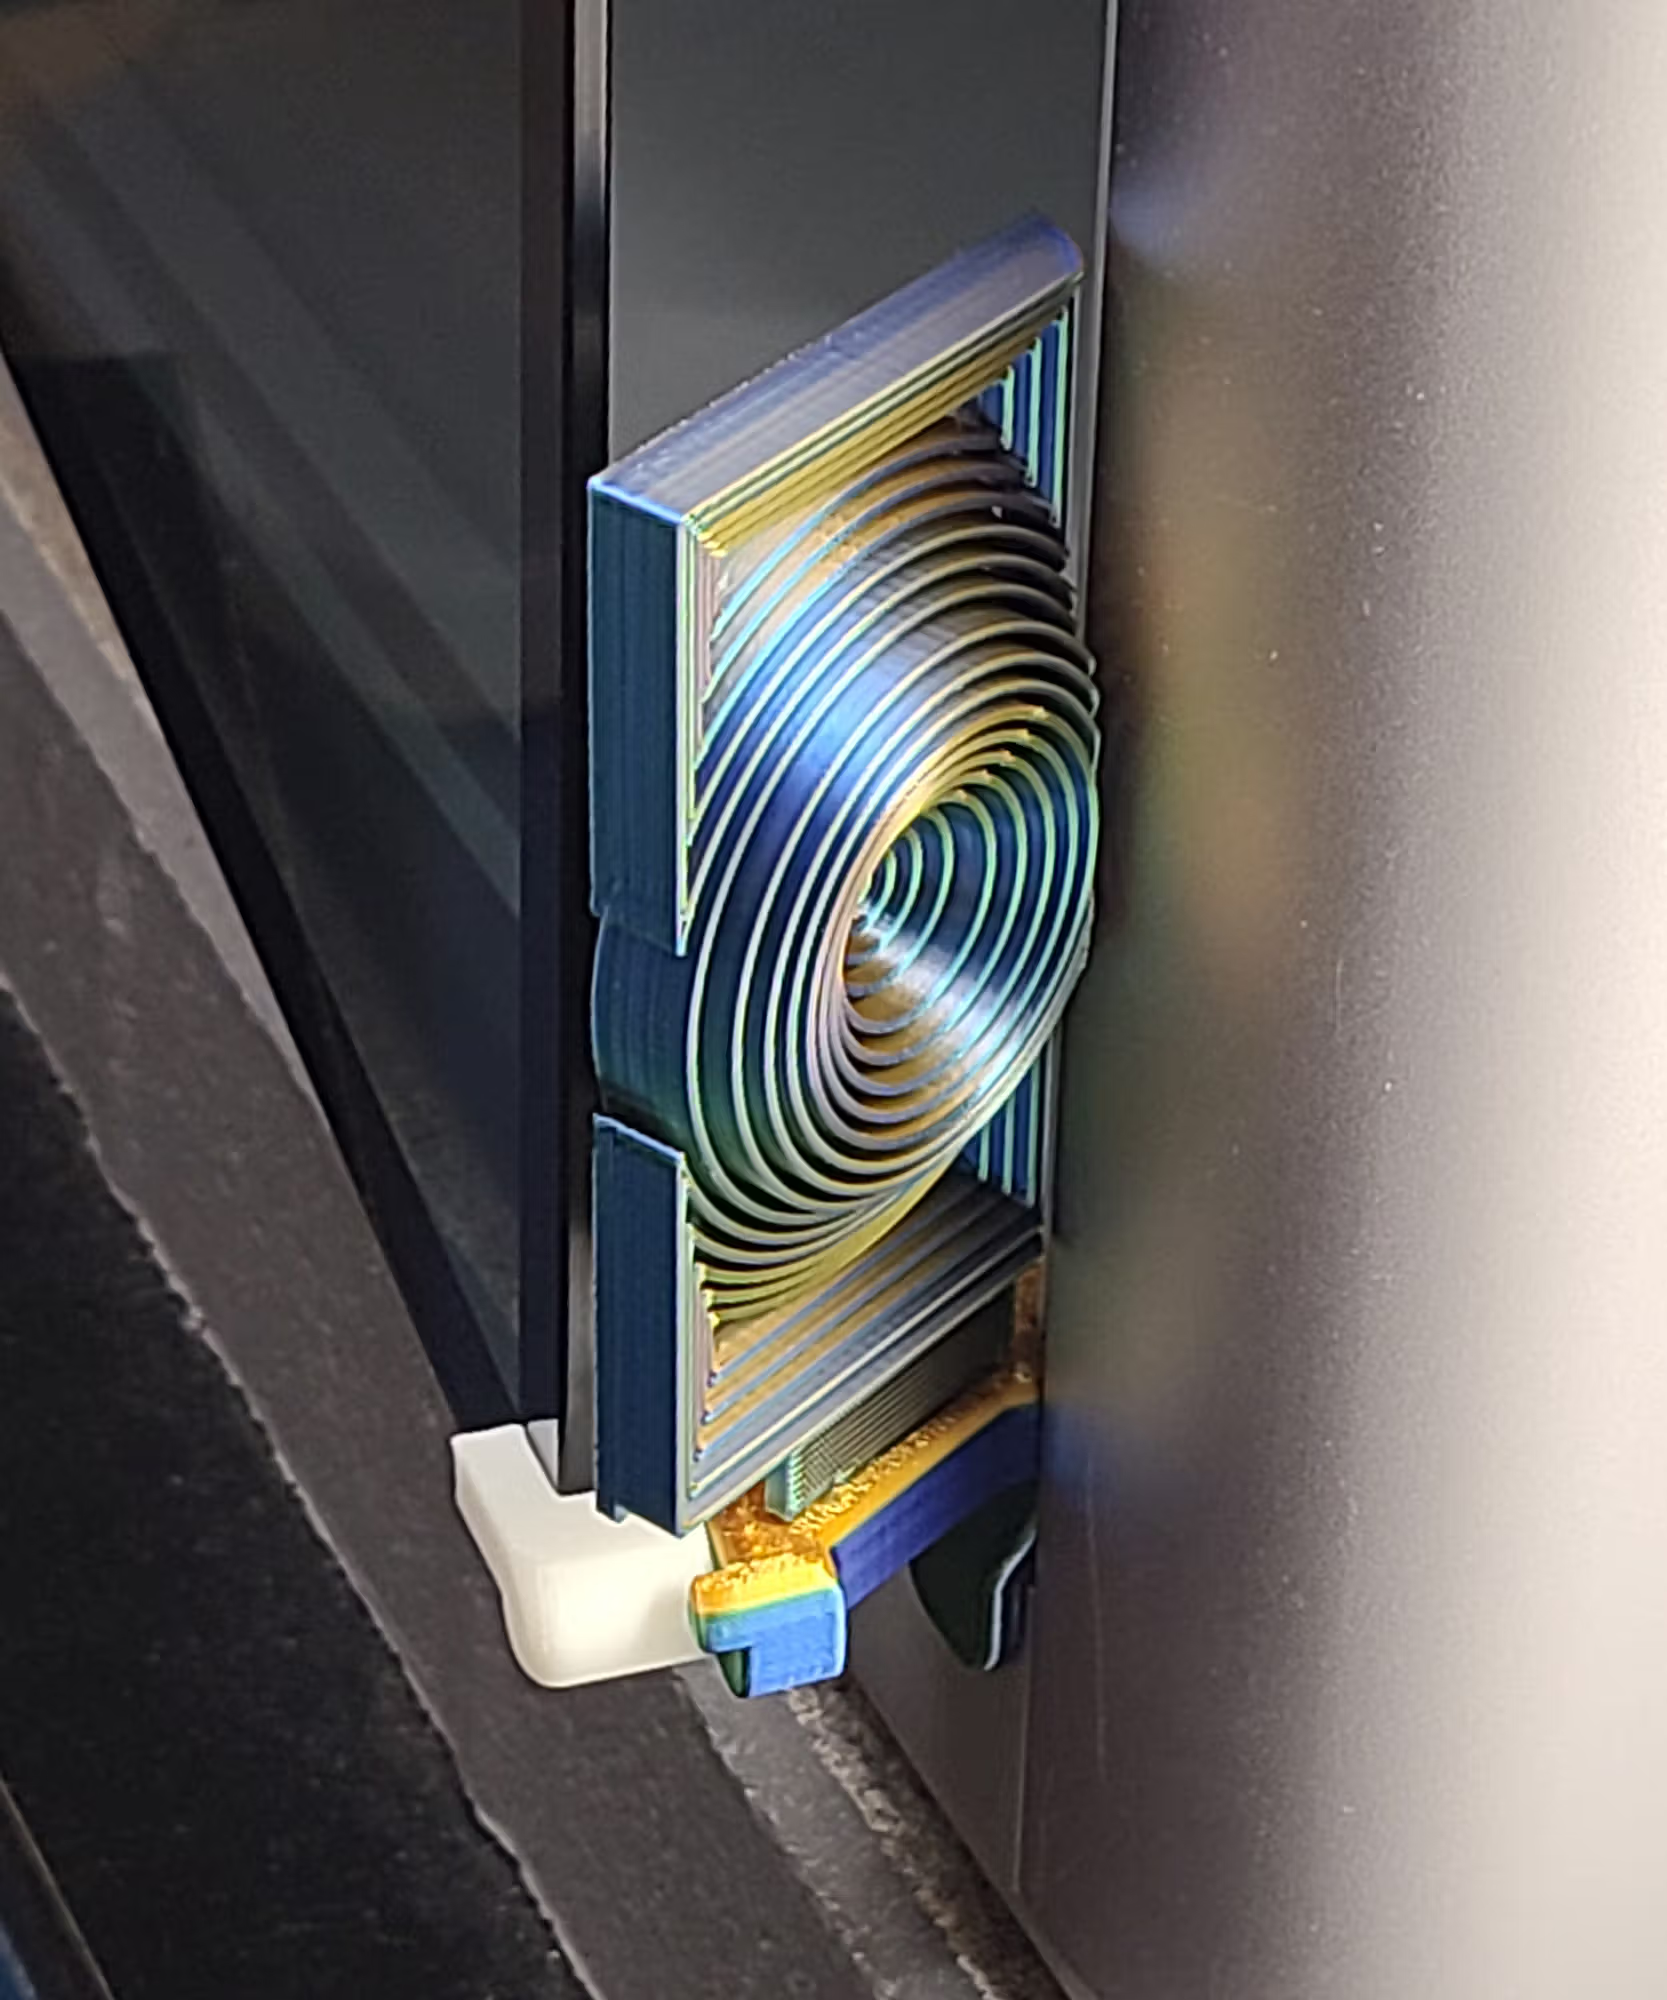
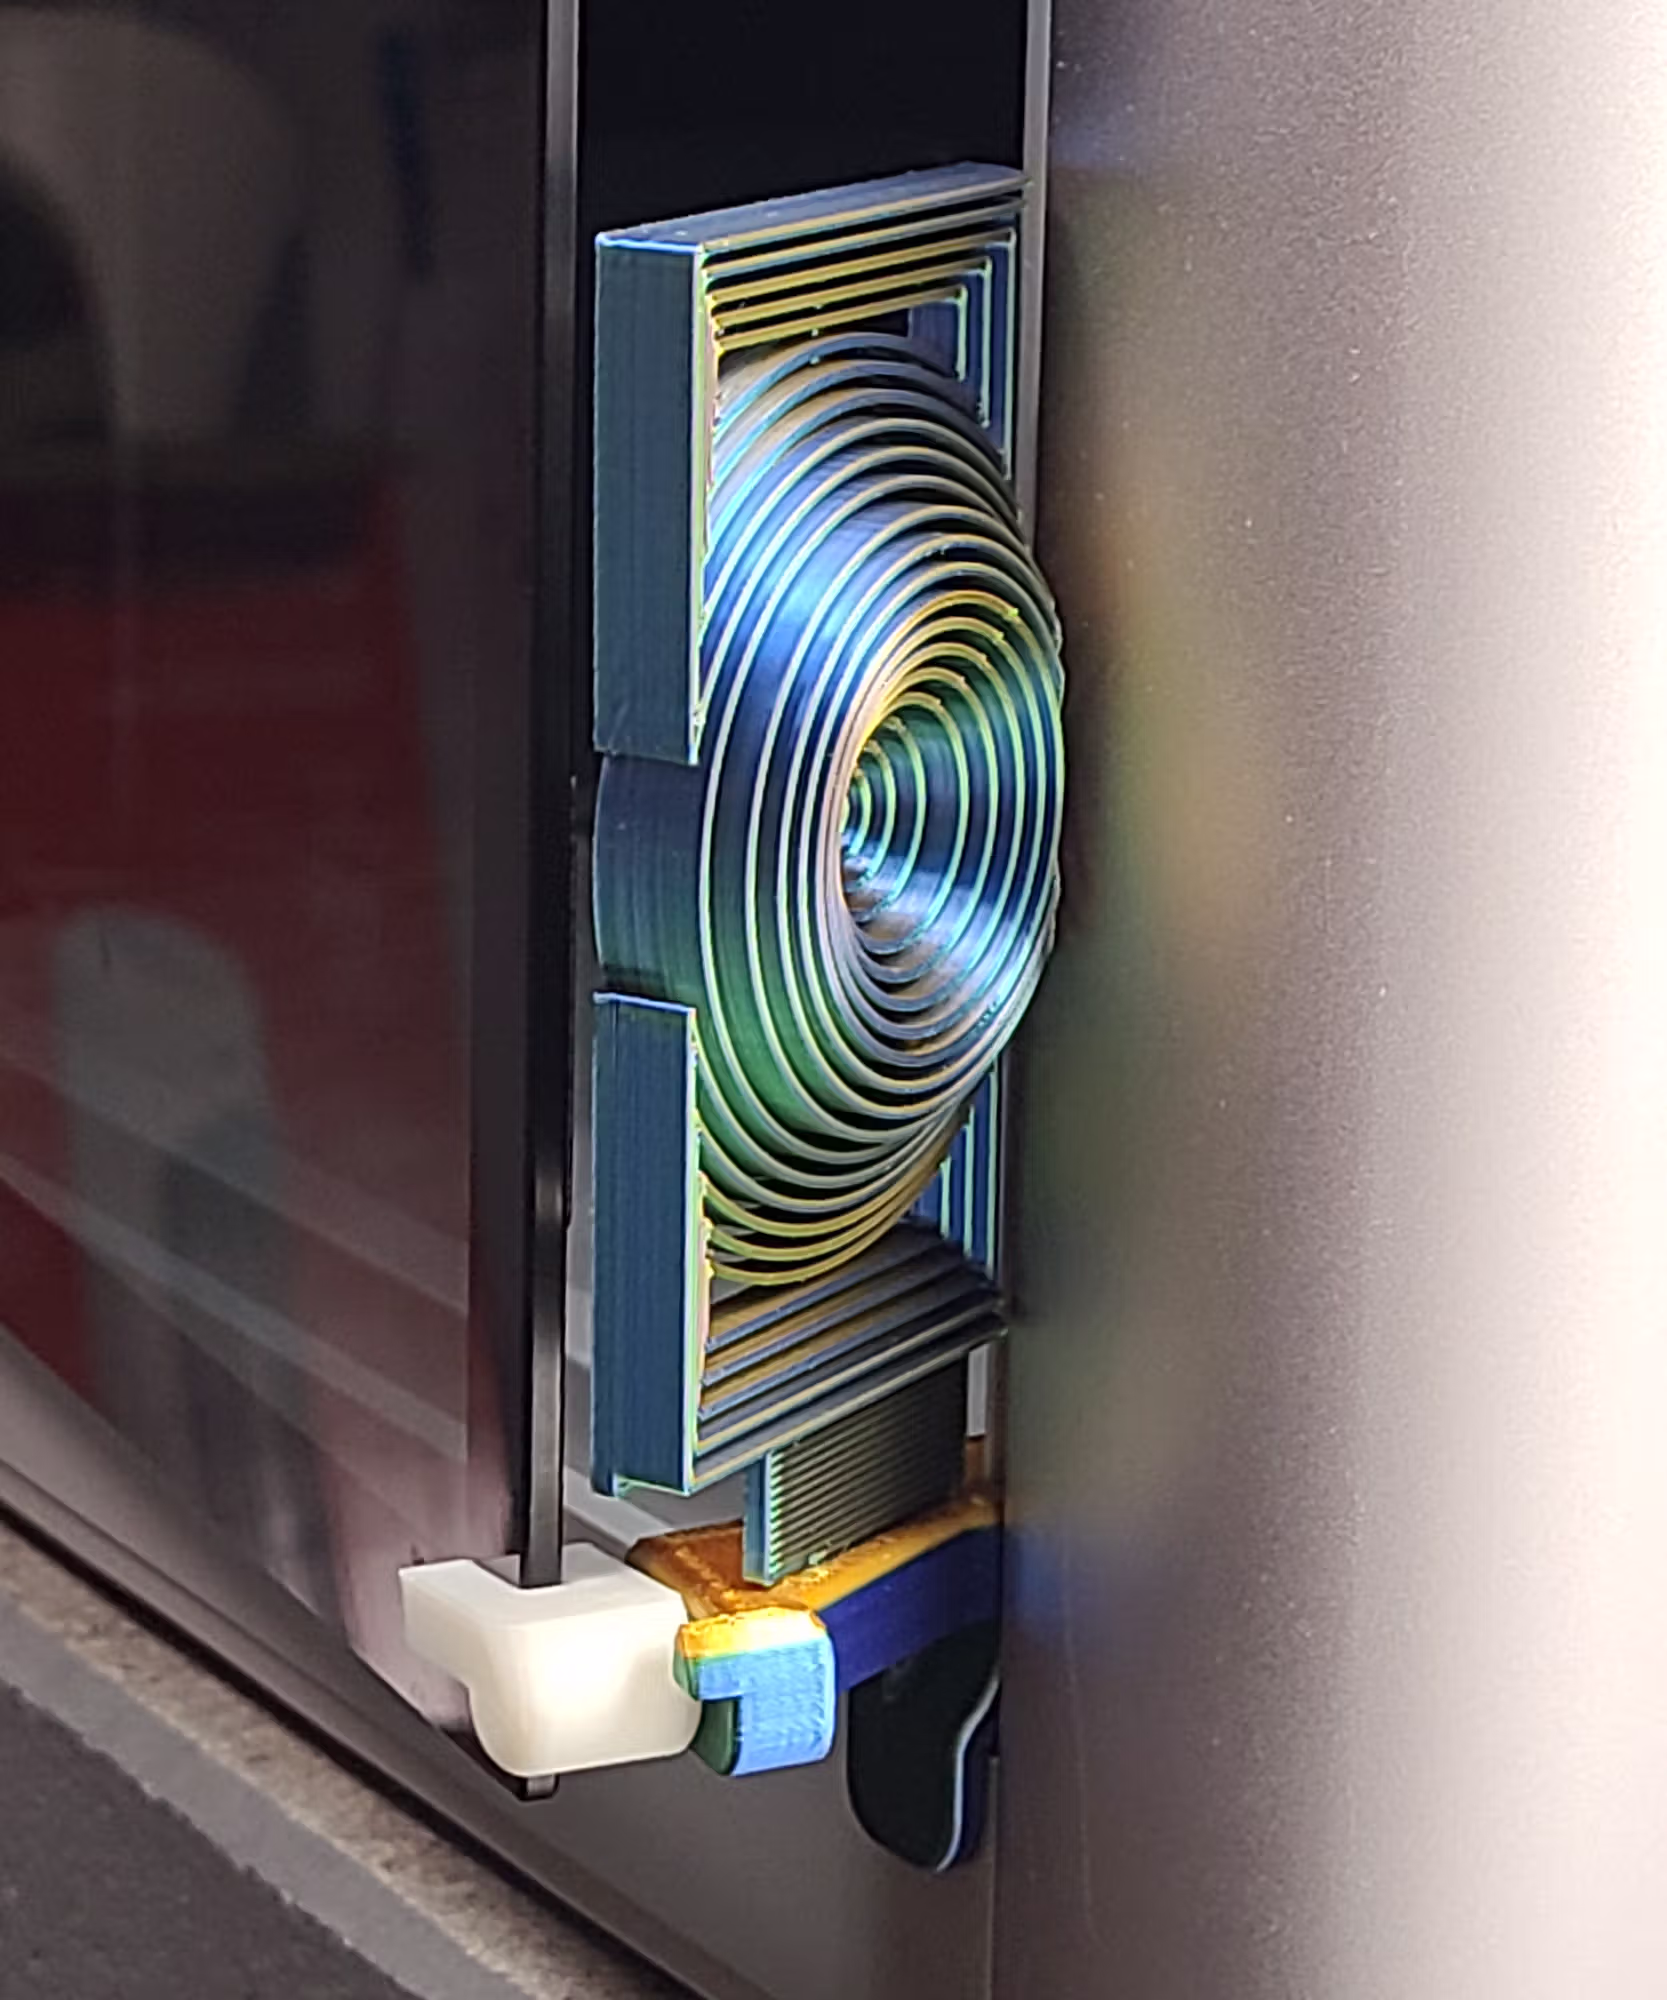

The Vortex-Matrix panel features nested concentric circles arranged in a bold geometric pattern that catches light and motion— especially striking in tri-color or silk PLA. View the Vortex-Matrix panel page for printing notes and WarpShield details.
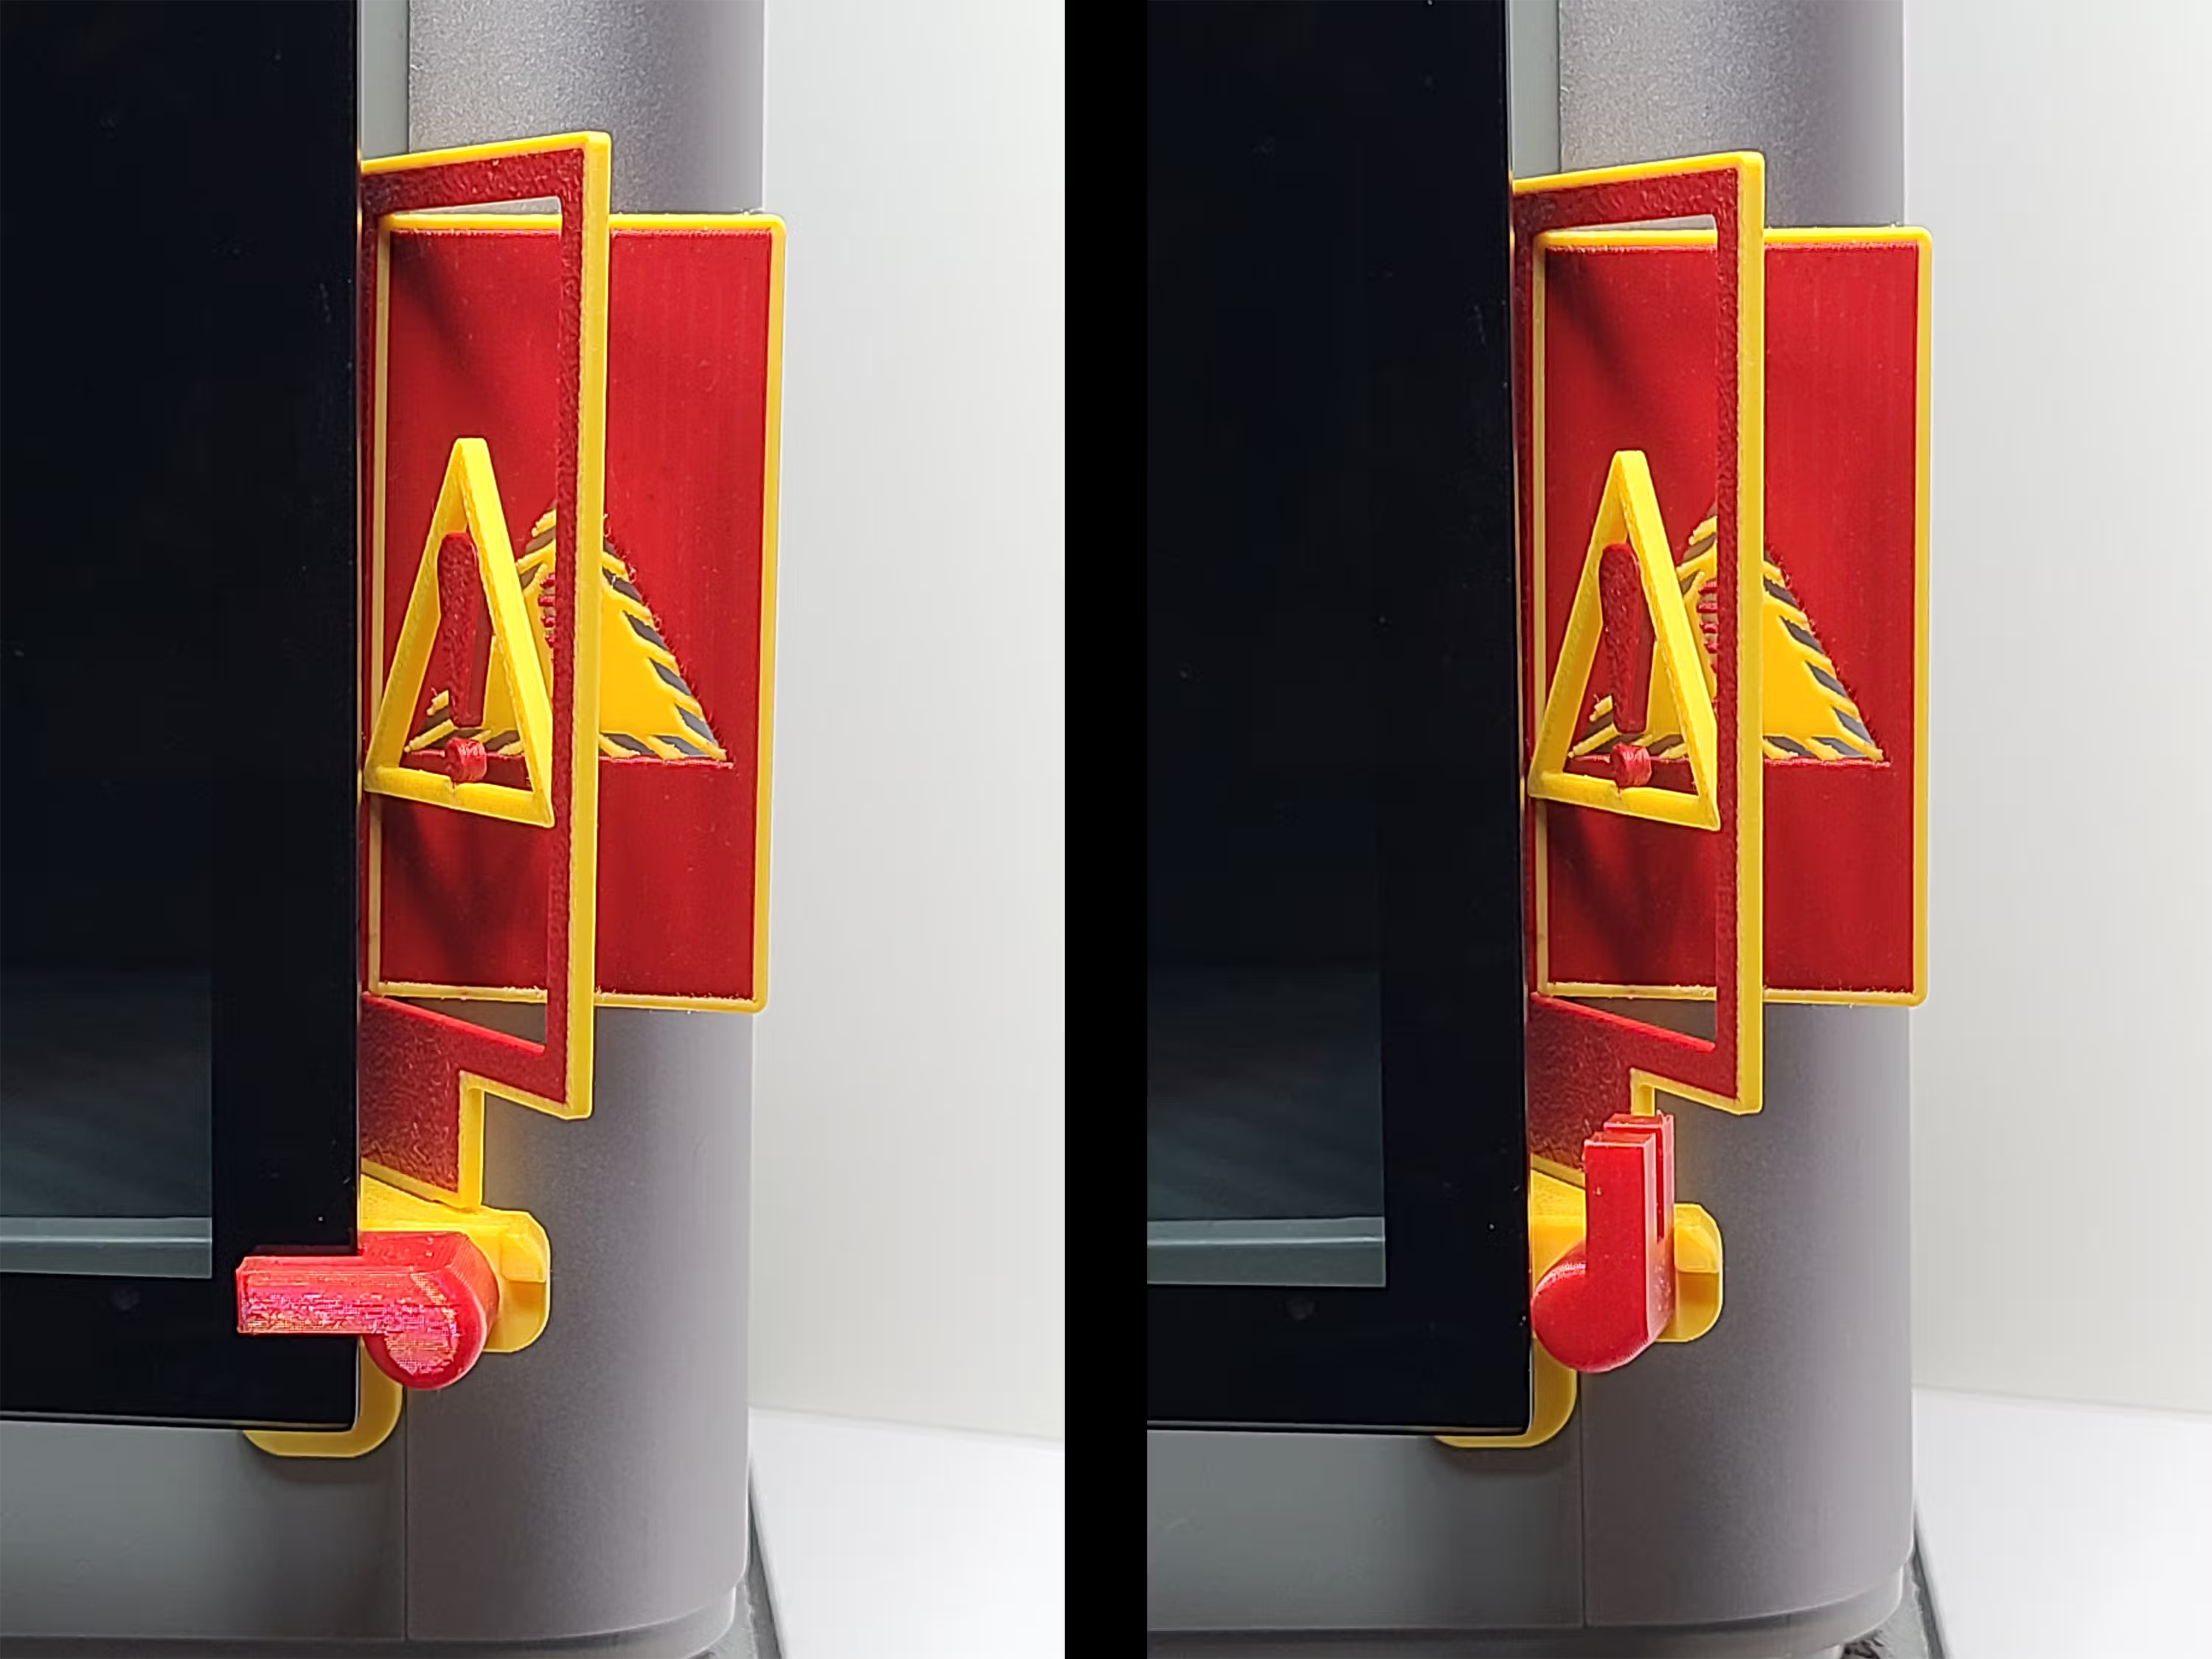
Open Warning EmBlazeGuard Panel


The Open Warning panel is built for maximum visibility with a clear hazard-style layout—ideal for shared spaces, classrooms, and print farms. View the Open Warning panel page for printing notes and WarpShield details.
Bambu Lab EmBlazeGuard Panel (Remixable)
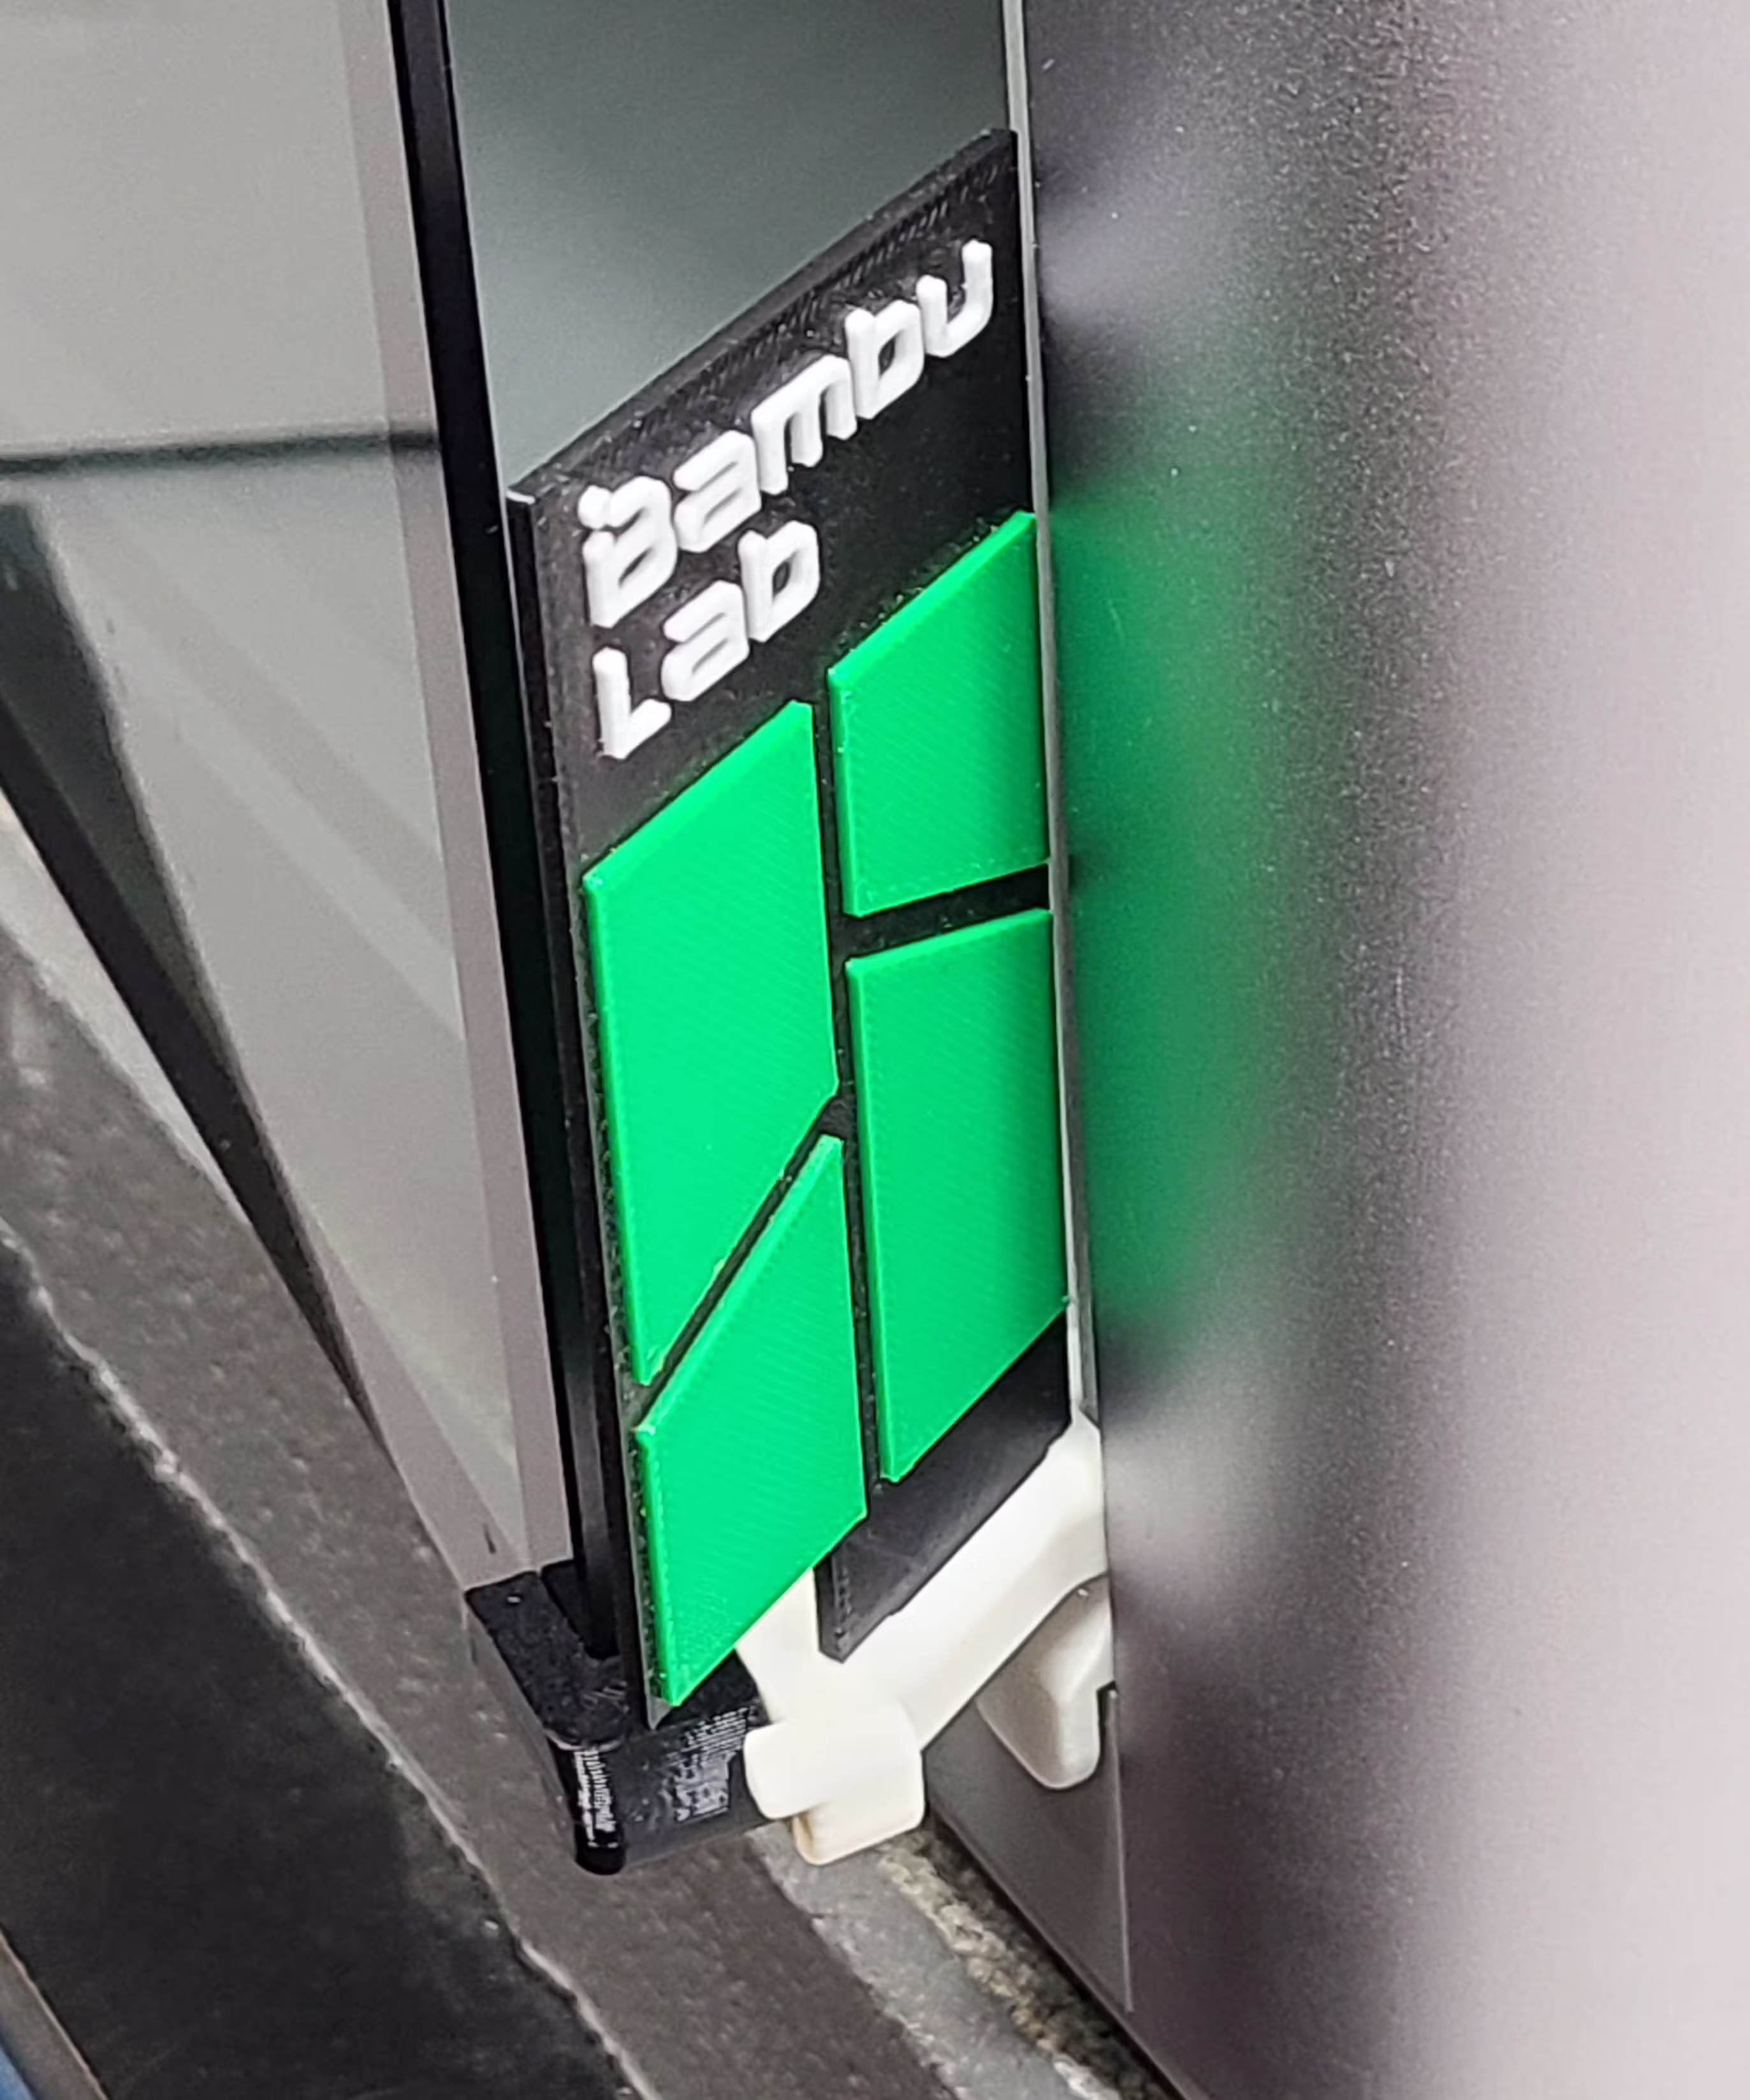
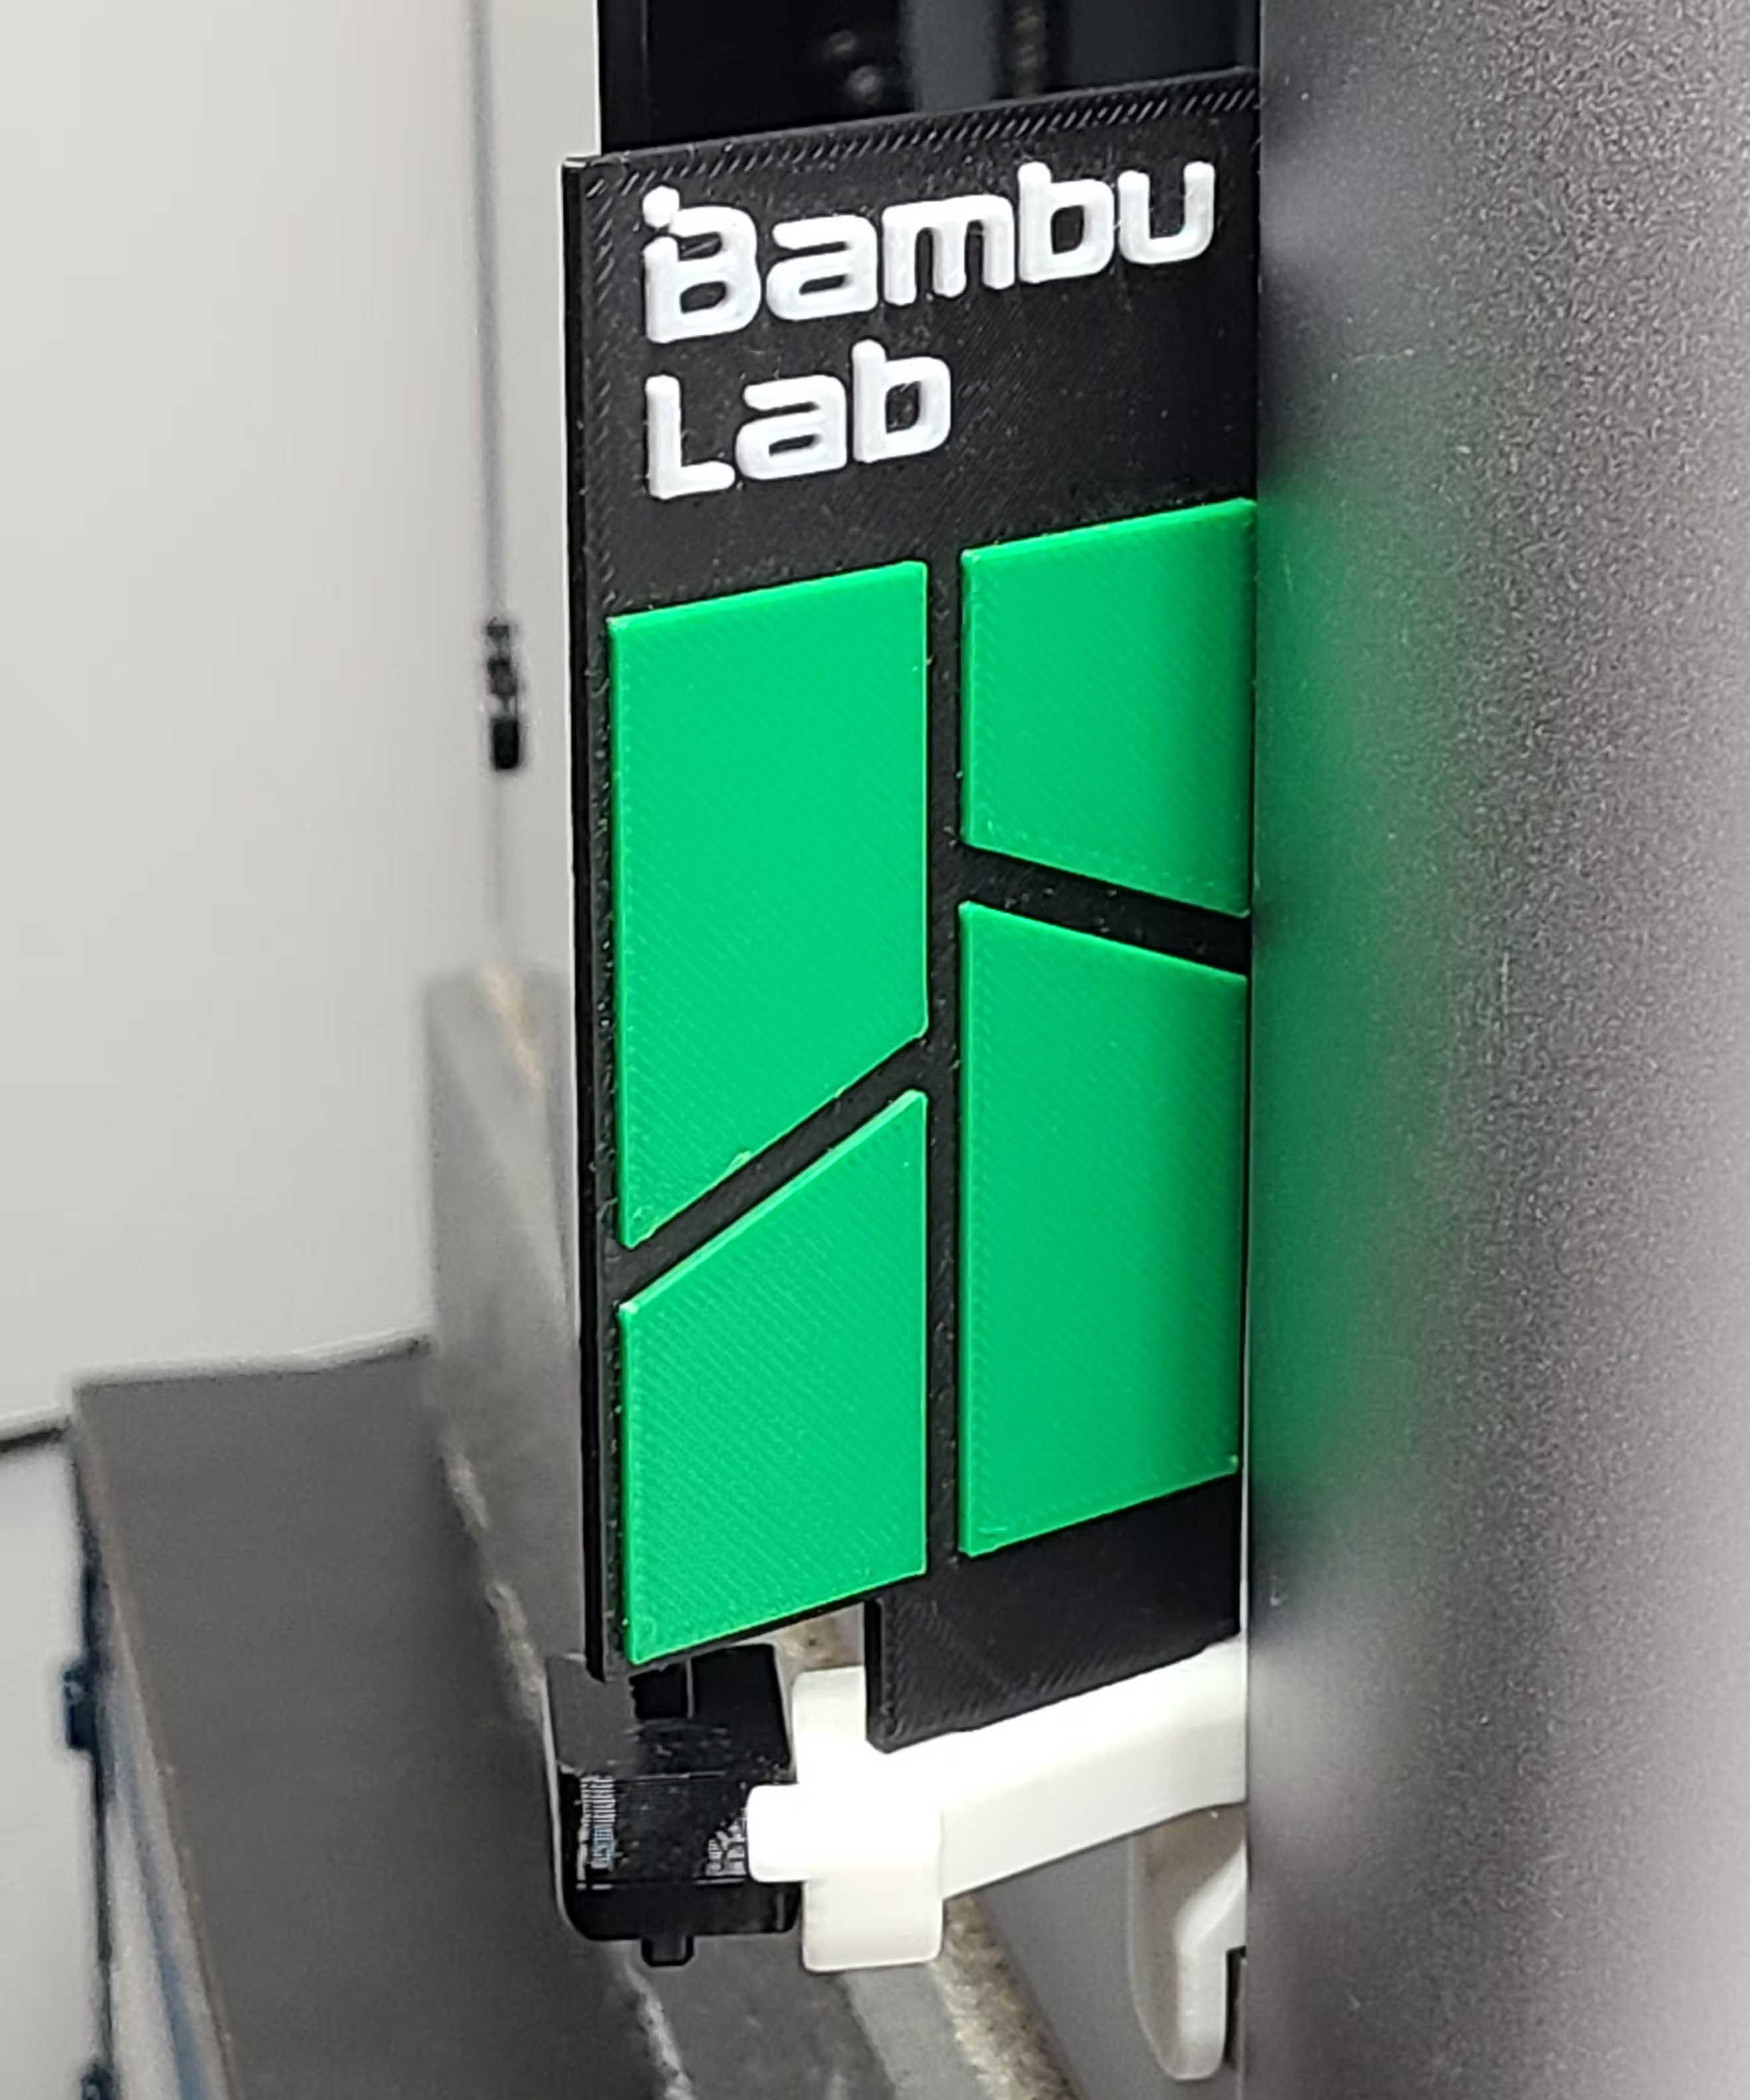
The Bambu Lab panel is a clean, brand-aligned option with segmented green accents and sharp geometry for a modern “official accessory” feel. View the Bambu Lab panel page for printing notes and WarpShield details.
Back to Top
Installing / Swapping an EmBlazeGuard Panel
The EmBlazeGuard Panel attaches to the holder using a snap-fit tab that locks into the holder’s slot. It can be inserted and removed multiple times for swapping or remixing.
Orientation matters:
- Insert the panel so the side that extends farther out is pointing toward the Latch Fork.
- Align the snap-fit tab with the holder slot, then press until it seats securely.
Installation Overview
Installation is quick and tool-free:
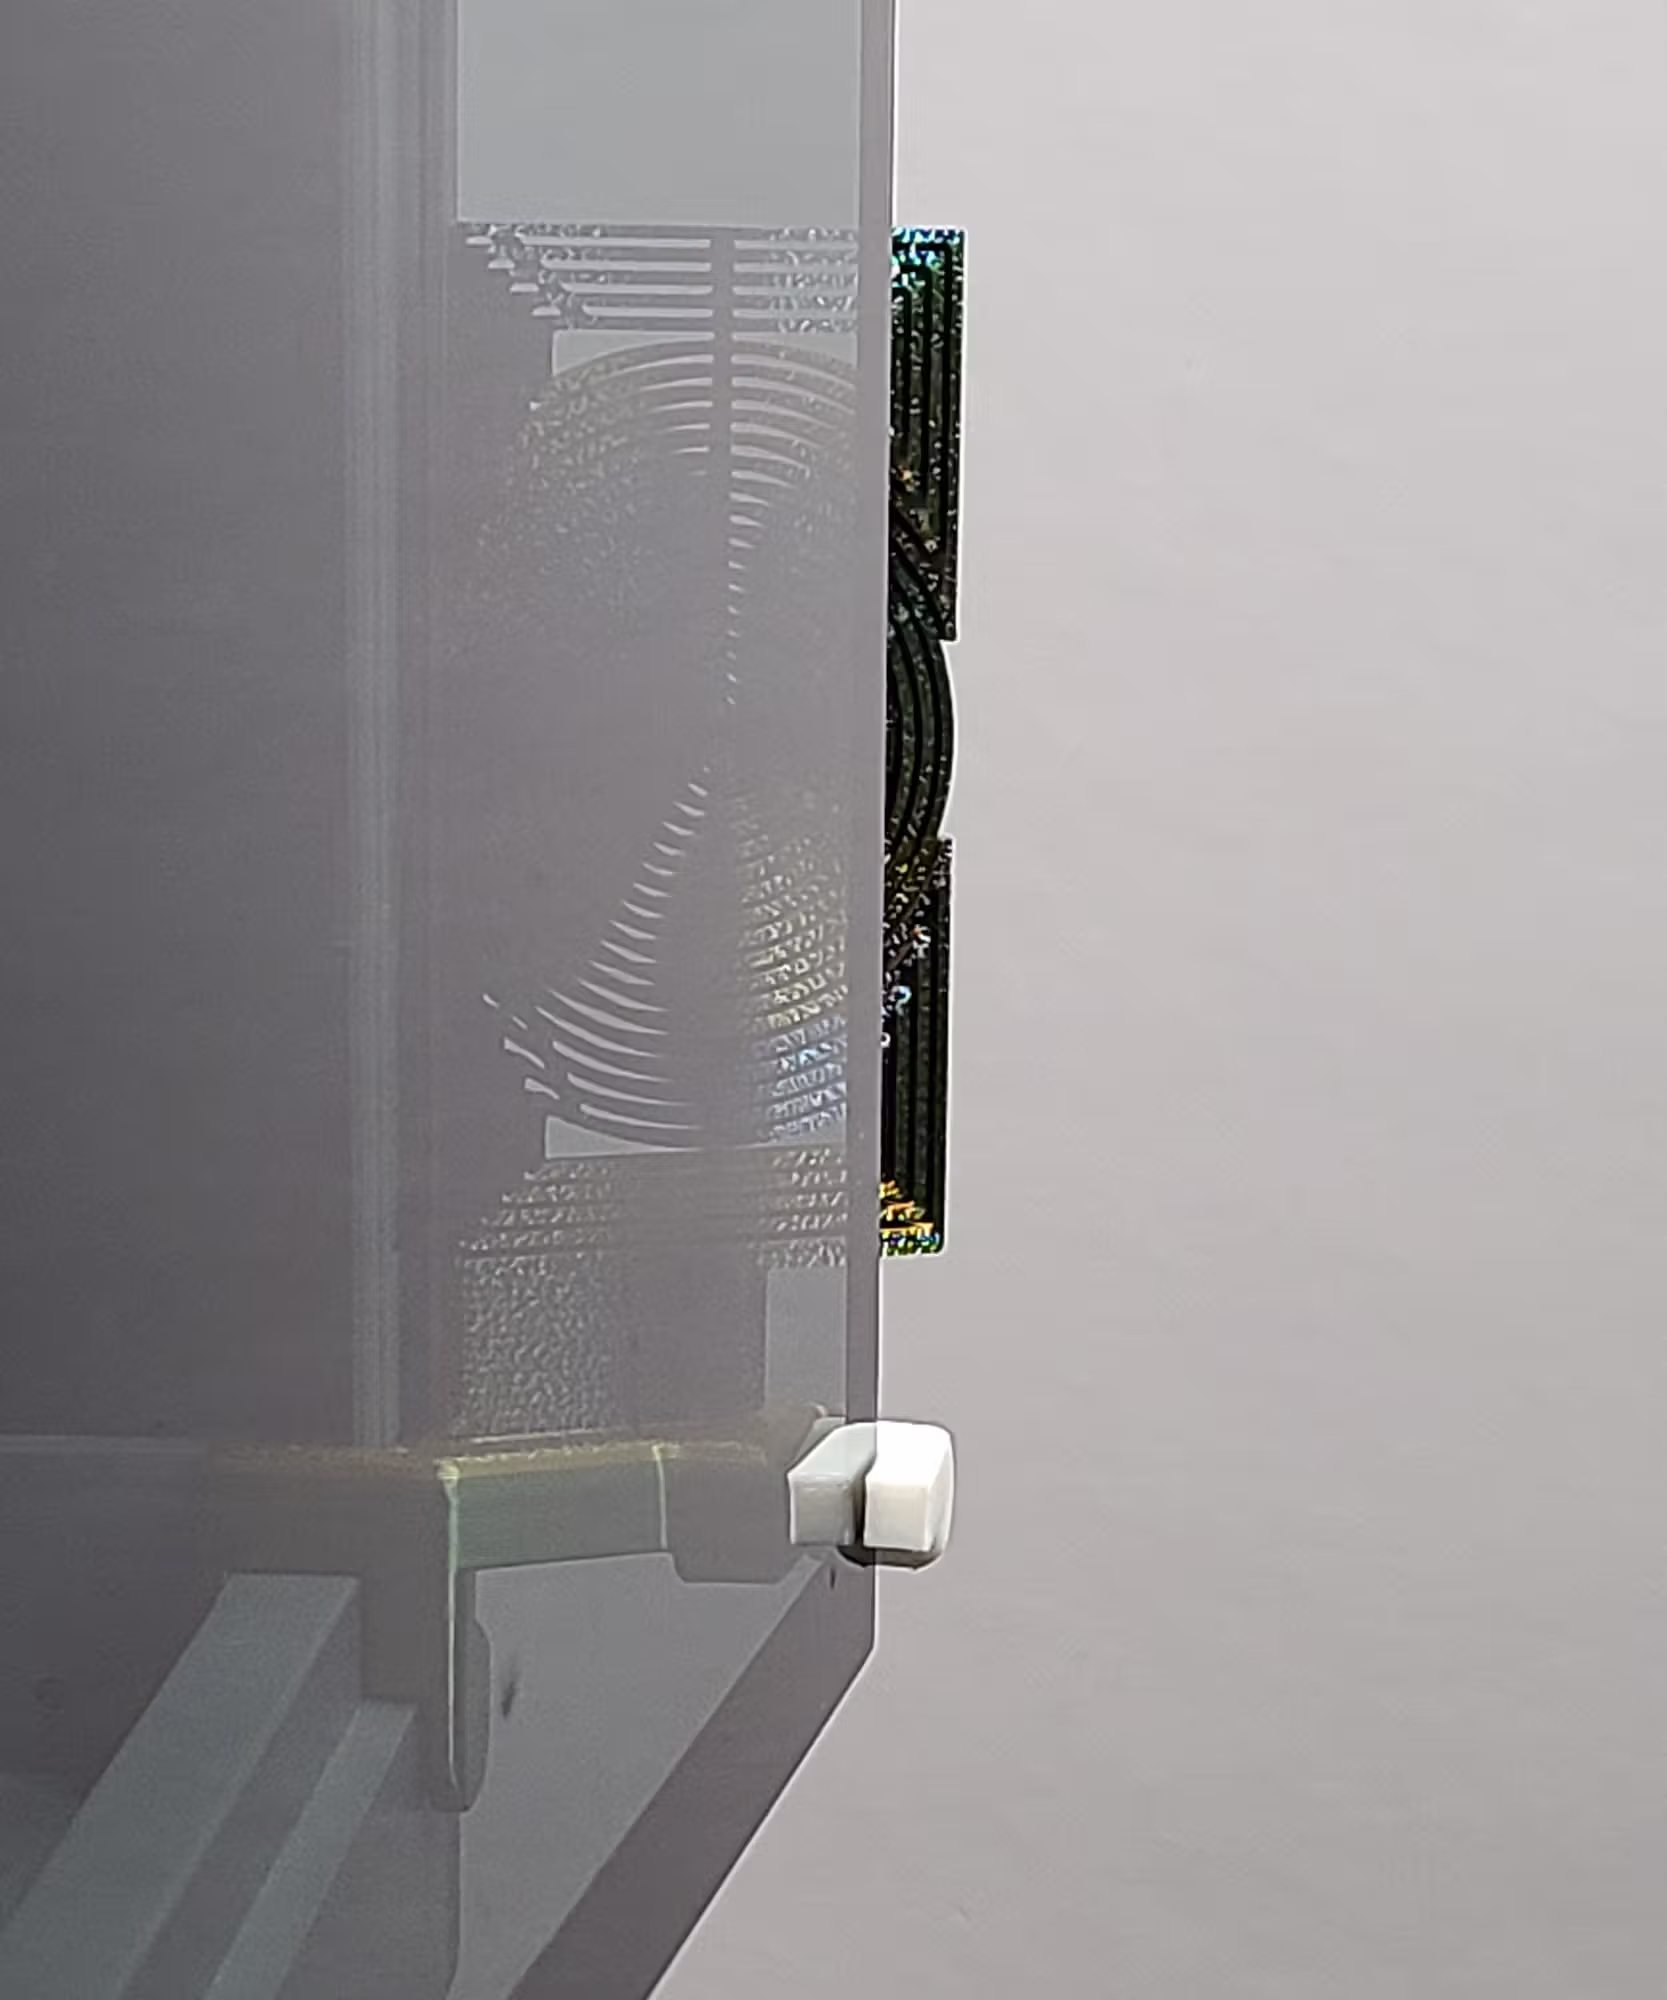
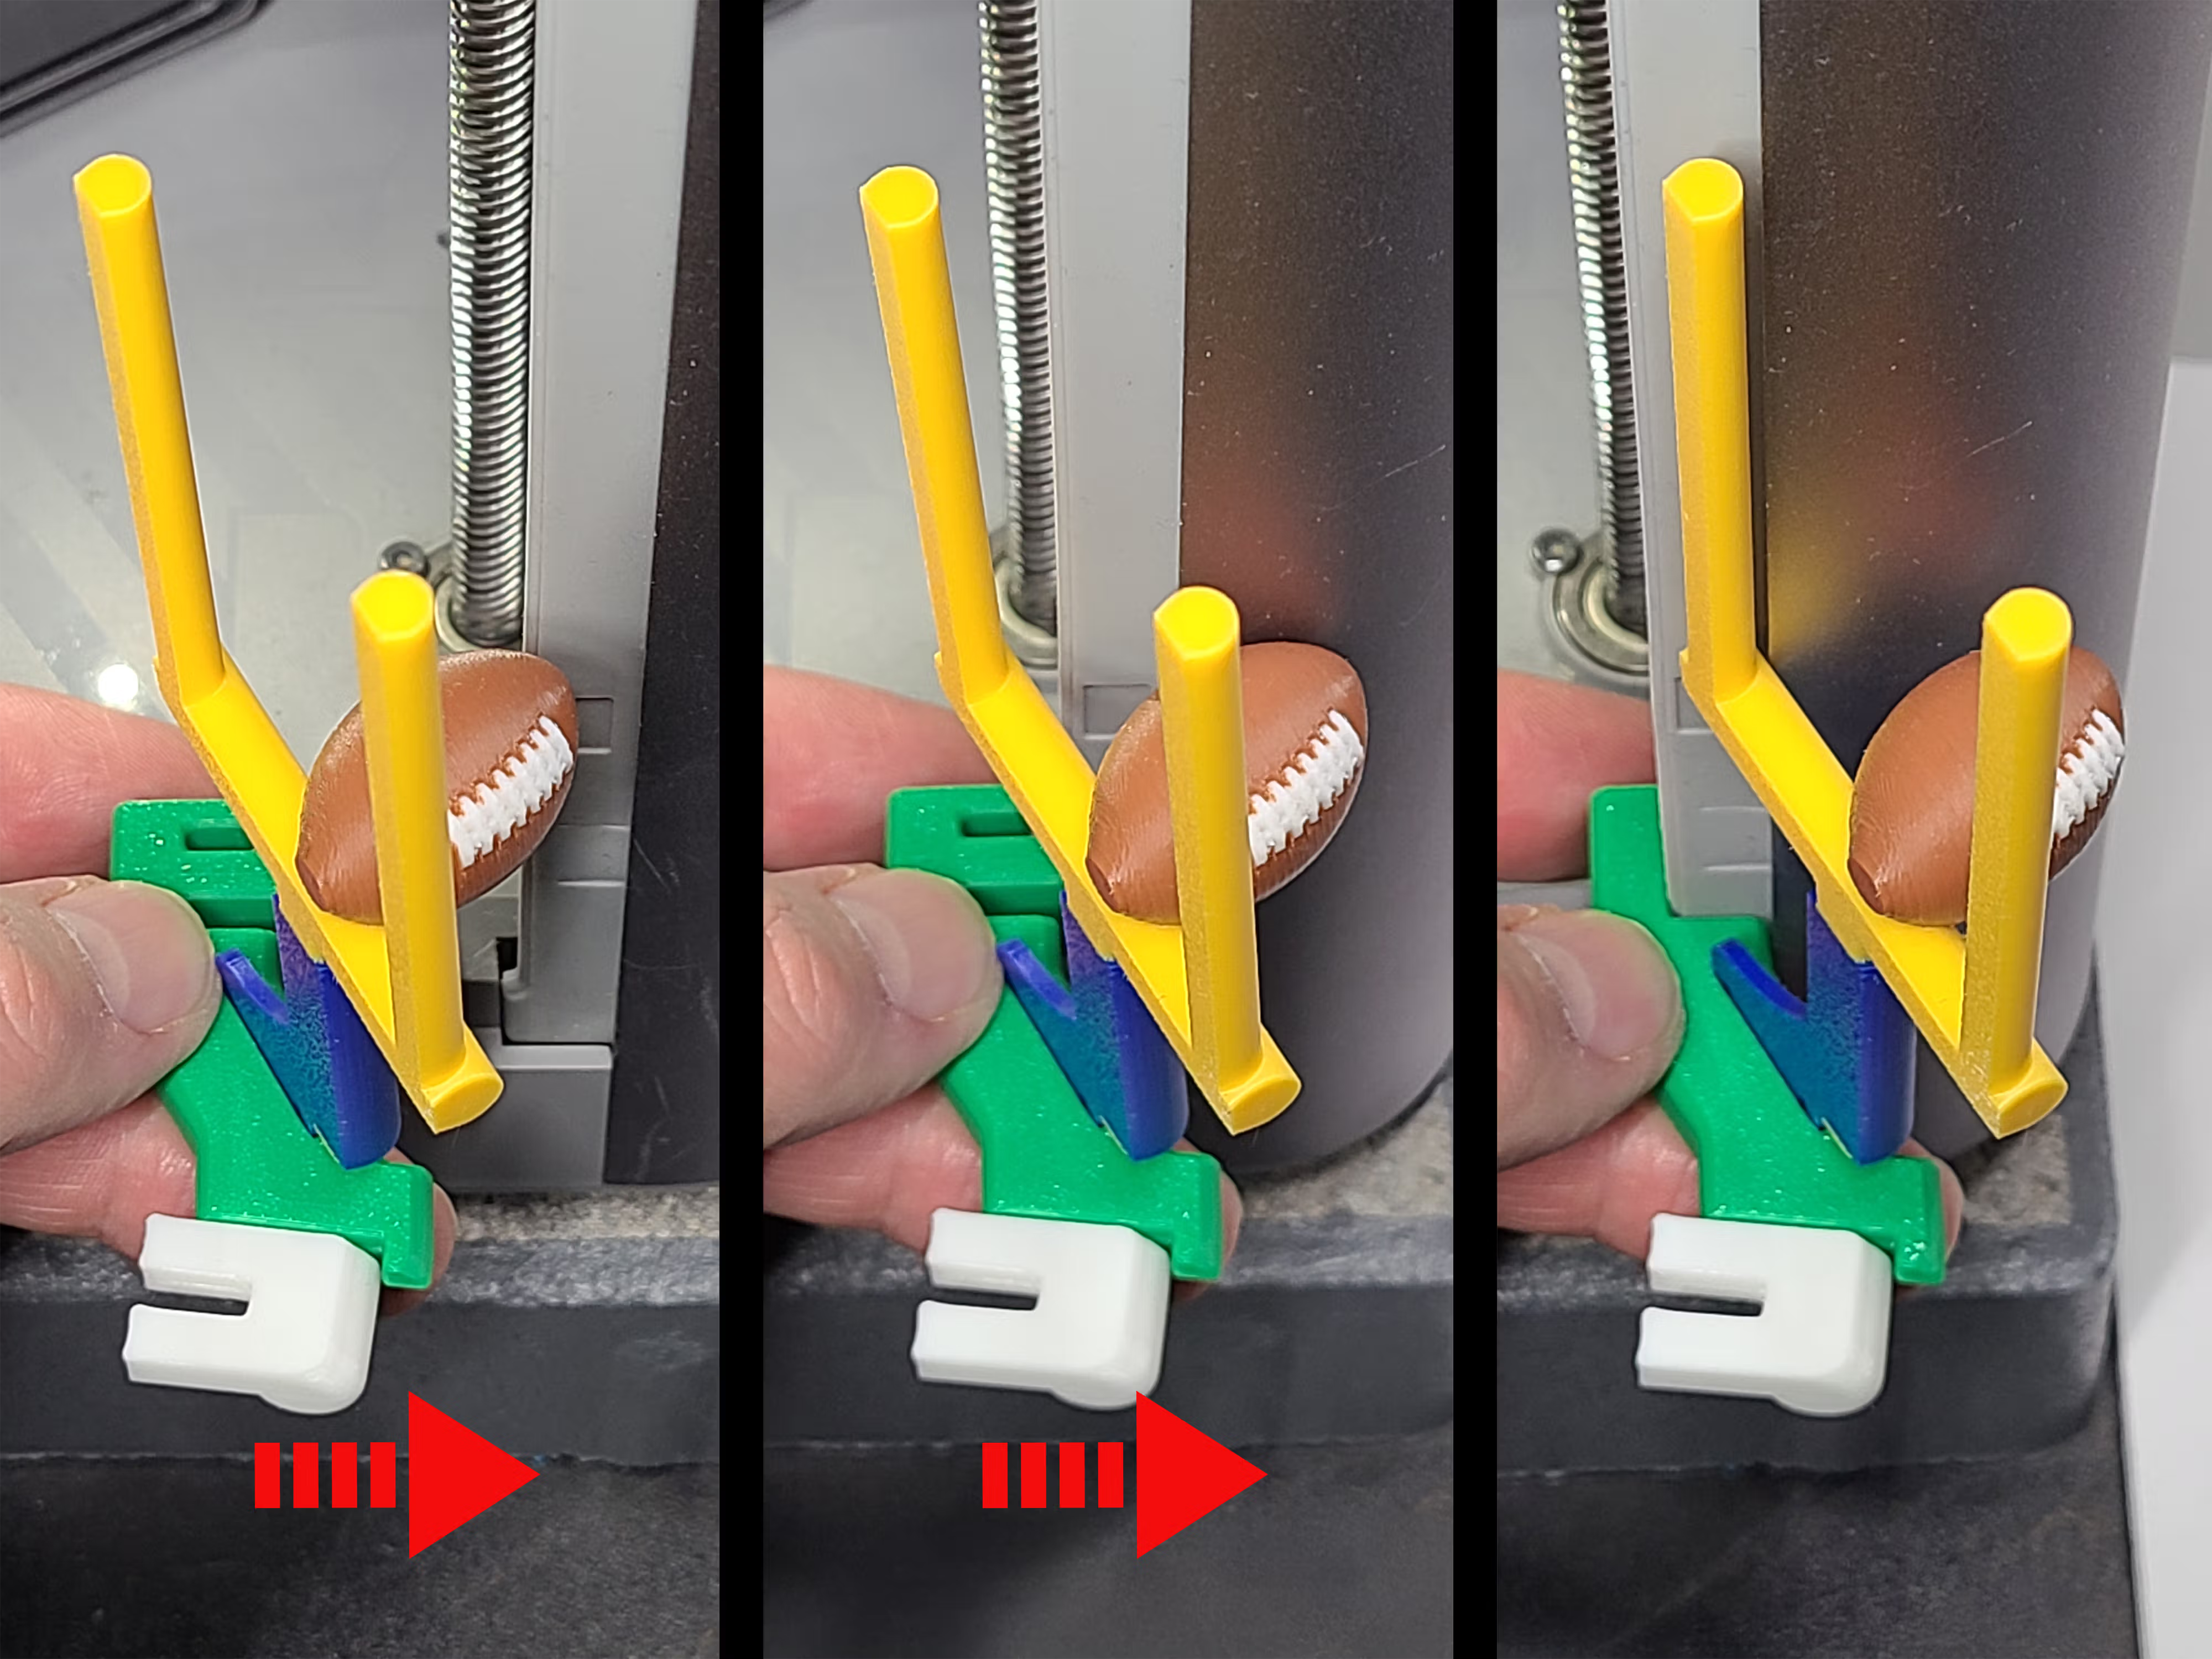
The holder is secured in place by an underside tab(A) that seats into an existing rectangular recess(B) in the printer door frame.
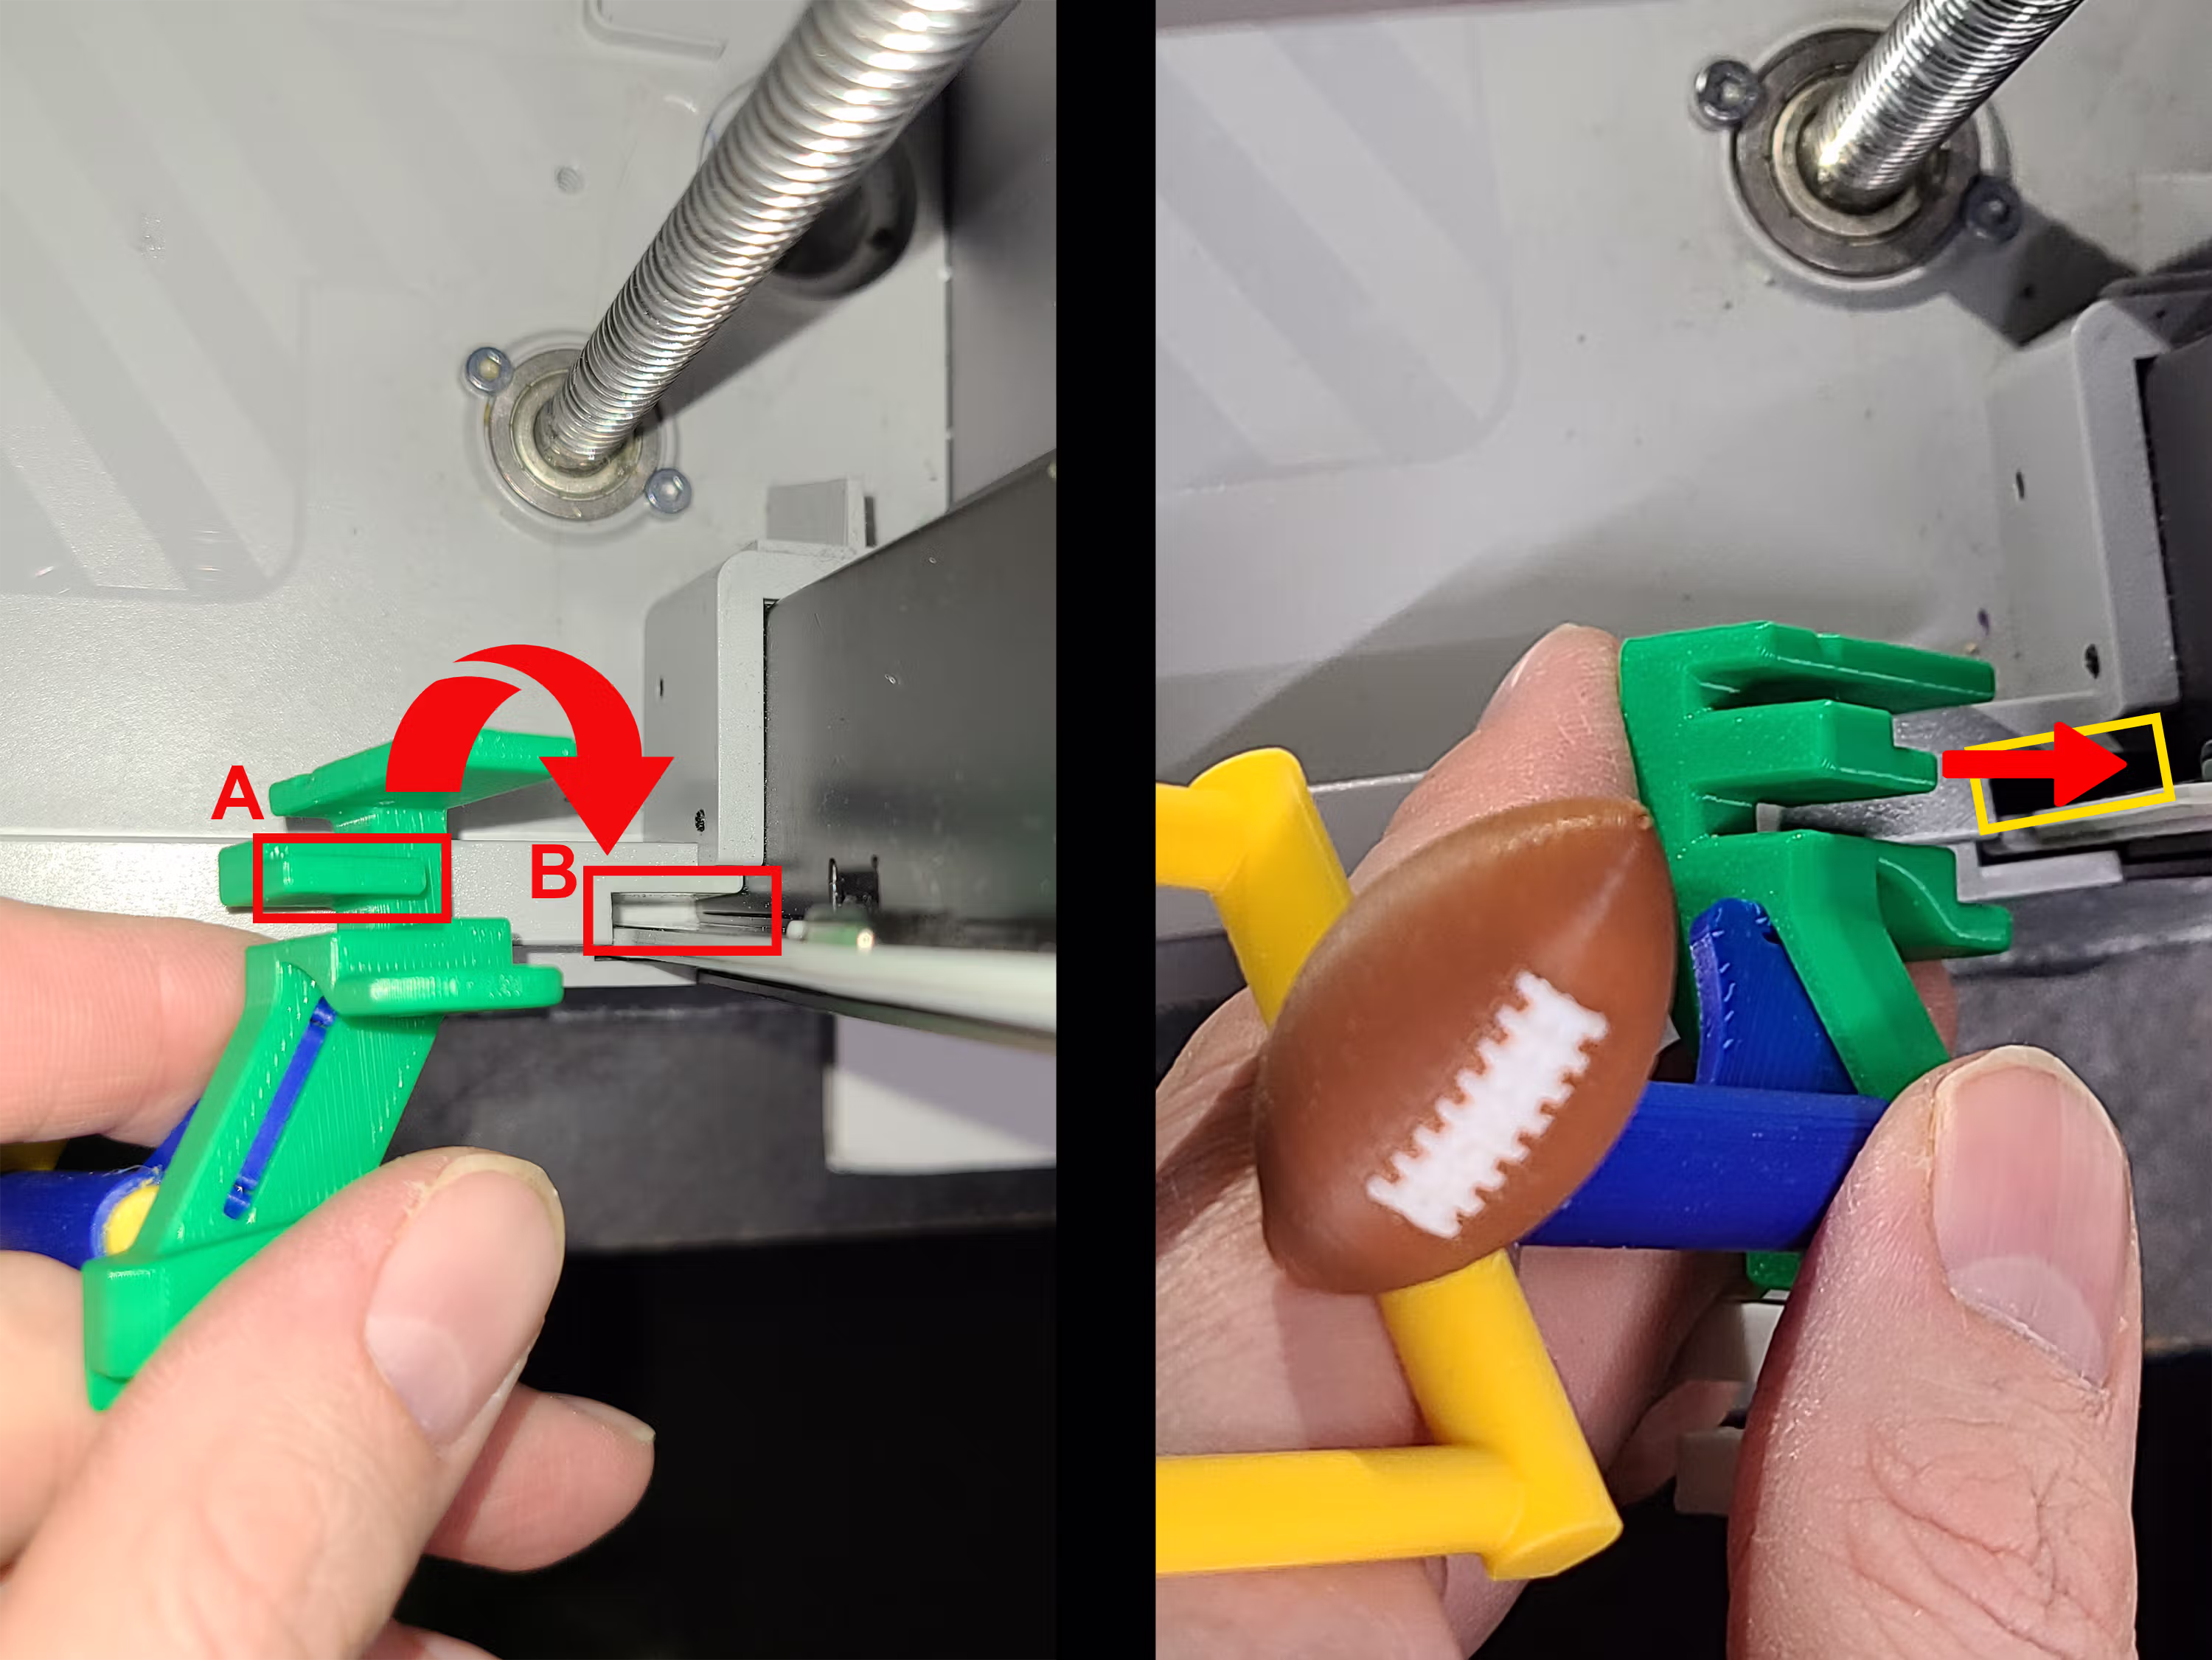
- Place the holder down as shown below and slide it to the right.
- Push downward until the tab is fully seated into the recess.
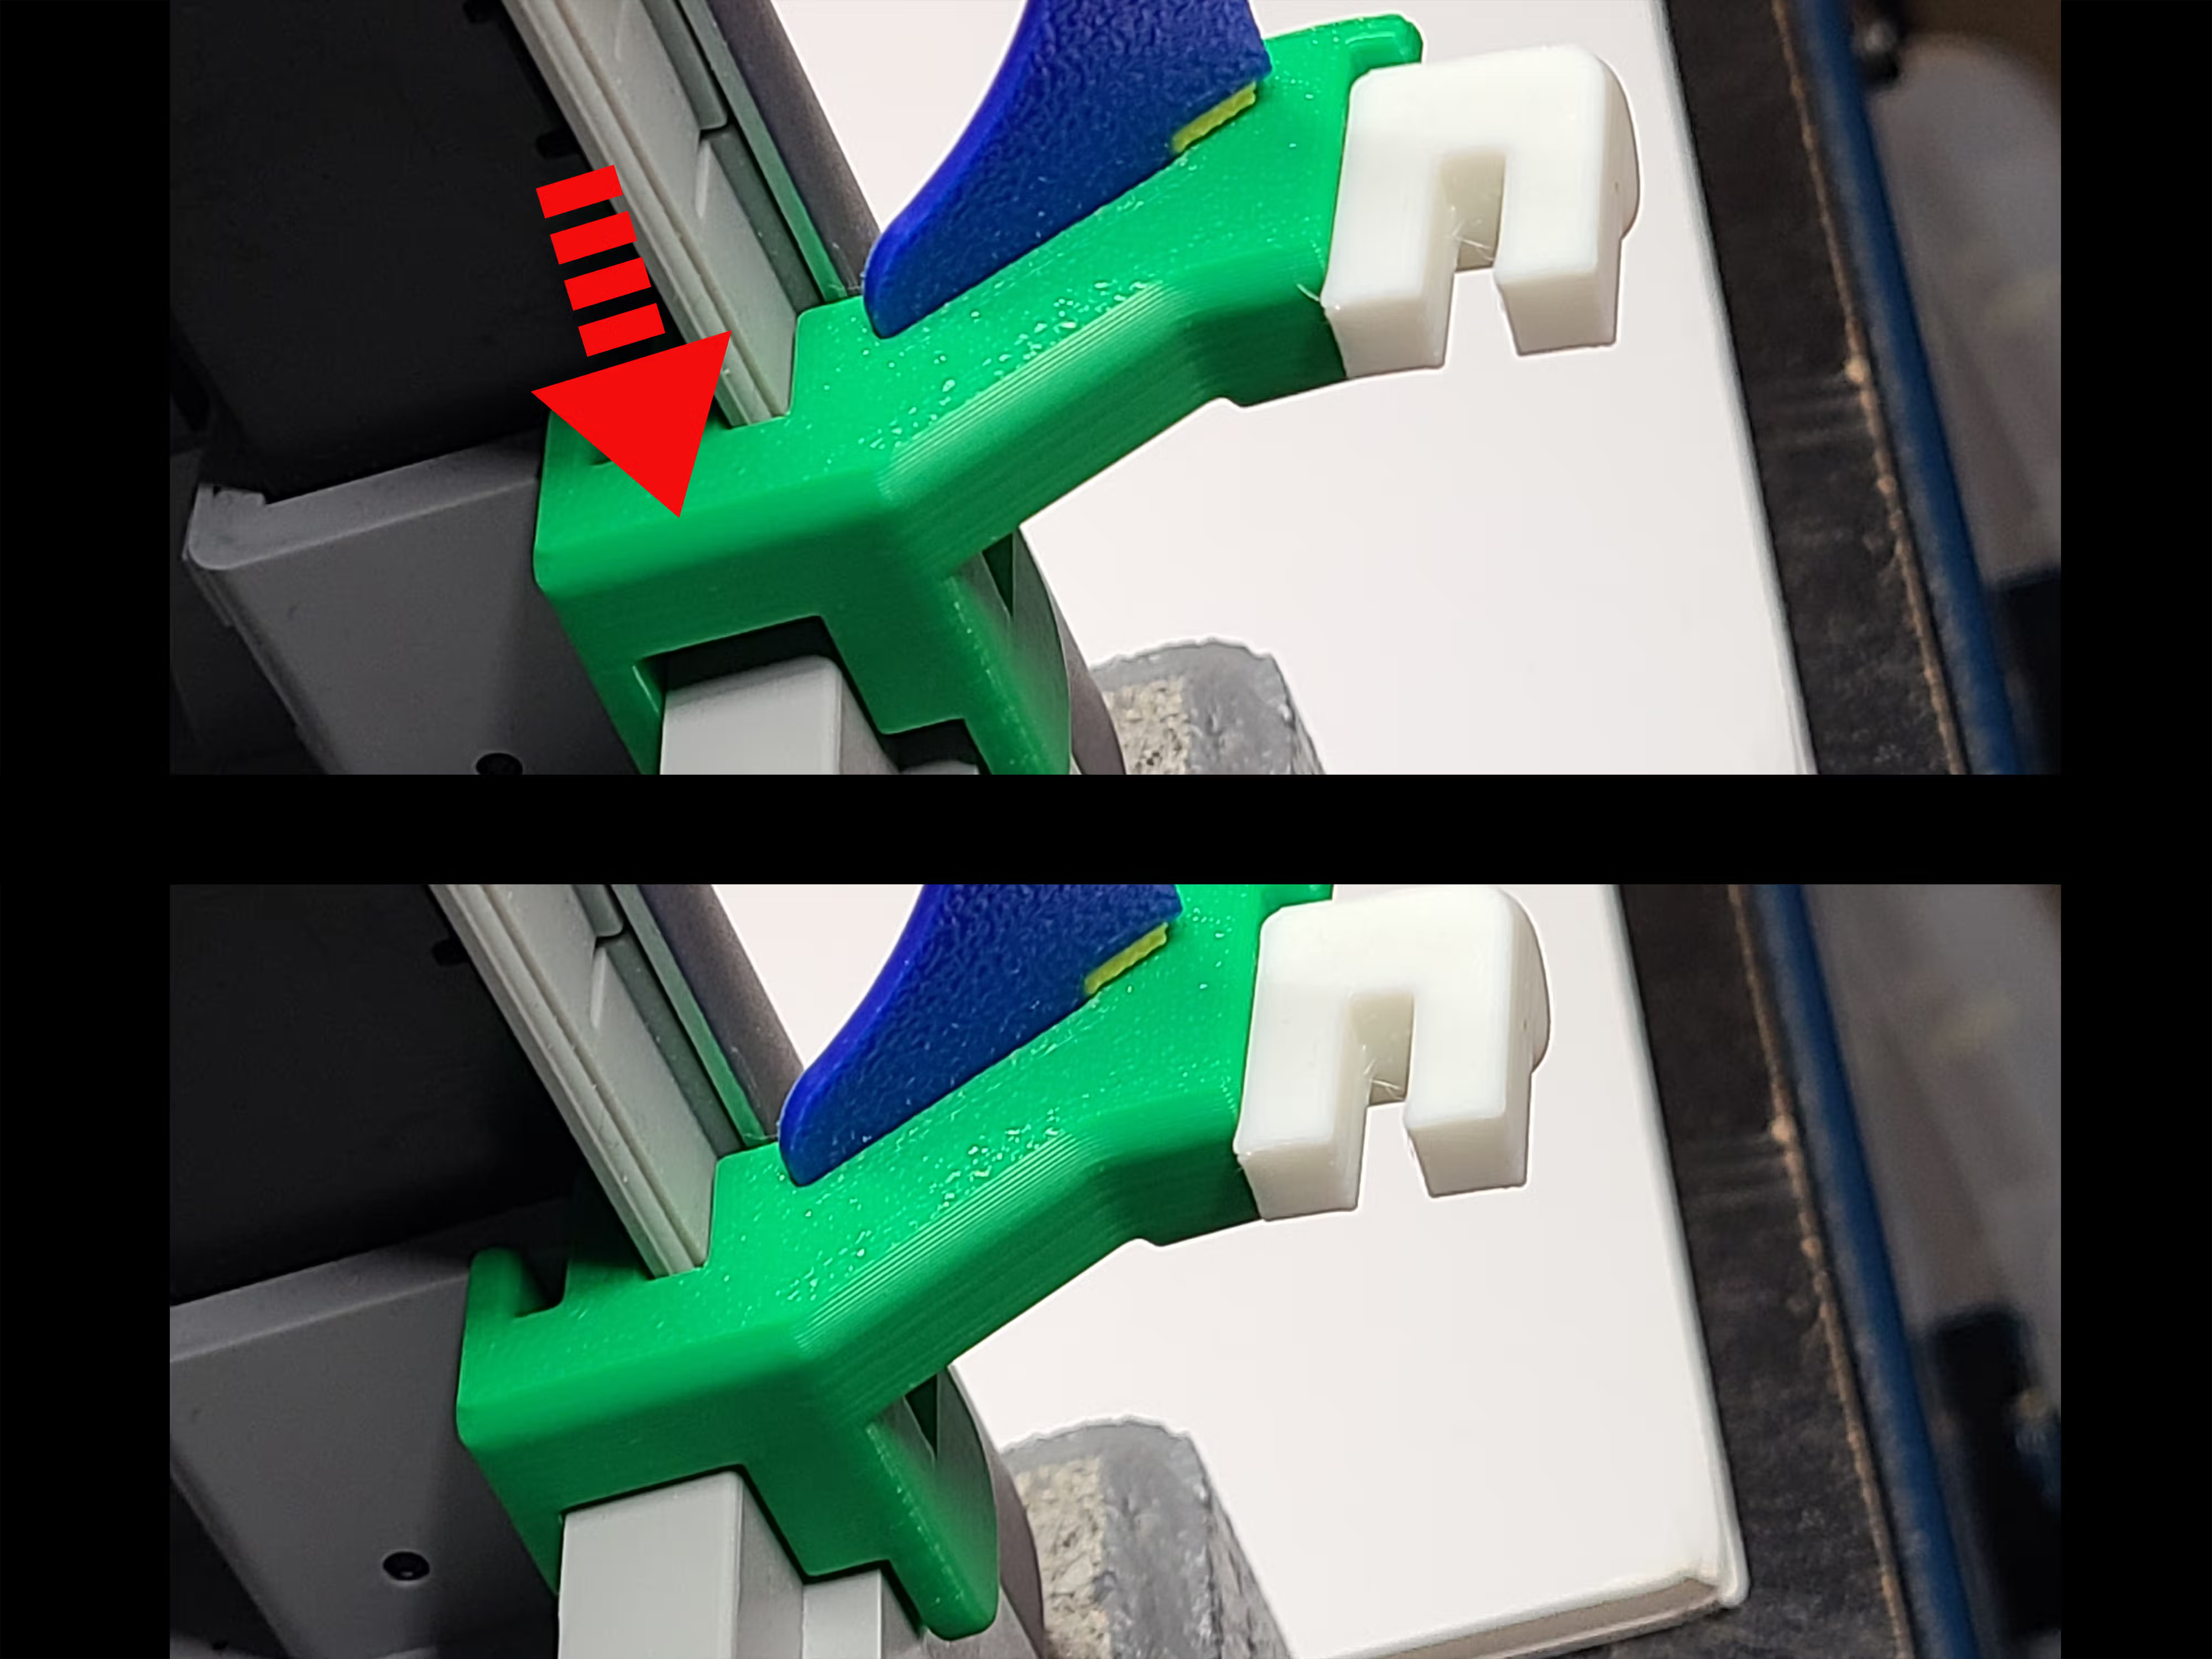
Important: If the holder is not pushed fully down, it may feel loose, sit at an angle, or lift out of position when turning the latch fork.
Removal
Lift straight upward to remove. Do not slide first.
Back to Top
Door Use Warning
The EmBlazeGuard Door Holder is designed for open-door printing only. The printer door cannot fully close while the holder is installed. Remove the holder to close the door completely.
Back to TopSimEyeSee WarpShield (Included)
A SimEyeSee WarpShield is included with the EmBlazeGuard 3MF files to allow the auxiliary fan to be set to at least 70%, improving overhang quality, bridges, and fine surface details—without causing warping on the fan-facing side of the print. For more information, see the SimEyeSee WarpShield page.
⚠️ WARNING: If the WarpShield is not used, the auxiliary fan must be set to 0% to avoid fan-side warping or distortion.
The EmBlazeGuard 3MF files containing the WarpShield are already configured using the settings described in the WarpShield Instructions.
The SimEyeSee WarpShield is printed to a height a few millimeters above the snap-fit hole. This allows the auxiliary fan to provide more effective and even cooling while the horizontally printed hole is being formed, improving both the top and bottom layers of the opening and resulting in cleaner edges and more accurate geometry.

Field Goal Panel: Measured Results
The values below describe the total print (panel + WarpShield), and how much the WarpShield adds. Material breakdown distinguishes normal flush to the chute from purge redirected to the WarpShield instead of being discarded.
- Total print time (panel + WarpShield): 24m 16s
- WarpShield time added: 3 minutes
- Total filament used (panel + WarpShield): 9.87 g
- WarpShield total: 2.28 g
Printing the EmBlazeGuard Parts
EmBlazeGuard Holder
The EmBlazeGuard Holder is designed to print cleanly and reliably using standard Bambu profiles. No supports are required.
Recommended Setup
- Printer: Bambu Lab X1 / P1
- Material: PLA, PETG, or ABS
- Orientation: Print as provided
- Supports: Not required
- Auxiliary part cooling fan: 70%
- Special cooling (first 1 mm / 5 layers): 0% Fan Speed
Process Settings Used (Bambu Studio)
- Wall generator: Arachne
- Wall loops: 3
- Top shell layers: 5
- Bottom shell layers: 5
- Sparse infill density: 35%
- Sparse infill pattern: Gyroid
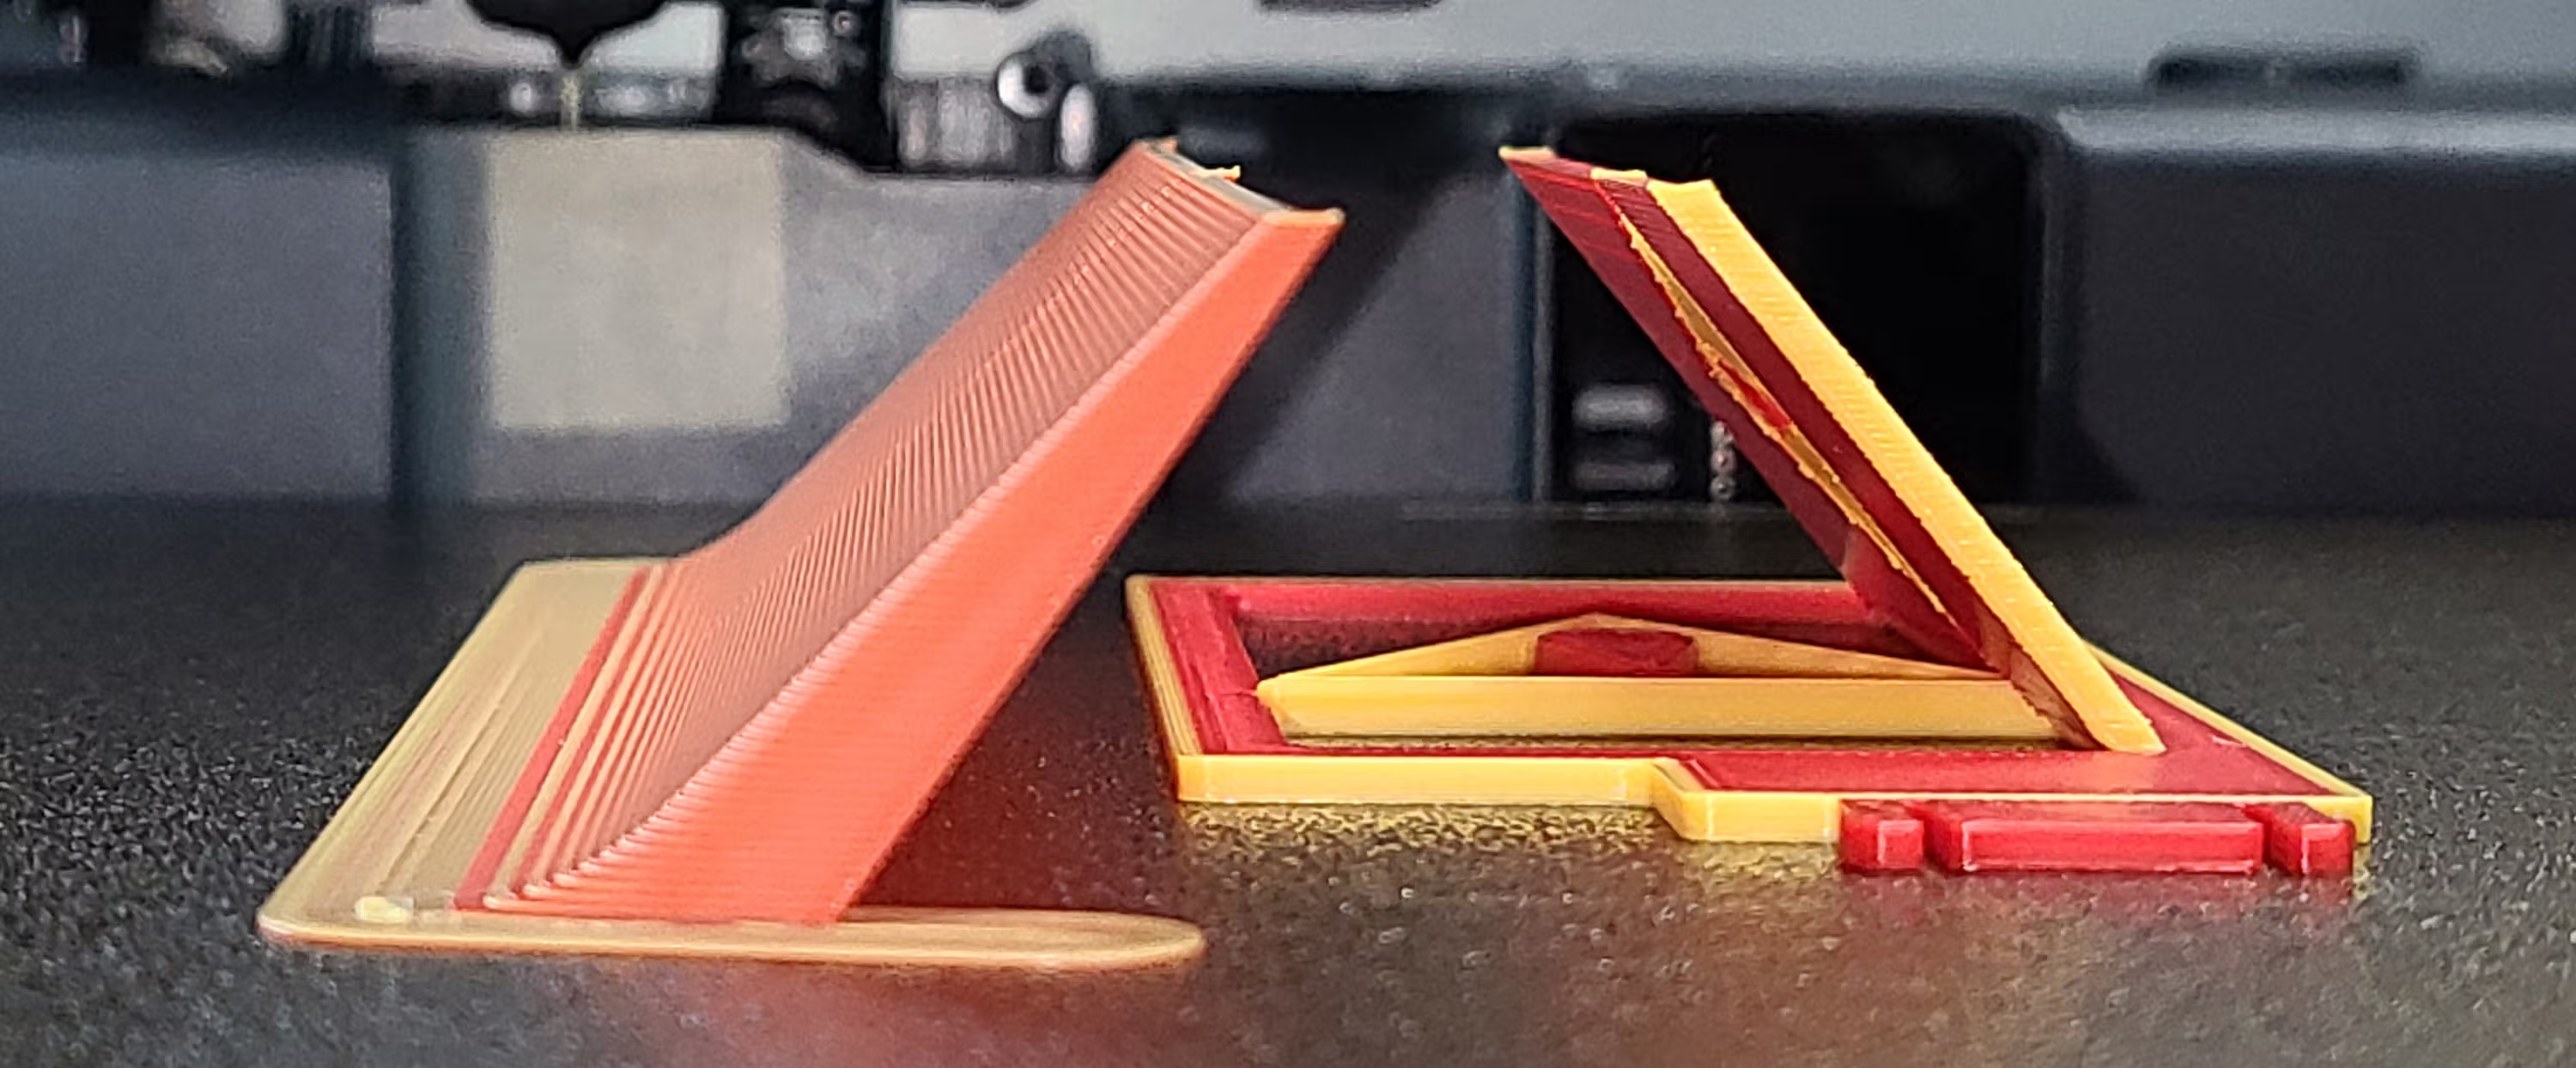
⚠️ Material warning for excessively brittle PLA: The Holder works well with most PLA (including most silk PLA), PETG, and ABS. Avoid using filament that is known to be brittle or prone to snapping—such as some older or poorly stored PLA, and some silk PLA blends that fracture easily.
I’ve inserted and removed EmBlazeGuard holders many times over months without any breakage using normal and silk PLA. The only failure I’ve seen was when I performed a stress test with a gold silk PLA (unknown manufacturer) that I already knew was unusually brittle.
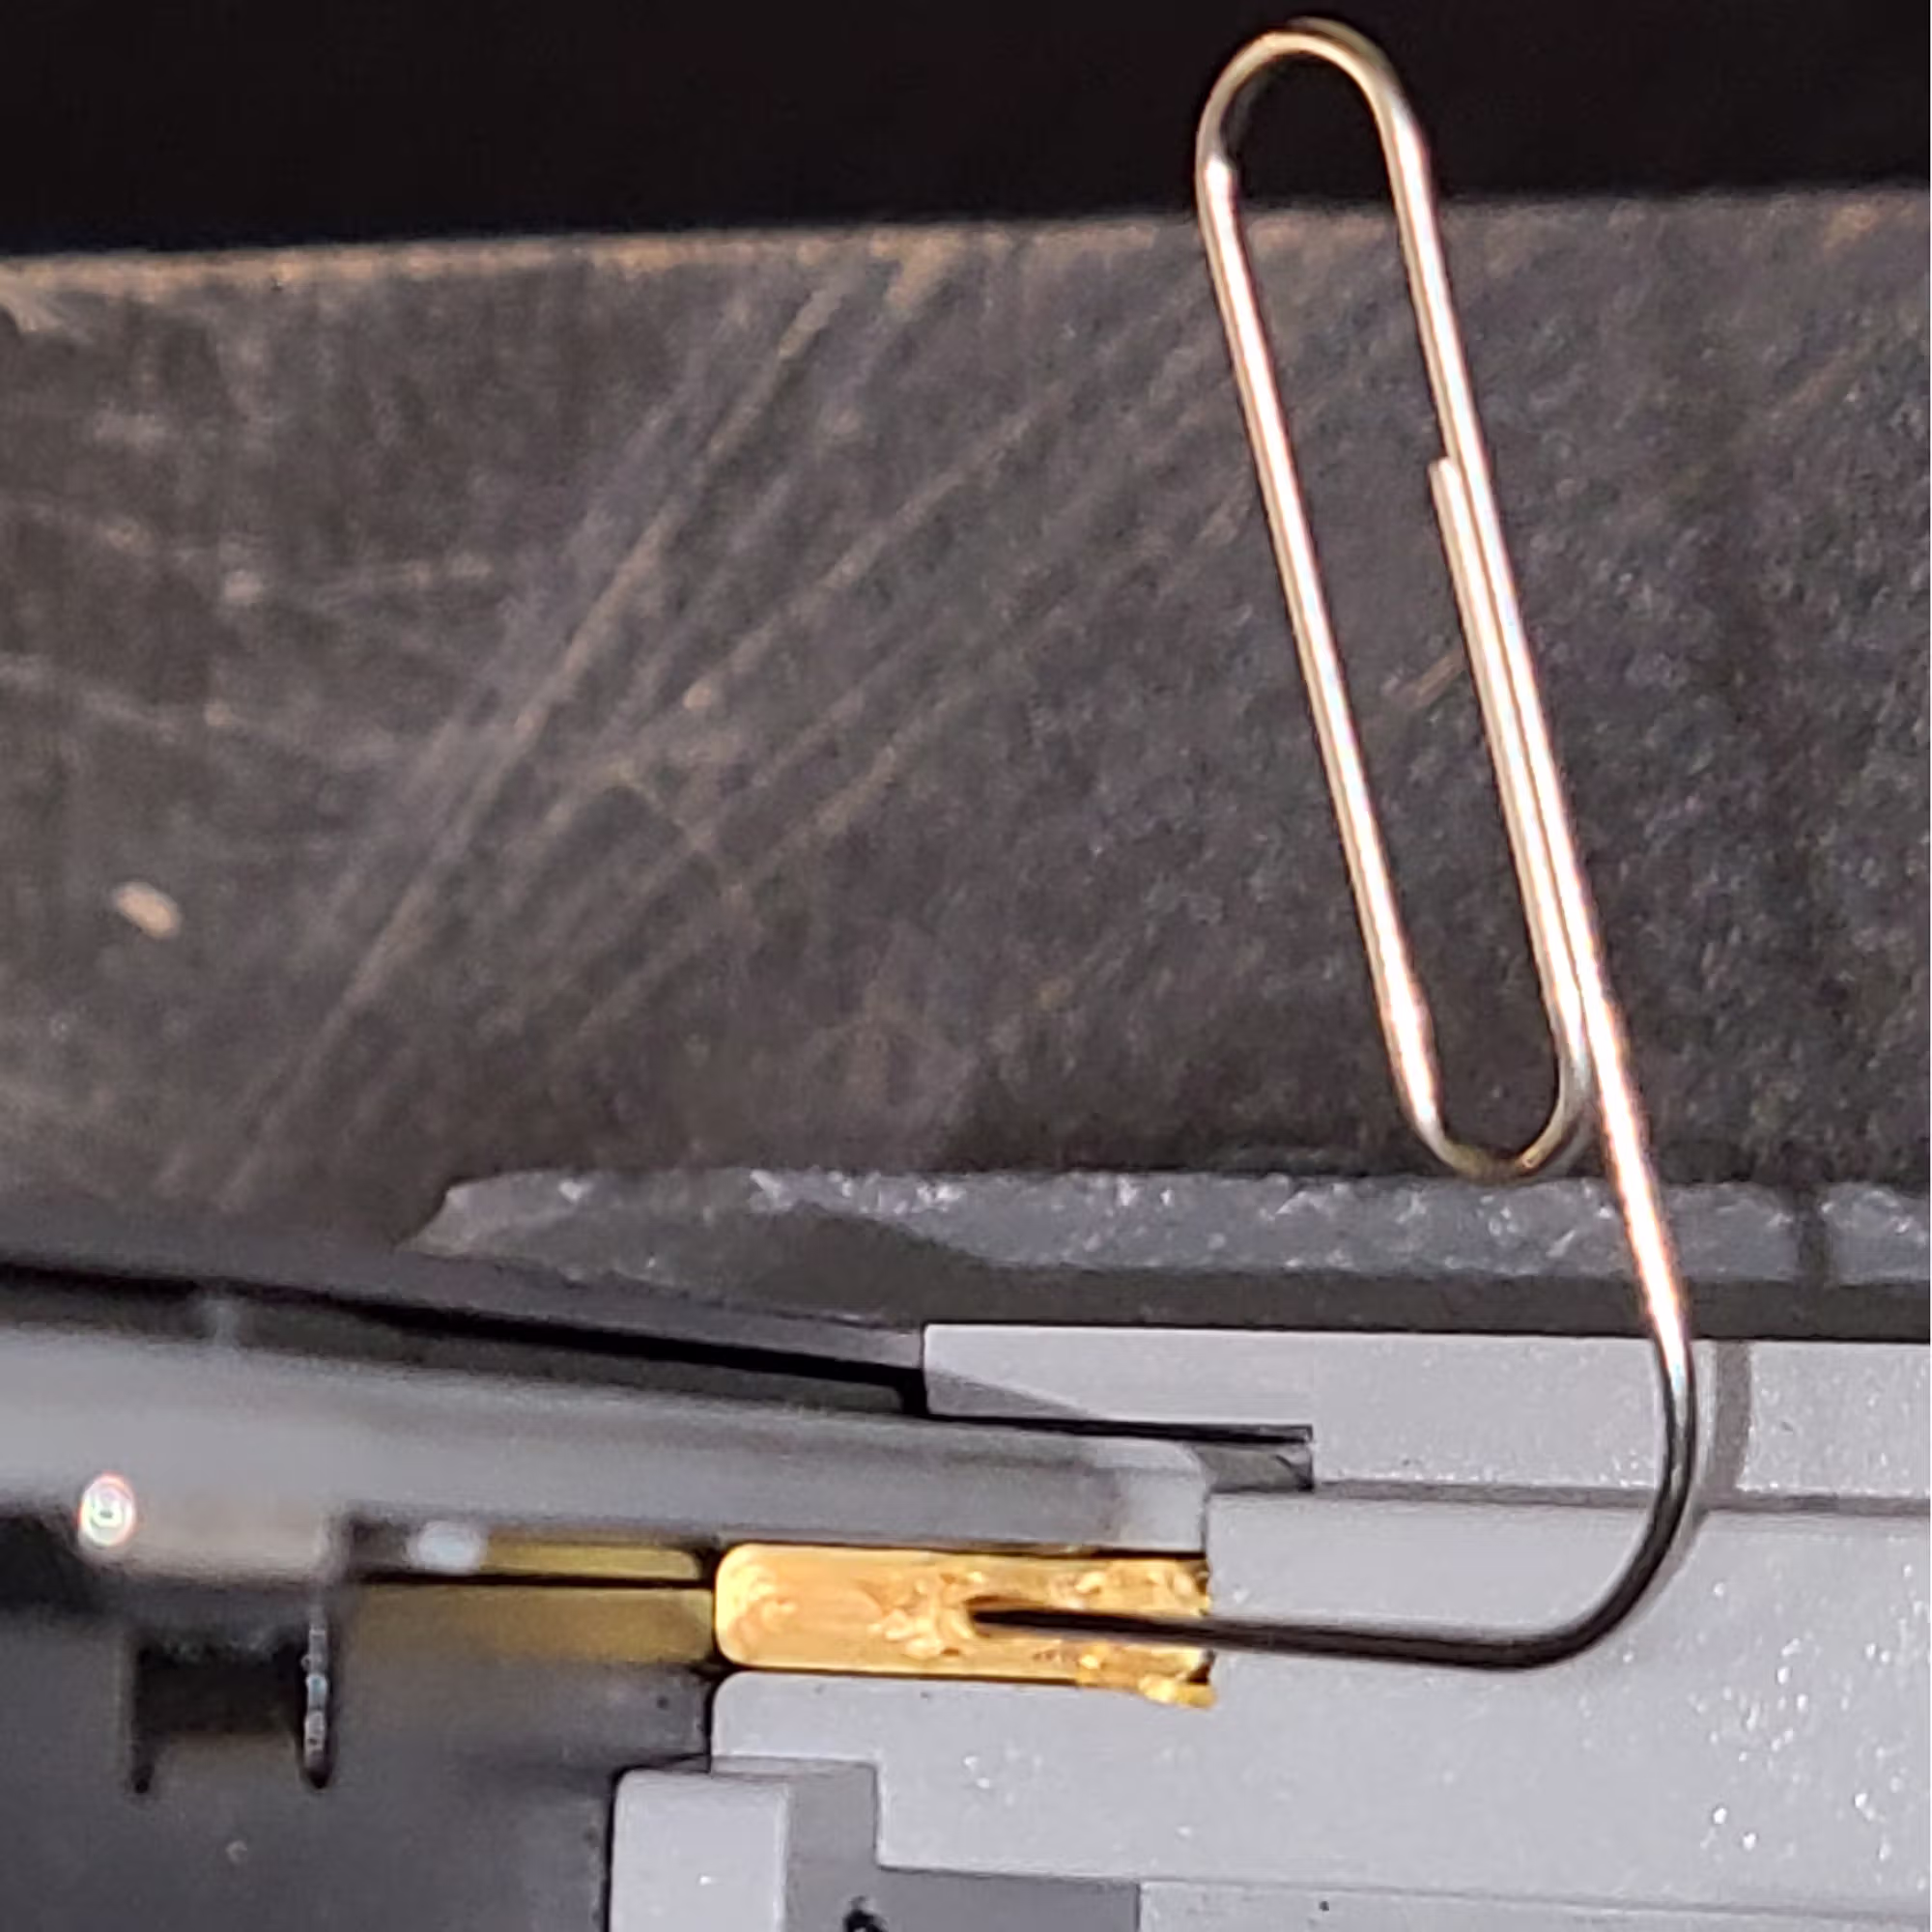
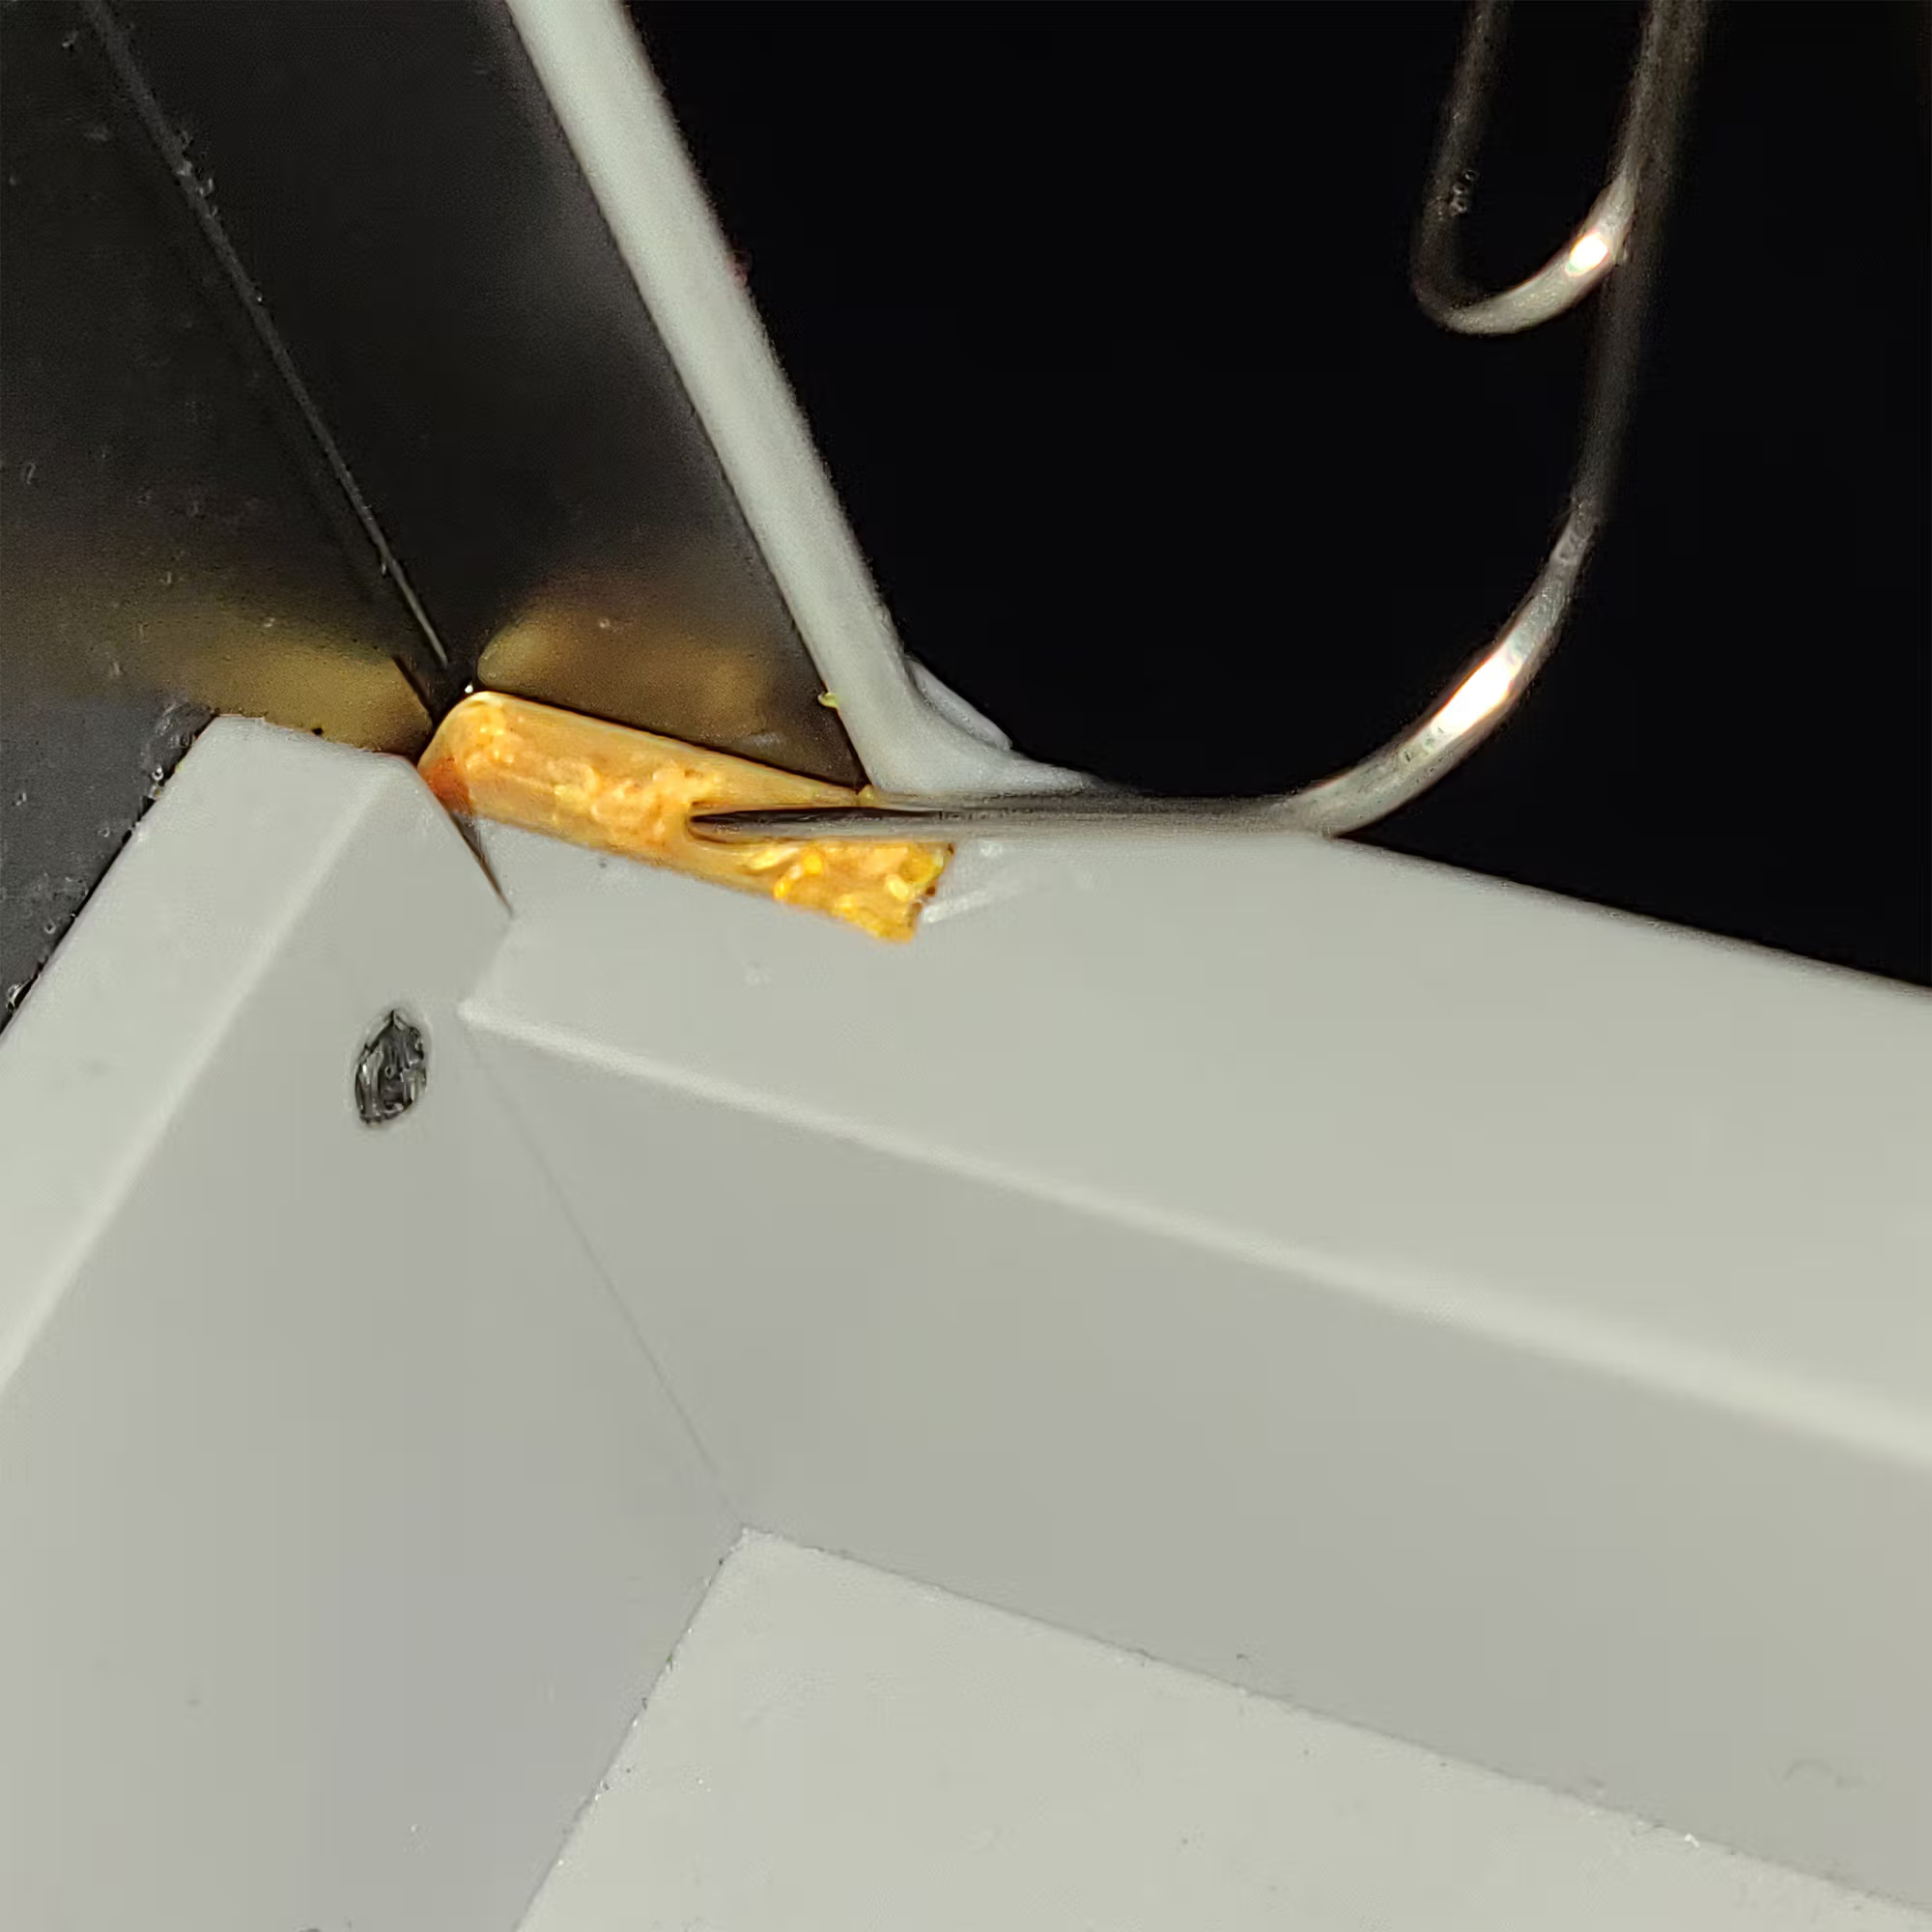
If the tab ever breaks
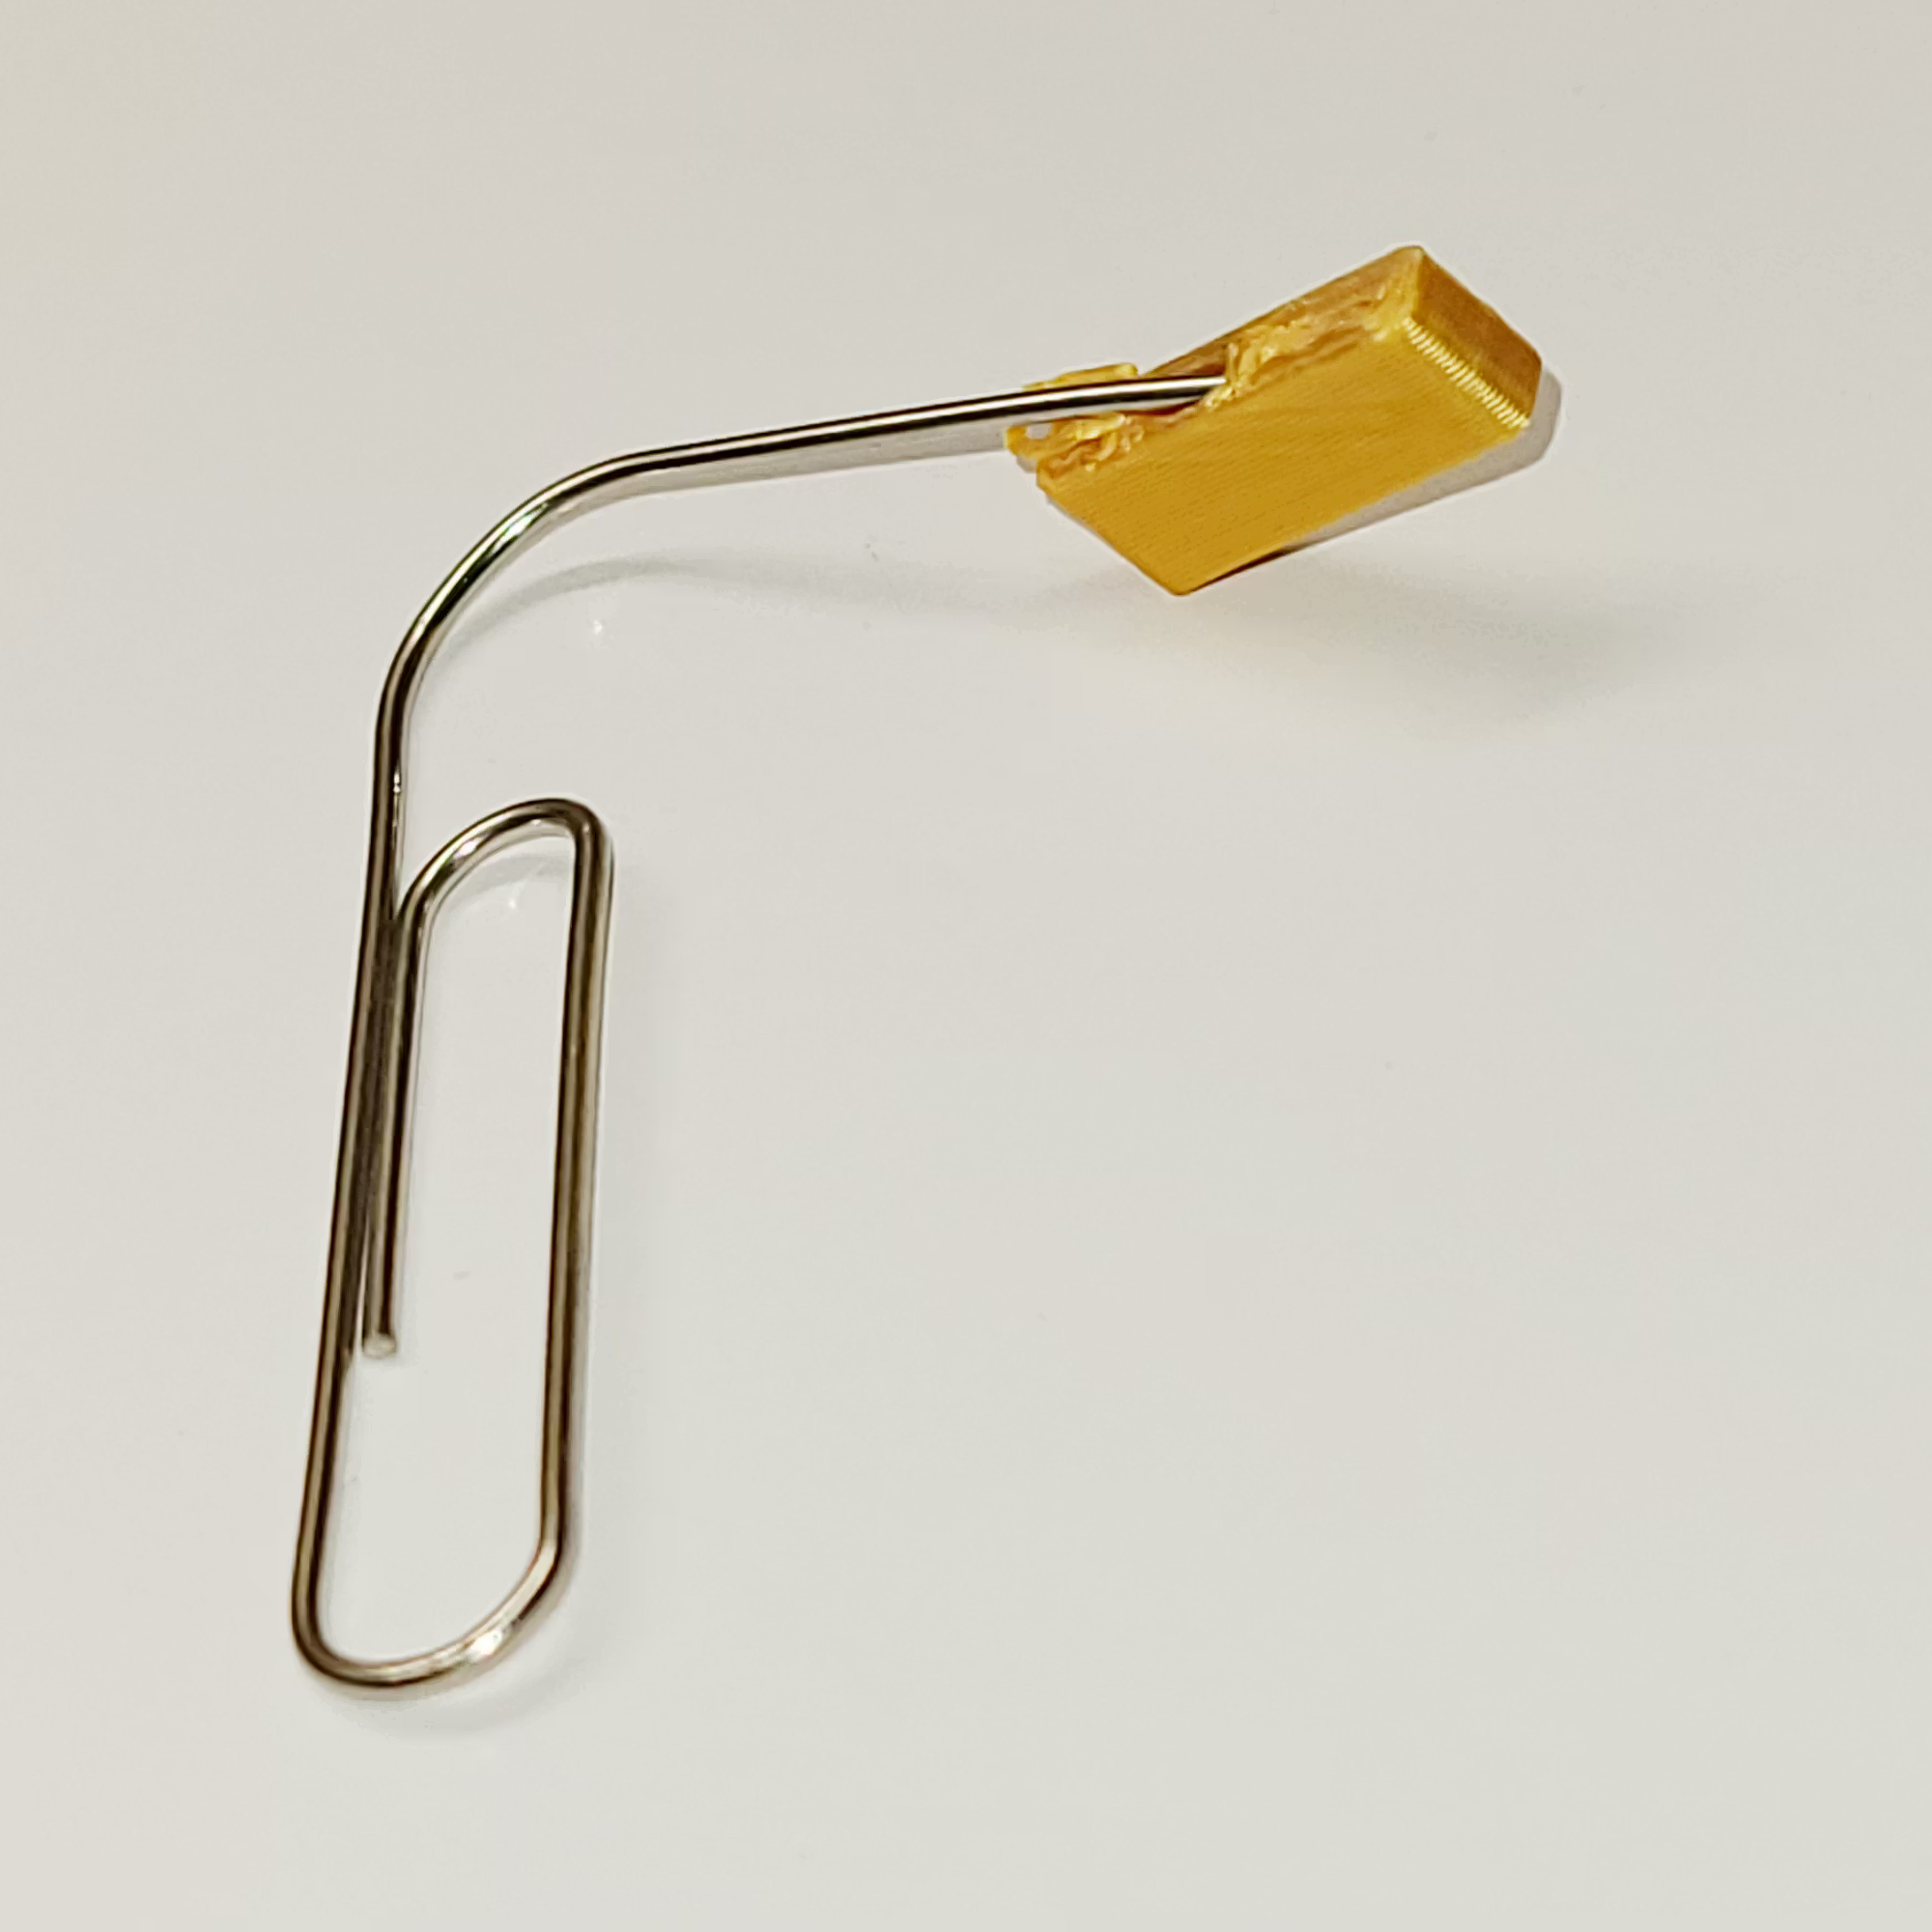
The underside tab fills the recess to prevent the holder from sliding or tilting. To make removal easy in the unlikely event a brittle PLA causes the tab to break, the holder design includes a 1 mm diagonal pull-hole through the tab (angled downward about 25°). This hole fits a standard size paper clip so the tab can be pulled out.
Latch Fork (TPU Recommended)
The Latch Fork is the only EmBlazeGuard part that requires supports. TPU is strongly recommended to prevent rattling, absorb vibration, and provide a quieter printing experience.
Supports are required only on the snap-fit feature. Any surface marks left by support removal will not be visible once installed.
⚠️ Modifier note: The Latch Fork includes a Modifier intended to anchor the snap-fit into the body of the part. In the provided 3MF, it is already configured correctly. If you are not using the 3MF, ensure the modifier is set to Modifier type (or remove it) so it does not negatively affect the print.
Depending on filament type, filament settings, and how cleanly the supports are removed, the latch fork may feel slightly tight when first installed. If it is only mildly tight, normal use will loosen it over time.
If the latch fork feels too tight, first try quickly turning the latch fork back and forth a few times. This often loosens the fit sufficiently.
If it still feels too tight, or if the holder shifts when turning the latch fork, remove the latch fork and re-insert it. This can be done more than once if needed and will gradually loosen the fit.
Latch Fork Recommended Setup
- Material: TPU
- Supports: Normal (Auto)
Latch Fork Process Settings Used (Bambu Studio)
- Wall generator: Arachne
- Wall loops: 2
- Top shell layers: 5
- Bottom shell layers: 3
- Sparse infill density: 30%
- Sparse infill pattern: Gyroid
Do not use tree supports.
Tree supports tend to bond too aggressively to TPU,
making them significantly harder and more time-consuming to remove cleanly.
Standard supports provide better control and easier cleanup for this part.
EmBlazeGuard Panels
EmBlazeGuard Panels have their own printing notes and material recommendations. For panel-specific print instructions, please see the EmBlazeGuard Panel section above.
Back to TopRemix & Licensing
EmBlazeGuard Holder & EmBlazeGuard Panels
The EmBlazeGuard Holder, Latch Fork, and all official SimEyeSee EmBlazeGuard Panels except where explicitly noted are licensed under Creative Commons Attribution–NoDerivatives (CC BY-ND).
This license allows sharing with attribution, but does not permit remixing, modification, or derivative works for these parts.
Remixable EmBlazeGuard Panels
The following EmBlazeGuard Panels are provided as remixable designs:
Bambu Lab EmBlazeGuard Panel — licensed under Creative Commons Attribution (CC BY). Remixing and modification are allowed with attribution.
Blank EmBlazeGuard Panel (Remix Base) — licensed under Creative Commons Attribution (CC BY). This panel is intended as a foundation for creating custom EmBlazeGuard Panels.
 Remix Base (Full) used to create Floral Gate EmBlazeGuard Panel
 Remix Base (Snap Fit) used to create Field Goal EmBlazeGuard Panel
Find links to the Remix Base and other Panels on the 3D Prints page.
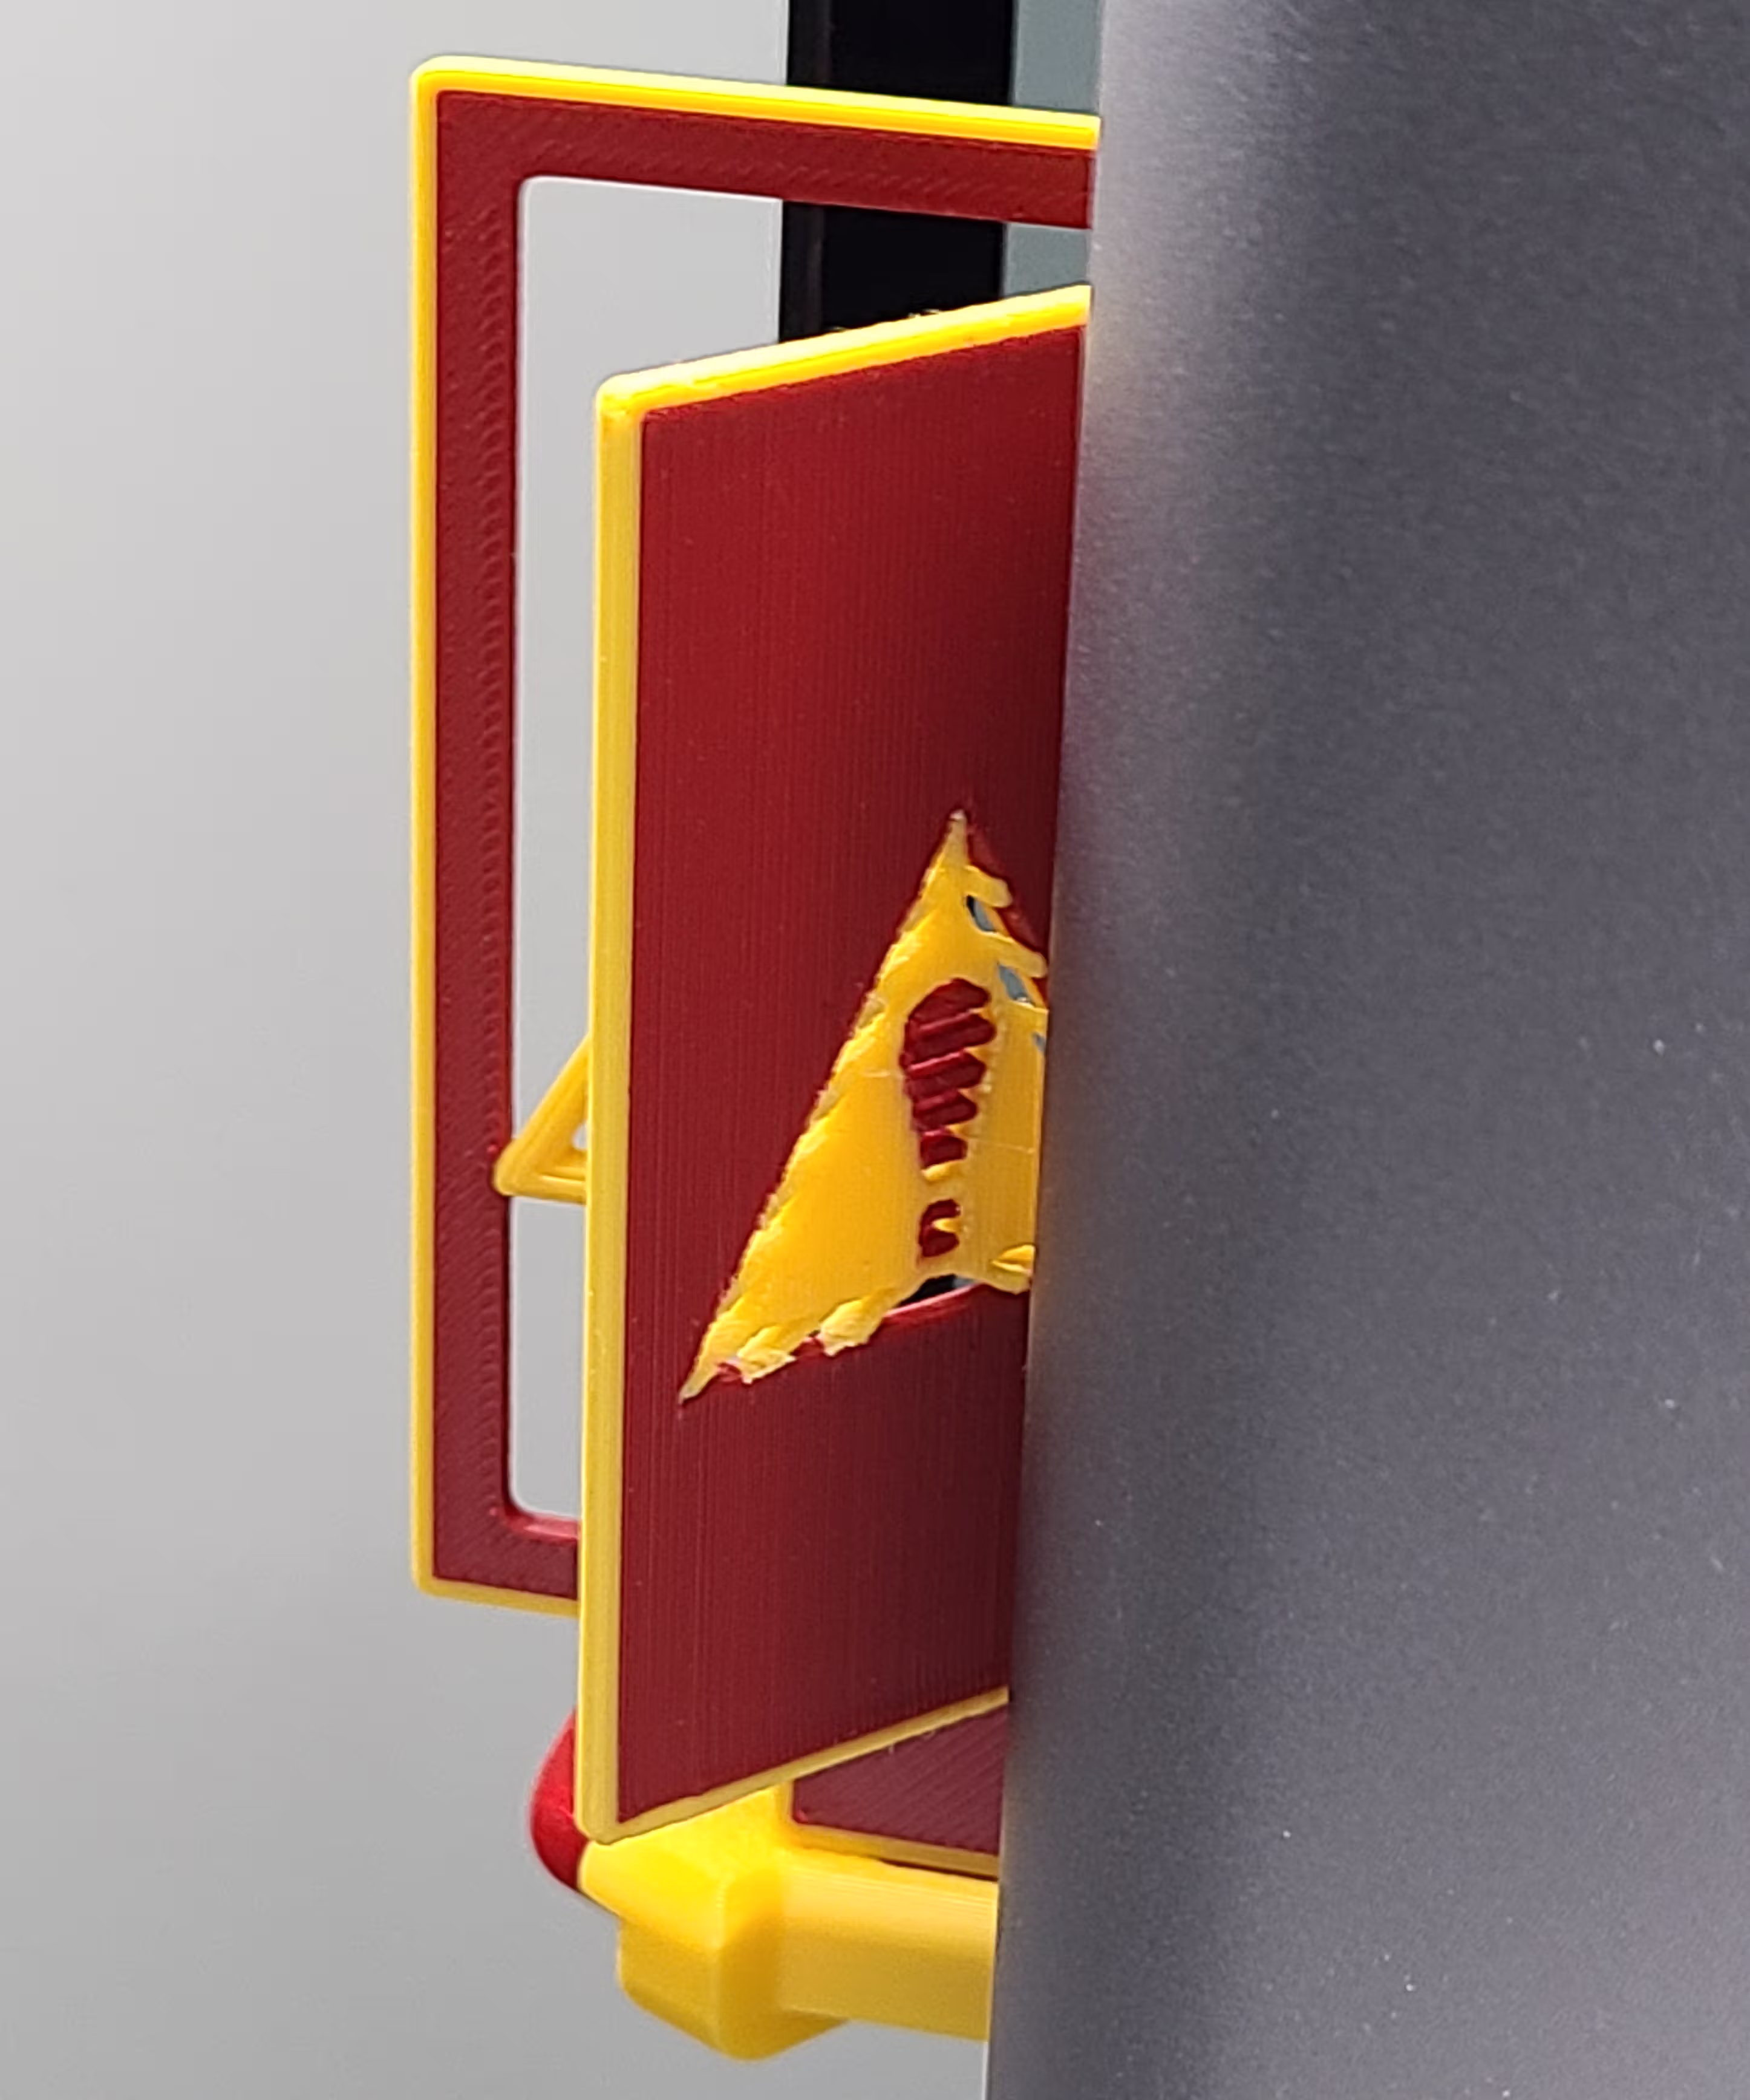
All remixed panels must preserve the core safety and visibility function of the EmBlazeGuard system. In particular:
- The design must extend past the door on both sides
- The panel must remain clearly visible from the front and left side
- Panels should not sit flush with the door edge
Important Remix Guidance (Snap-Fit Area)
When remixing or applying color changes, avoid placing color transitions too close to the snap-fit legs.
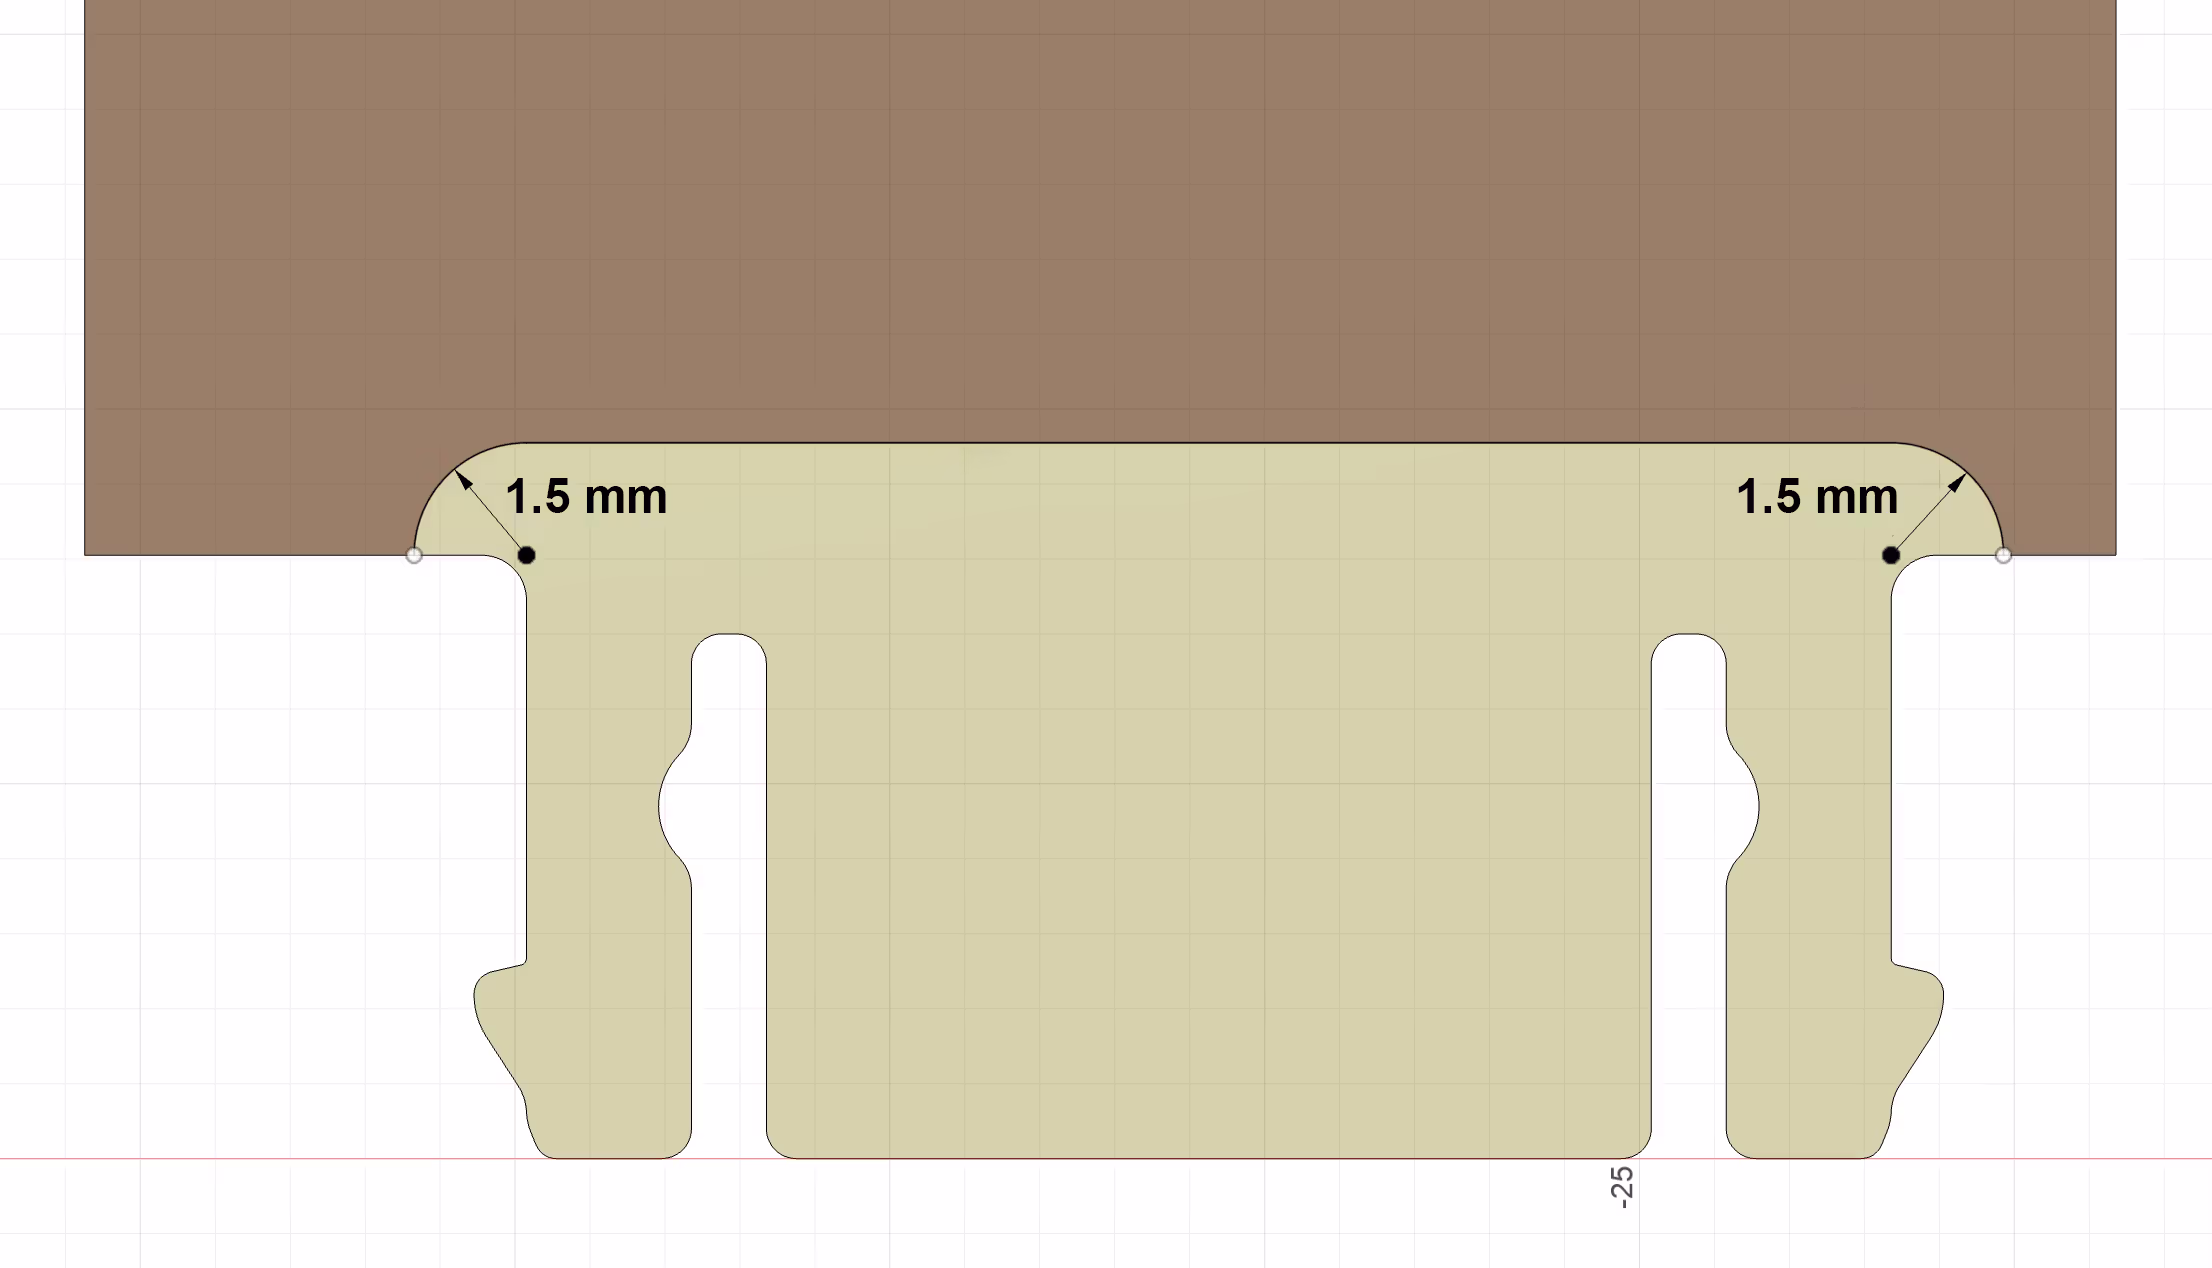
The yellow area above highlights the single-color zone around the snap-fit legs. This region experiences the highest mechanical stress during insertion and removal.
When remixing or recoloring EmBlazeGuard Panels, keep all color or material transitions at least 1.5 mm away from the snap-fit legs, as shown. Placing transitions inside the yellow zone can weaken layer bonding and prevent the legs from flexing and returning correctly.
This guideline applies to all materials, including standard PLA.
Back to Top